How to Read This Book
Welcome to The ProFacet Book.
Gemstone faceting sits at the intersection of three disciplines: 3D solid geometry (slicing a crystal with intersecting planes), physical optics (Total Internal Reflection, refraction, and spectral dispersion), and workshop craft (turning an index gear, setting a mast angle, and cutting until facets meet at a razor-sharp point).
Most documentation forces you to choose between a superficial button list and a dry programming manual. This book is written differently. It is structured as a 16-chapter, two-part online textbook: Part I takes you step by step through the Visual Gem Cutter's Studio with zero coding required, and Part II teaches the FSL and Lua scripting languages with live, interactive 3D gemstone playgrounds right on the page.
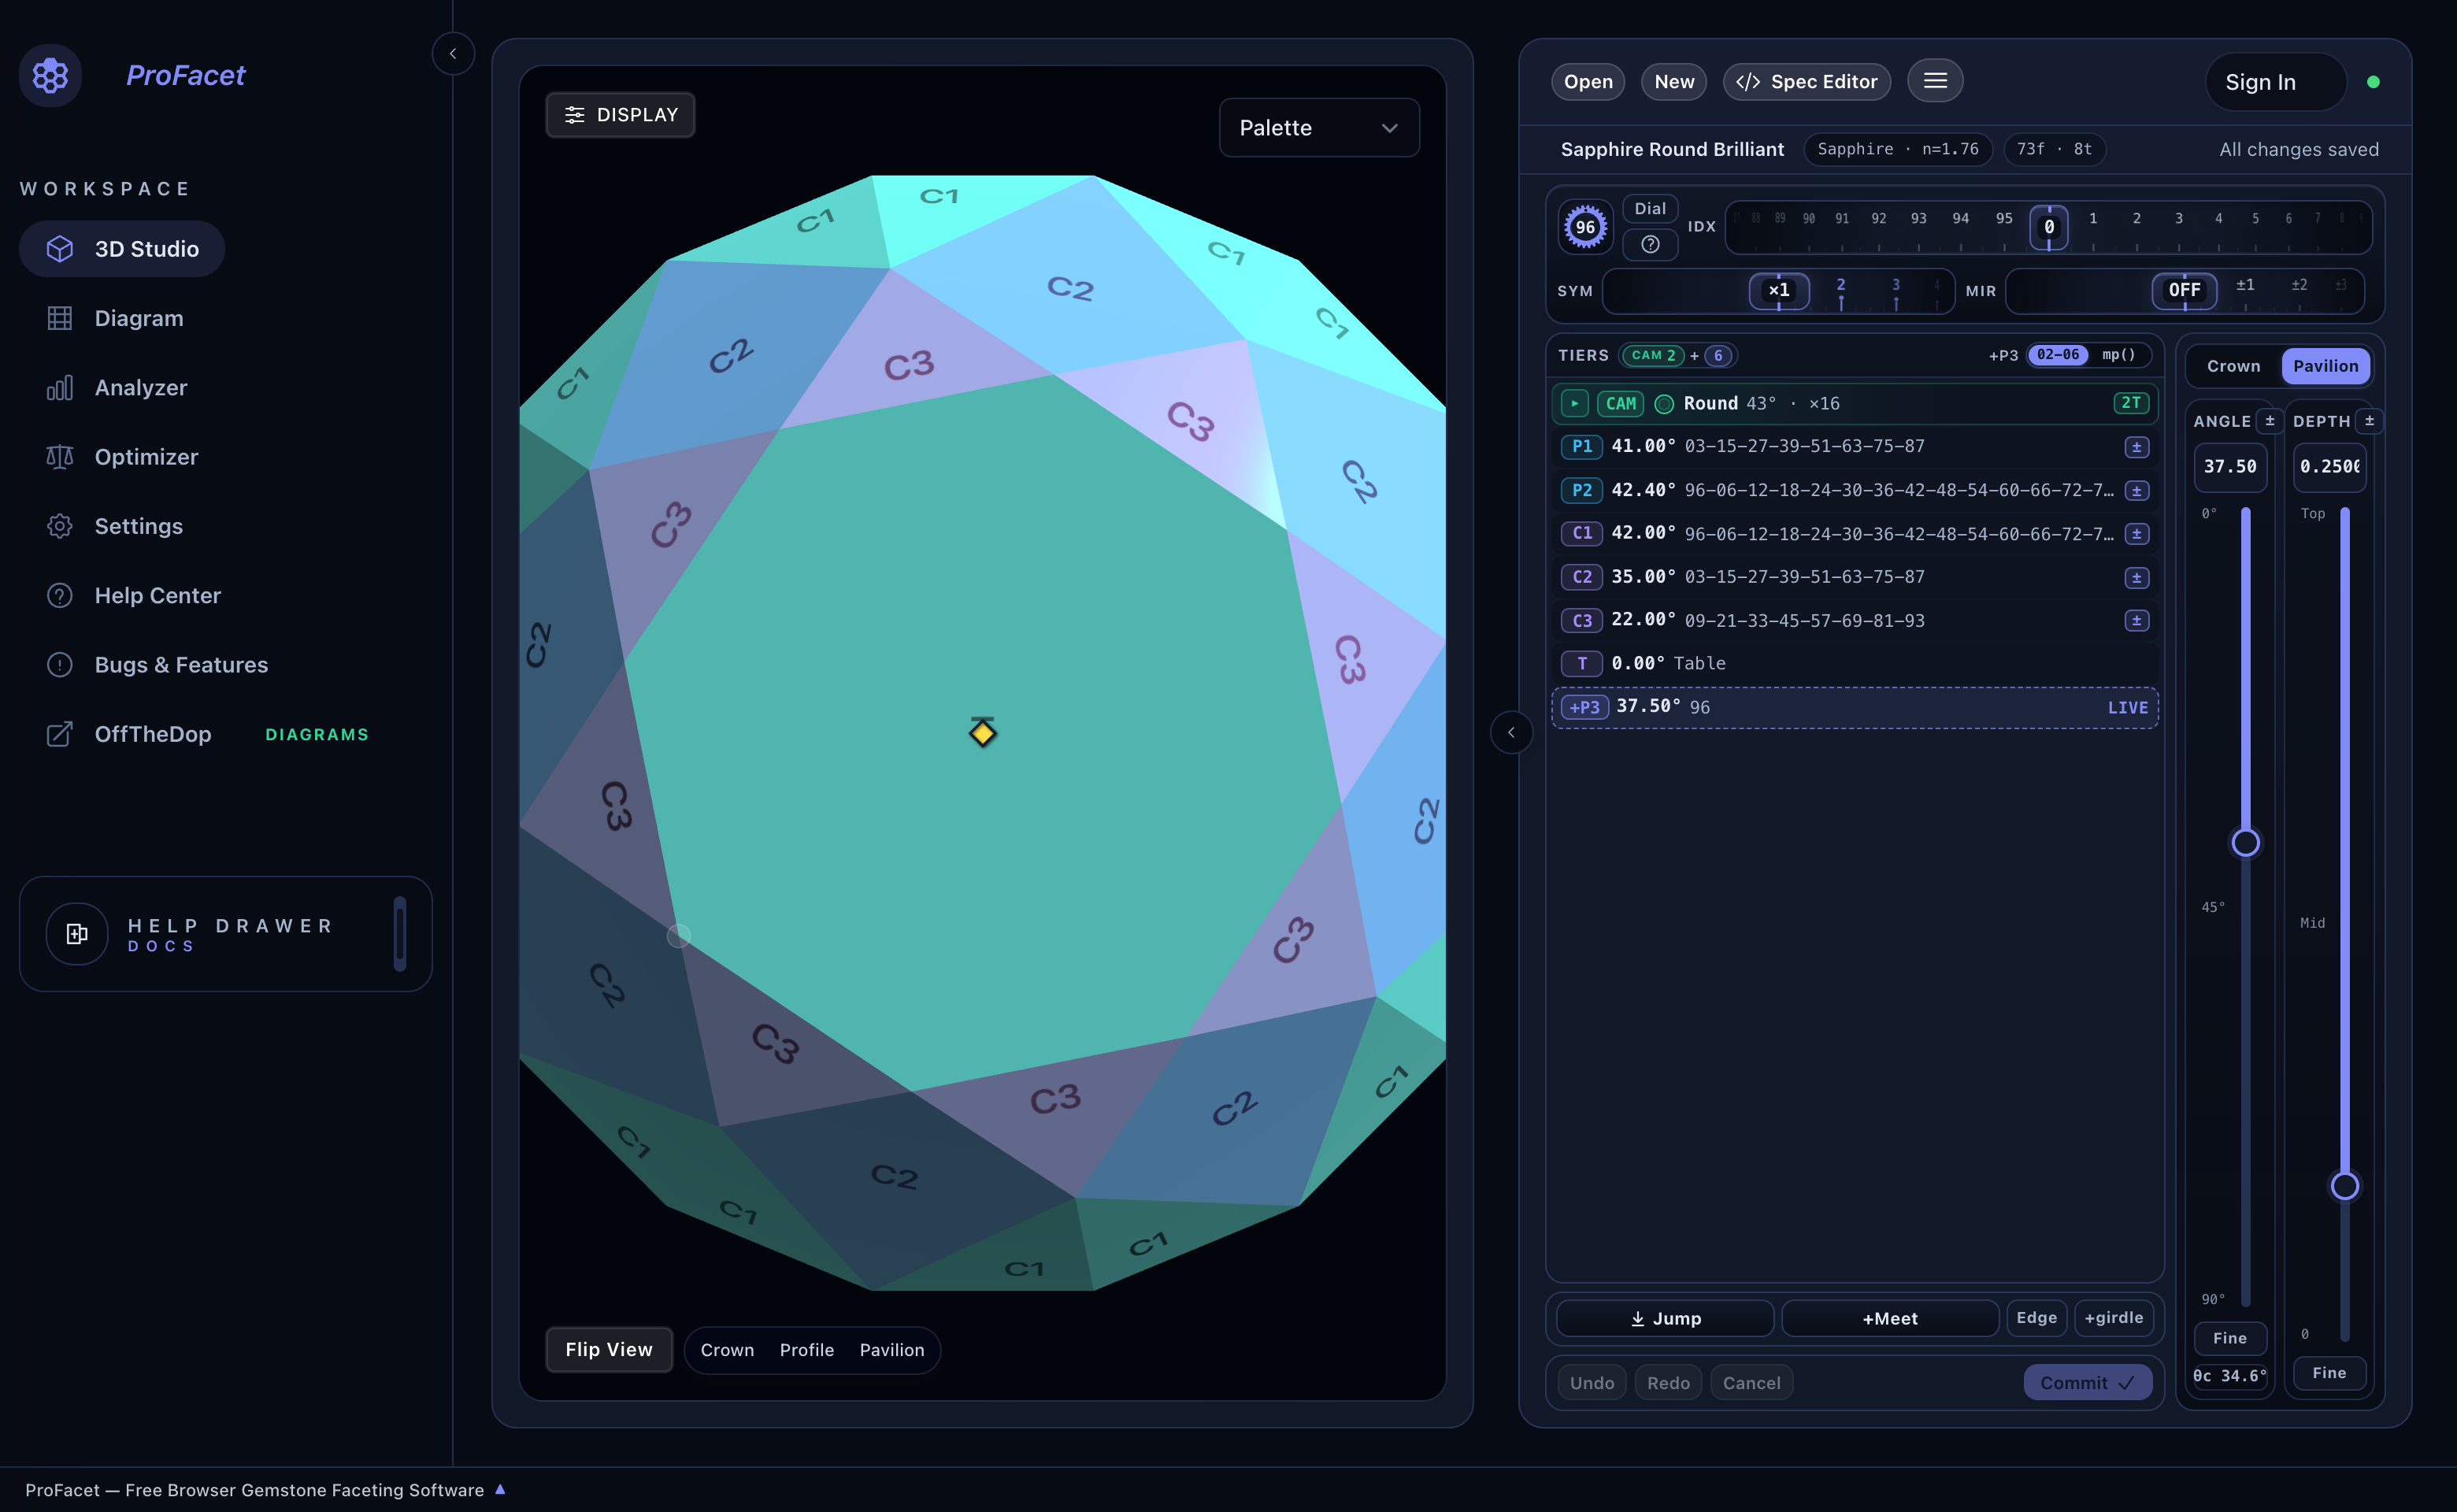
The Two Parts of This Book
The Visual Gem Cutter's Studio
Designed for cutters who want to work visually with a mouse or trackpad—no coding required. We start with how a physical faceting machine works, cut a complete stone from scratch, and master every visual tool in the Studio.
- Ch 1 · How Gemstones Are Cut: The Dop, Gear, Angle & Light
- Ch 2 · Guided Tutorial: Cut Your First Round Brilliant
- Ch 3 · Interactive Slicer: Drum Dials, Jump, +Meet & Edgepoints
- Ch 4 · CAM Preform Studio: Visual Preforms & All 28 Outlines
- Ch 5 · Symmetry Assistant: Decode Any Classic Book Diagram
- Ch 6 · Seeing Light: The 8 Shading Modes & Diagnostic Maps
- Ch 7 · Optical Lab: 19-Angle WebGPU Analyzer & GPU Optimizer
- Ch 8 · Workshop & Cloud: Printable Sheets, Import/Export & Sync
FSL & Lua — Parametric & Algorithmic Design
Every visual action in Part I generates clean FSL (Faceting Specification Language). Part II teaches both FSL and Lua side by side so you can write material-adaptive designs, custom meetpoint chains, and procedural cuts.
- Ch 9 · The Dual Engine: FSL & Lua Side by Side in 10 Minutes
- Ch 10 · Core Foundations: 3D Coordinates, Settings & Symmetry
- Ch 11 · Facets & Tiers: The Three Gem Design Styles
- Ch 12 · Point Helpers:
cp(),gp(),mp(),ep(),prz()&surface() - Ch 13 · Math & Optics: Vectors, Planes & RI-Driven Angles
- Ch 14 · Functional FSL: Lambdas, Pipelines & Platonic Solids
- Ch 15 · Stone Reflection: Live Mesh Queries via
stone() - Ch 16 · Complete Lua Guide: Loops, Tables & Procedural Cuts
Turn the page to Chapter 1: How Gemstones Are Cut (In Life & In ProFacet) to begin Part I.
Chapter 1: How Gemstones Are Cut (In Life & In ProFacet)
Before we turn a dial or click a button, let’s spend three minutes understanding what a faceted gemstone actually is and how a physical faceting machine shapes it. Once you have this mental model, every single control in ProFacet Studio—and every line of FSL or Lua in Part II—will make intuitive sense.
1. The Three Anatomy Zones of a Gemstone
Every faceted gemstone is divided into three structural regions separated by a horizontal equator:
- The Girdle (
G,90°): The narrow vertical belt around the outer edge of the stone. Jeweler's prongs grip the girdle, and its silhouette defines whether the stone is a Round, Oval, Emerald, Pear, or Marquise. - The Pavilion (
P, cut from below): The conical bottom half of the stone. Contrary to popular belief, you are not supposed to see through the bottom of a gemstone! The Pavilion's facets are angled like a hall of mirrors so light entering from above bounces off one pavilion facet, crosses to the opposite pavilion facet, and reflects straight back up toward your eye. - The Crown (
Cand TableT, cut from above): The upper dome of the stone. The flat central Table (T,0°) lets light in and out, while the angled Crown facets (C1,C2,C3) act as miniature prisms that bend exiting light into flashes of rainbow fire.
2. How a Physical Faceting Machine Cuts a Stone
A physical faceting machine holds your rough crystal on the end of a metal rod called a dop and lowers it onto a spinning diamond-coated disc called a lap. To place a flat facet anywhere on the 3D crystal, the cutter controls three degrees of freedom:
| Control on a Physical Machine | Control in ProFacet Studio | What It Does |
|---|---|---|
1. Index Gear Tooth (0–96) | IDX Drum Dial (and SYM / MIR drums) | Rotates the dop around its central axis in precise steps. On a standard 96-tooth gear, each tooth rotates the stone by 360° / 96 = 3.75°. Tooth 96 (or 0) is top dead center (12 o'clock). |
2. Mast Angle (0.00°–90.00°) | Vertical ANGLE Mast | Tilts the dop relative to the lap:
|
| 3. Mast Height / Depth | Vertical DEPTH Mast, ↓ Jump, and +Meet | Lowers the stone onto the lap until the new flat facet touches an existing corner on the stone—called a meetpoint! |
3. Why Refractive Index (RI) & the Critical Angle (θc) Rule Everything
Why can't you cut a Quartz gemstone (RI = 1.54) using the exact same Pavilion angles as a Diamond (RI = 2.42)?
When a ray of light travels inside a gemstone and strikes a Pavilion facet from the inside, one of two things happens depending on the angle at which it hits the facet:
- Above the Critical Angle (
θ > θc) — Total Internal Reflection (TIR): The facet acts as a 100% perfect mirror, bouncing all of the light back inside the stone toward the Crown. - Below the Critical Angle (
θ < θc) — Windowing (Light Leakage): The ray refracts right through the bottom of the stone and escapes into the mounting! When you look straight down into a poorly angled stone and can read newsprint through its center, that dead, see-through hole is called a window.
The threshold between mirror reflection and leakage is the material's Critical Angle ():
| Gemstone Material | Refractive Index (RI) | Critical Angle (θc) | Typical Pavilion Main Angle (P1) |
|---|---|---|---|
| Quartz / Amethyst / Citrine | 1.54 | 40.49° | 41.5° – 43.0° |
| Beryl / Emerald / Aquamarine | 1.58 | 39.26° | 41.0° – 42.5° |
| Topaz / Tourmaline | 1.62 | 38.12° | 40.5° – 42.0° |
| Spinel | 1.72 | 35.55° | 40.0° – 41.5° |
| Sapphire / Ruby (Corundum) | 1.76 | 34.62° | 40.0° – 41.5° |
| Cubic Zirconia (CZ) | 2.15 | 27.72° | 39.5° – 41.0° |
| Diamond | 2.42 | 24.41° | 40.6° – 41.0° |
| Moissanite | 2.67 | 22.00° | 39.5° – 40.8° |
[!TIP] Built-In Critical Angle Guard in ProFacet Look at the bottom of the vertical
ANGLEmast in the Interactive Slicer: ProFacet continuously calculates and displaysθcfor your active material (e.g.,θc 40.5°for Quartz orθc 34.6°for Sapphire) so you never accidentally cut your Pavilion below the critical angle!
4. Tour of the ProFacet Studio Workspace

When you open ProFacet Studio, your screen is organized into three panes:
- Left Navigation Rail (
WORKSPACE): Switch between the 3D Studio, Diagram (Printable Cutting Instructions), Analyzer (19-angle WebGPU optical sweep), Optimizer (automated multi-variable GPU tuning), Settings, and the slide-over Help Drawer. - Center 3D Viewport: Your interactive gemstone stage with 8 shading modes (
Raytraced,Palette,Mono,ASET,Window,Fire,Scintillation,BDPT), display overlays (Facet Info,Wireframe,Explosion), and one-click camera presets (Flip View | Crown | Profile | Pavilion). - Right Workbench Pane: Switch freely between the visual Interactive Slicer (
Slicer) and the code-based Spec Editor (</> Spec Editor). They stay 100% synchronized at all times.
Now that you know how the machine and the Studio fit together, let’s cut a complete Round Brilliant Quartz Gemstone from scratch in Chapter 2: Guided Tutorial — Cut Your First Round Brilliant.
Chapter 2: Guided Tutorial — Cut Your First Round Brilliant
In this chapter, you will cut a complete Standard Round Brilliant Quartz Gemstone (RI = 1.54, 96 index gear) using only your mouse in the Interactive Slicer. Follow along step by step directly in ProFacet Studio!
Step 1: Click New to Mount a Fresh Round Preform
- In the top toolbar of the right-hand pane, click
New. - ProFacet creates a clean 16-sided round preform (
Round(43, 16)) on a96-tooth gear and automatically sets the 3D Viewport toPalettemode so you can see individual facets and meetpoint markers clearly. - Click the
⌄(Show display options) button in the top-left of the 3D viewport and turn onFacet Infoso every facet displays itsTier:Indexlabel. - At the bottom-left of the 3D viewport, click
Pavilion(Flip View | Crown | Profile | Pavilion) so you are looking straight at the bottom of the blank.
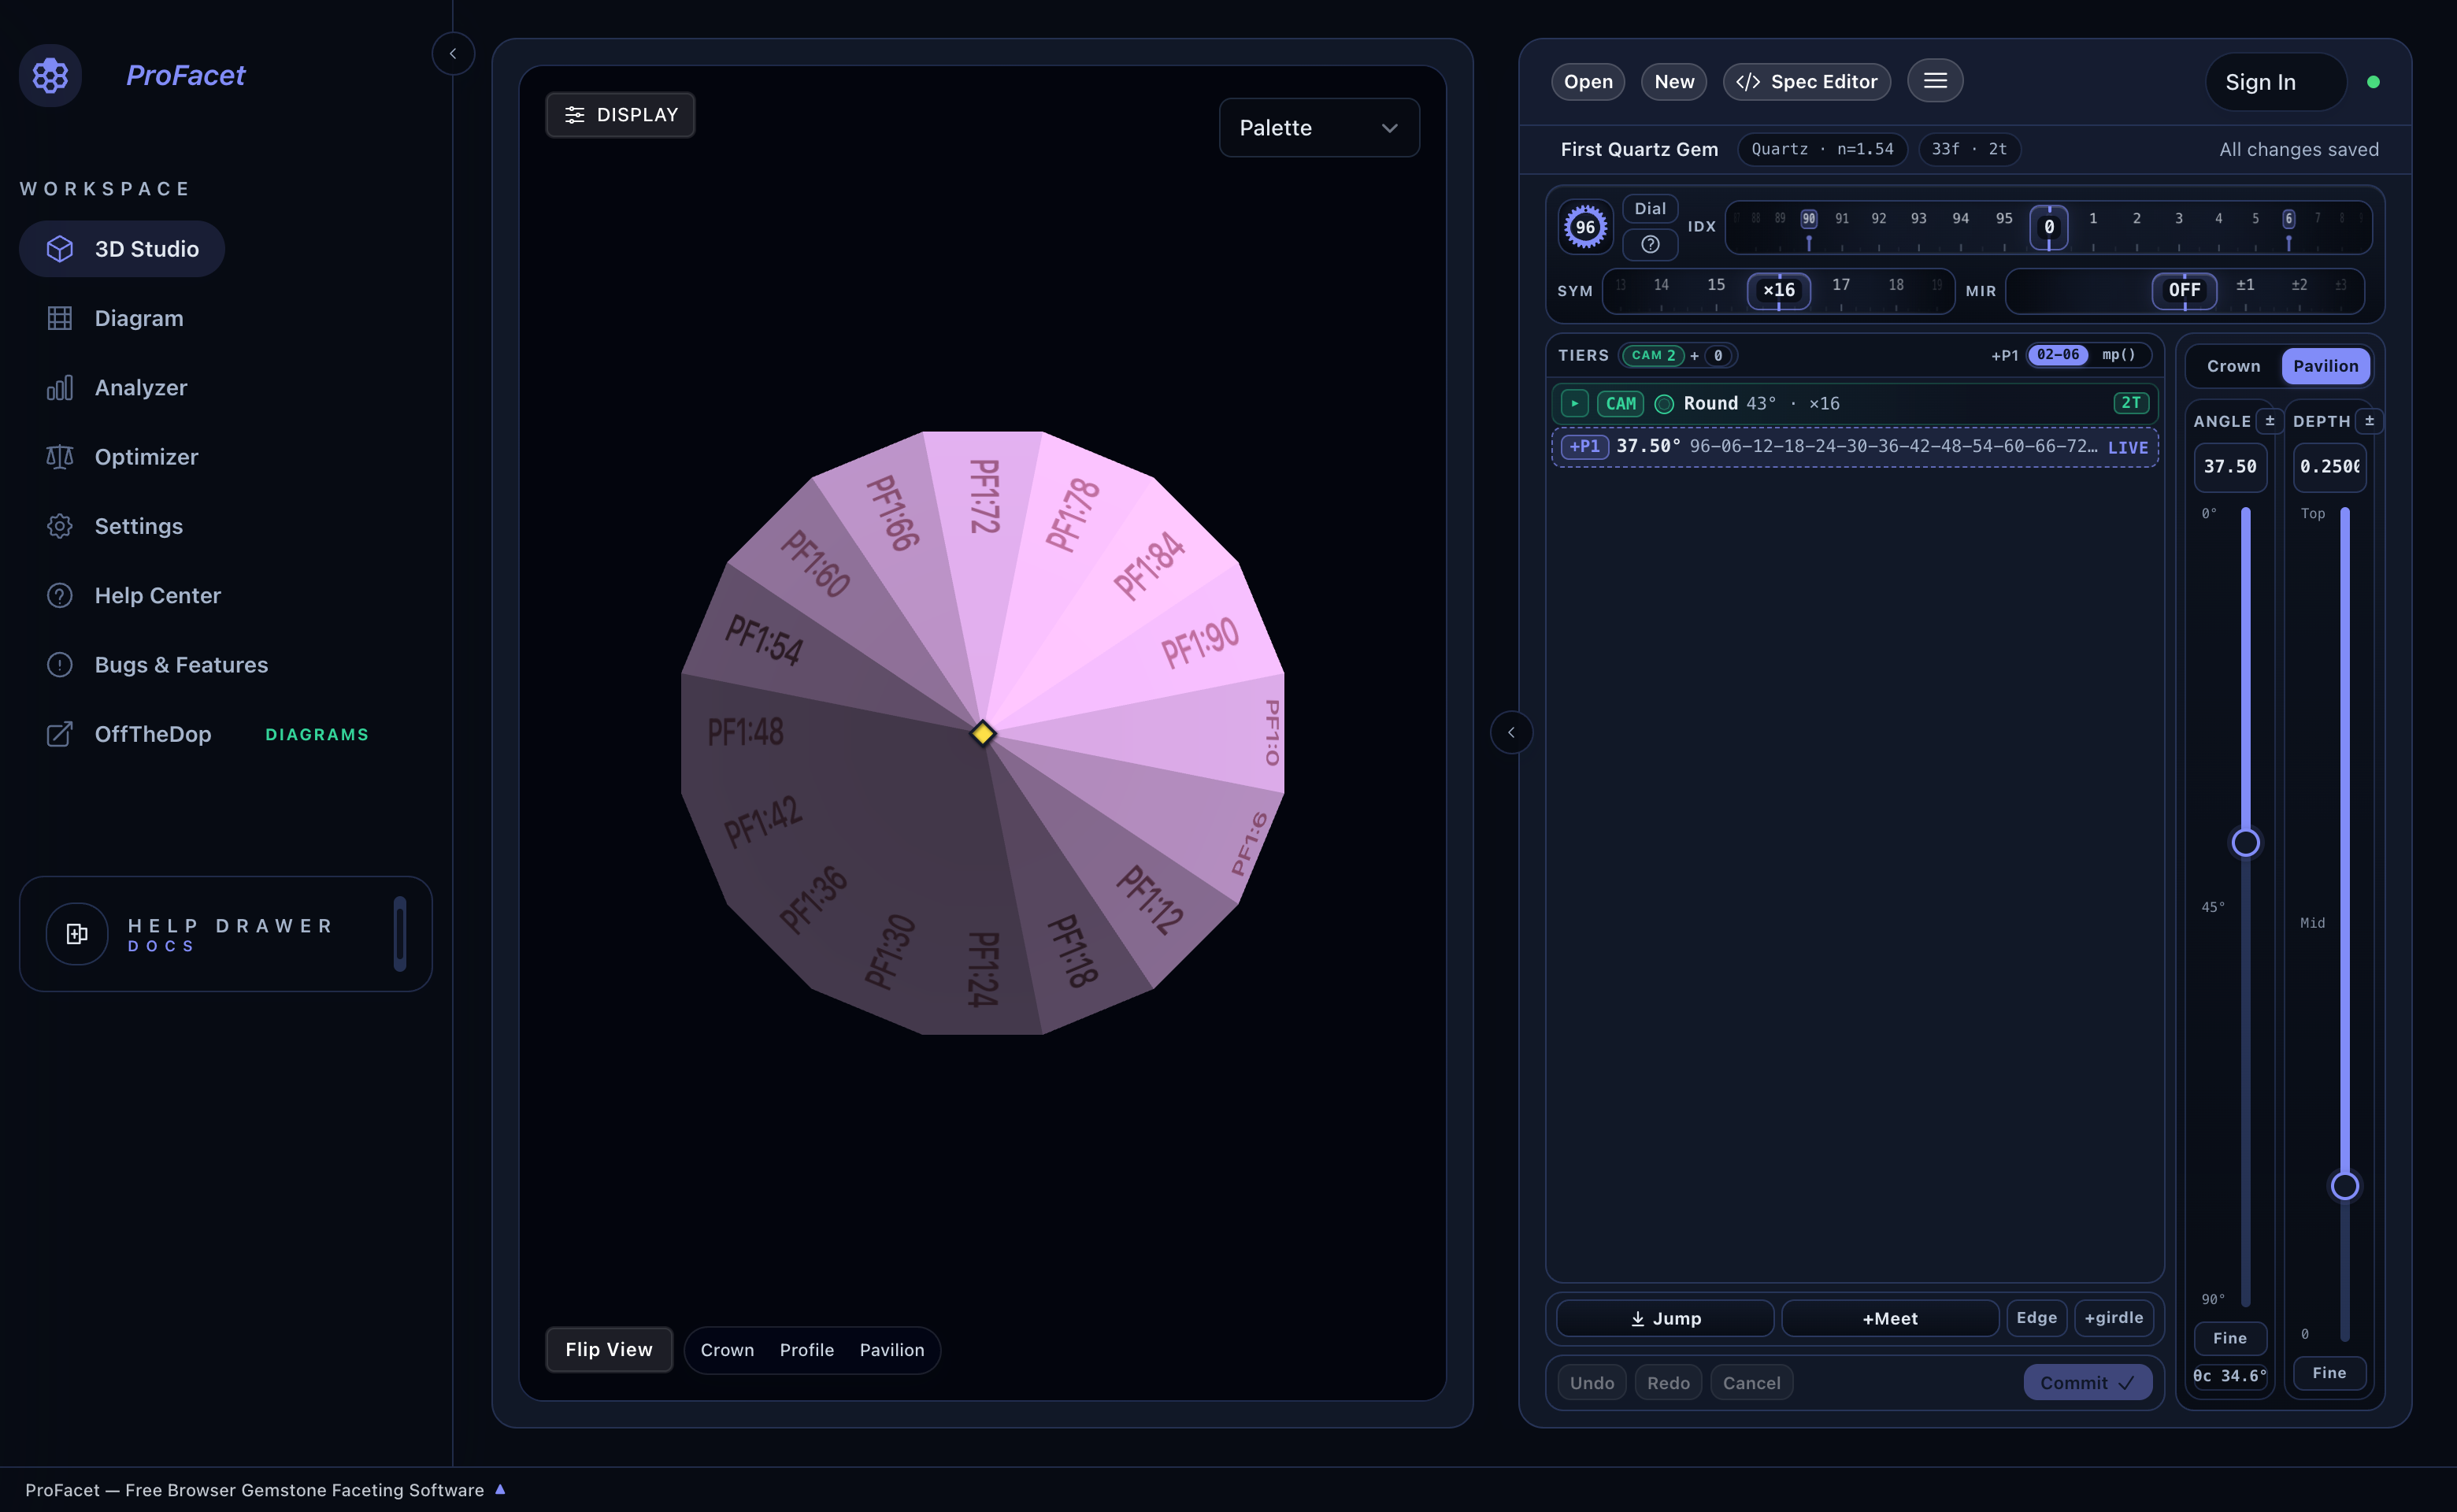
[!NOTE] What Is That Green
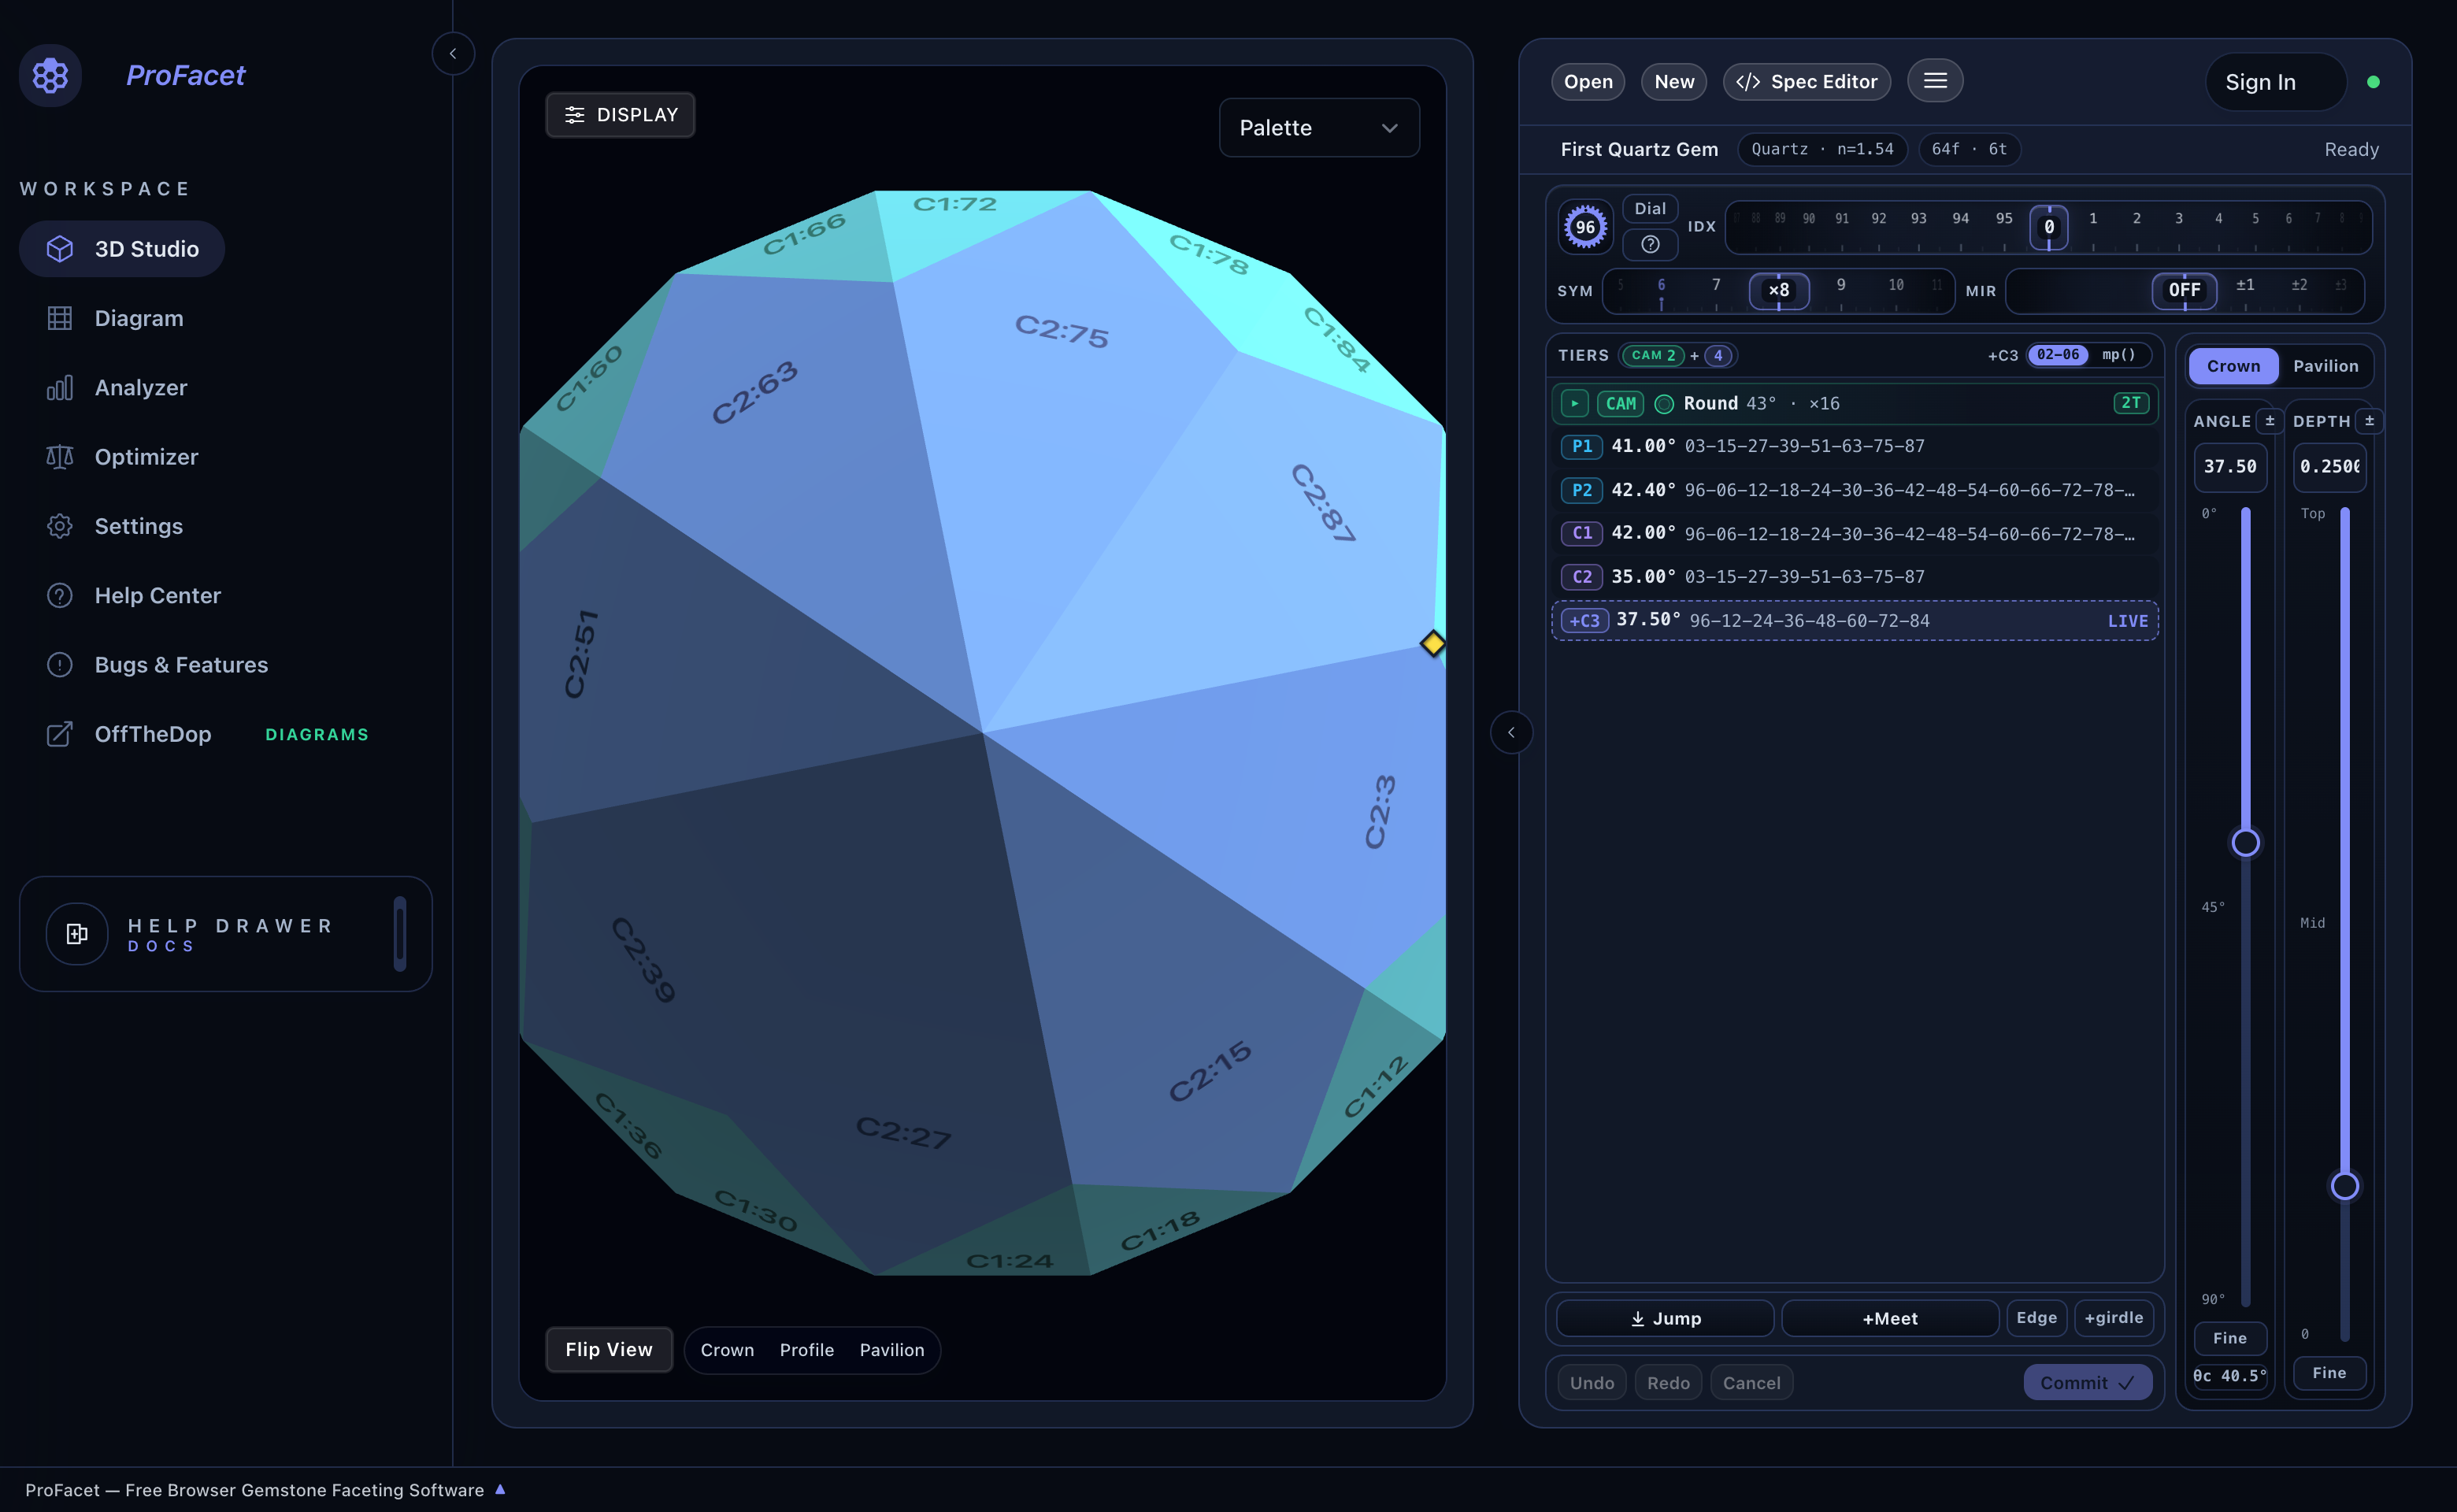
CAM · Round 43° · ×16Row? Instead of making you manually cut 16 temporary centerpoint facets and 16 vertical90°girdle facets just to get a round cylinder,Round(43, 16)does that preform work in a single step! Notice the golden diamond (♦) in the center of the Pavilion view—that is the centerpoint (cp()) where our Pavilion Mains will meet.
Step 2: Cut the 8 Pavilion Mains (P1) Anchored at the Girdle (gp())
First, we will slice 8 kite-shaped main pavilion facets at 41.00° (safely above Quartz's 40.5° critical angle) starting from the 8 outer girdle corners (gp()) and meeting at a brand-new central culet:
- Above the vertical masts on the right, make sure
Pavilionis active. - In the top Precision Dial Deck, set the three horizontal drums:
IDX:3(aligns with the girdle corners ofRound(43, 16)at03-15-27-39-51-63-75-87)SYM:×8(cuts 8 evenly spaced facets around the 96-tooth gear)MIR:OFF
- In the
ANGLEbox on the right mast, enter41.00. - Click
↓ Jumpin the action bar below the Tiers table so the cutting plane slides inward to touch the outer girdle corners (gp()), then click+Meetto lock it togp().- Why anchor
P1atgp()instead ofcp()? BecauseRound(43, 16)already cut a43.00°preform cone to the old centerpoint (cp()), a shallower41.00°cone passing through that samecp()would float outside the stone in thin air! AnchoringP1at the outer girdle corners (gp()) slices deeper into the pavilion from the rim, carving 8 kite-shaped Pavilion Mains that meet at a new central culet while leaving 16 temporaryPF1triangles around the rim.
- Why anchor
- Click
Commit ✓.
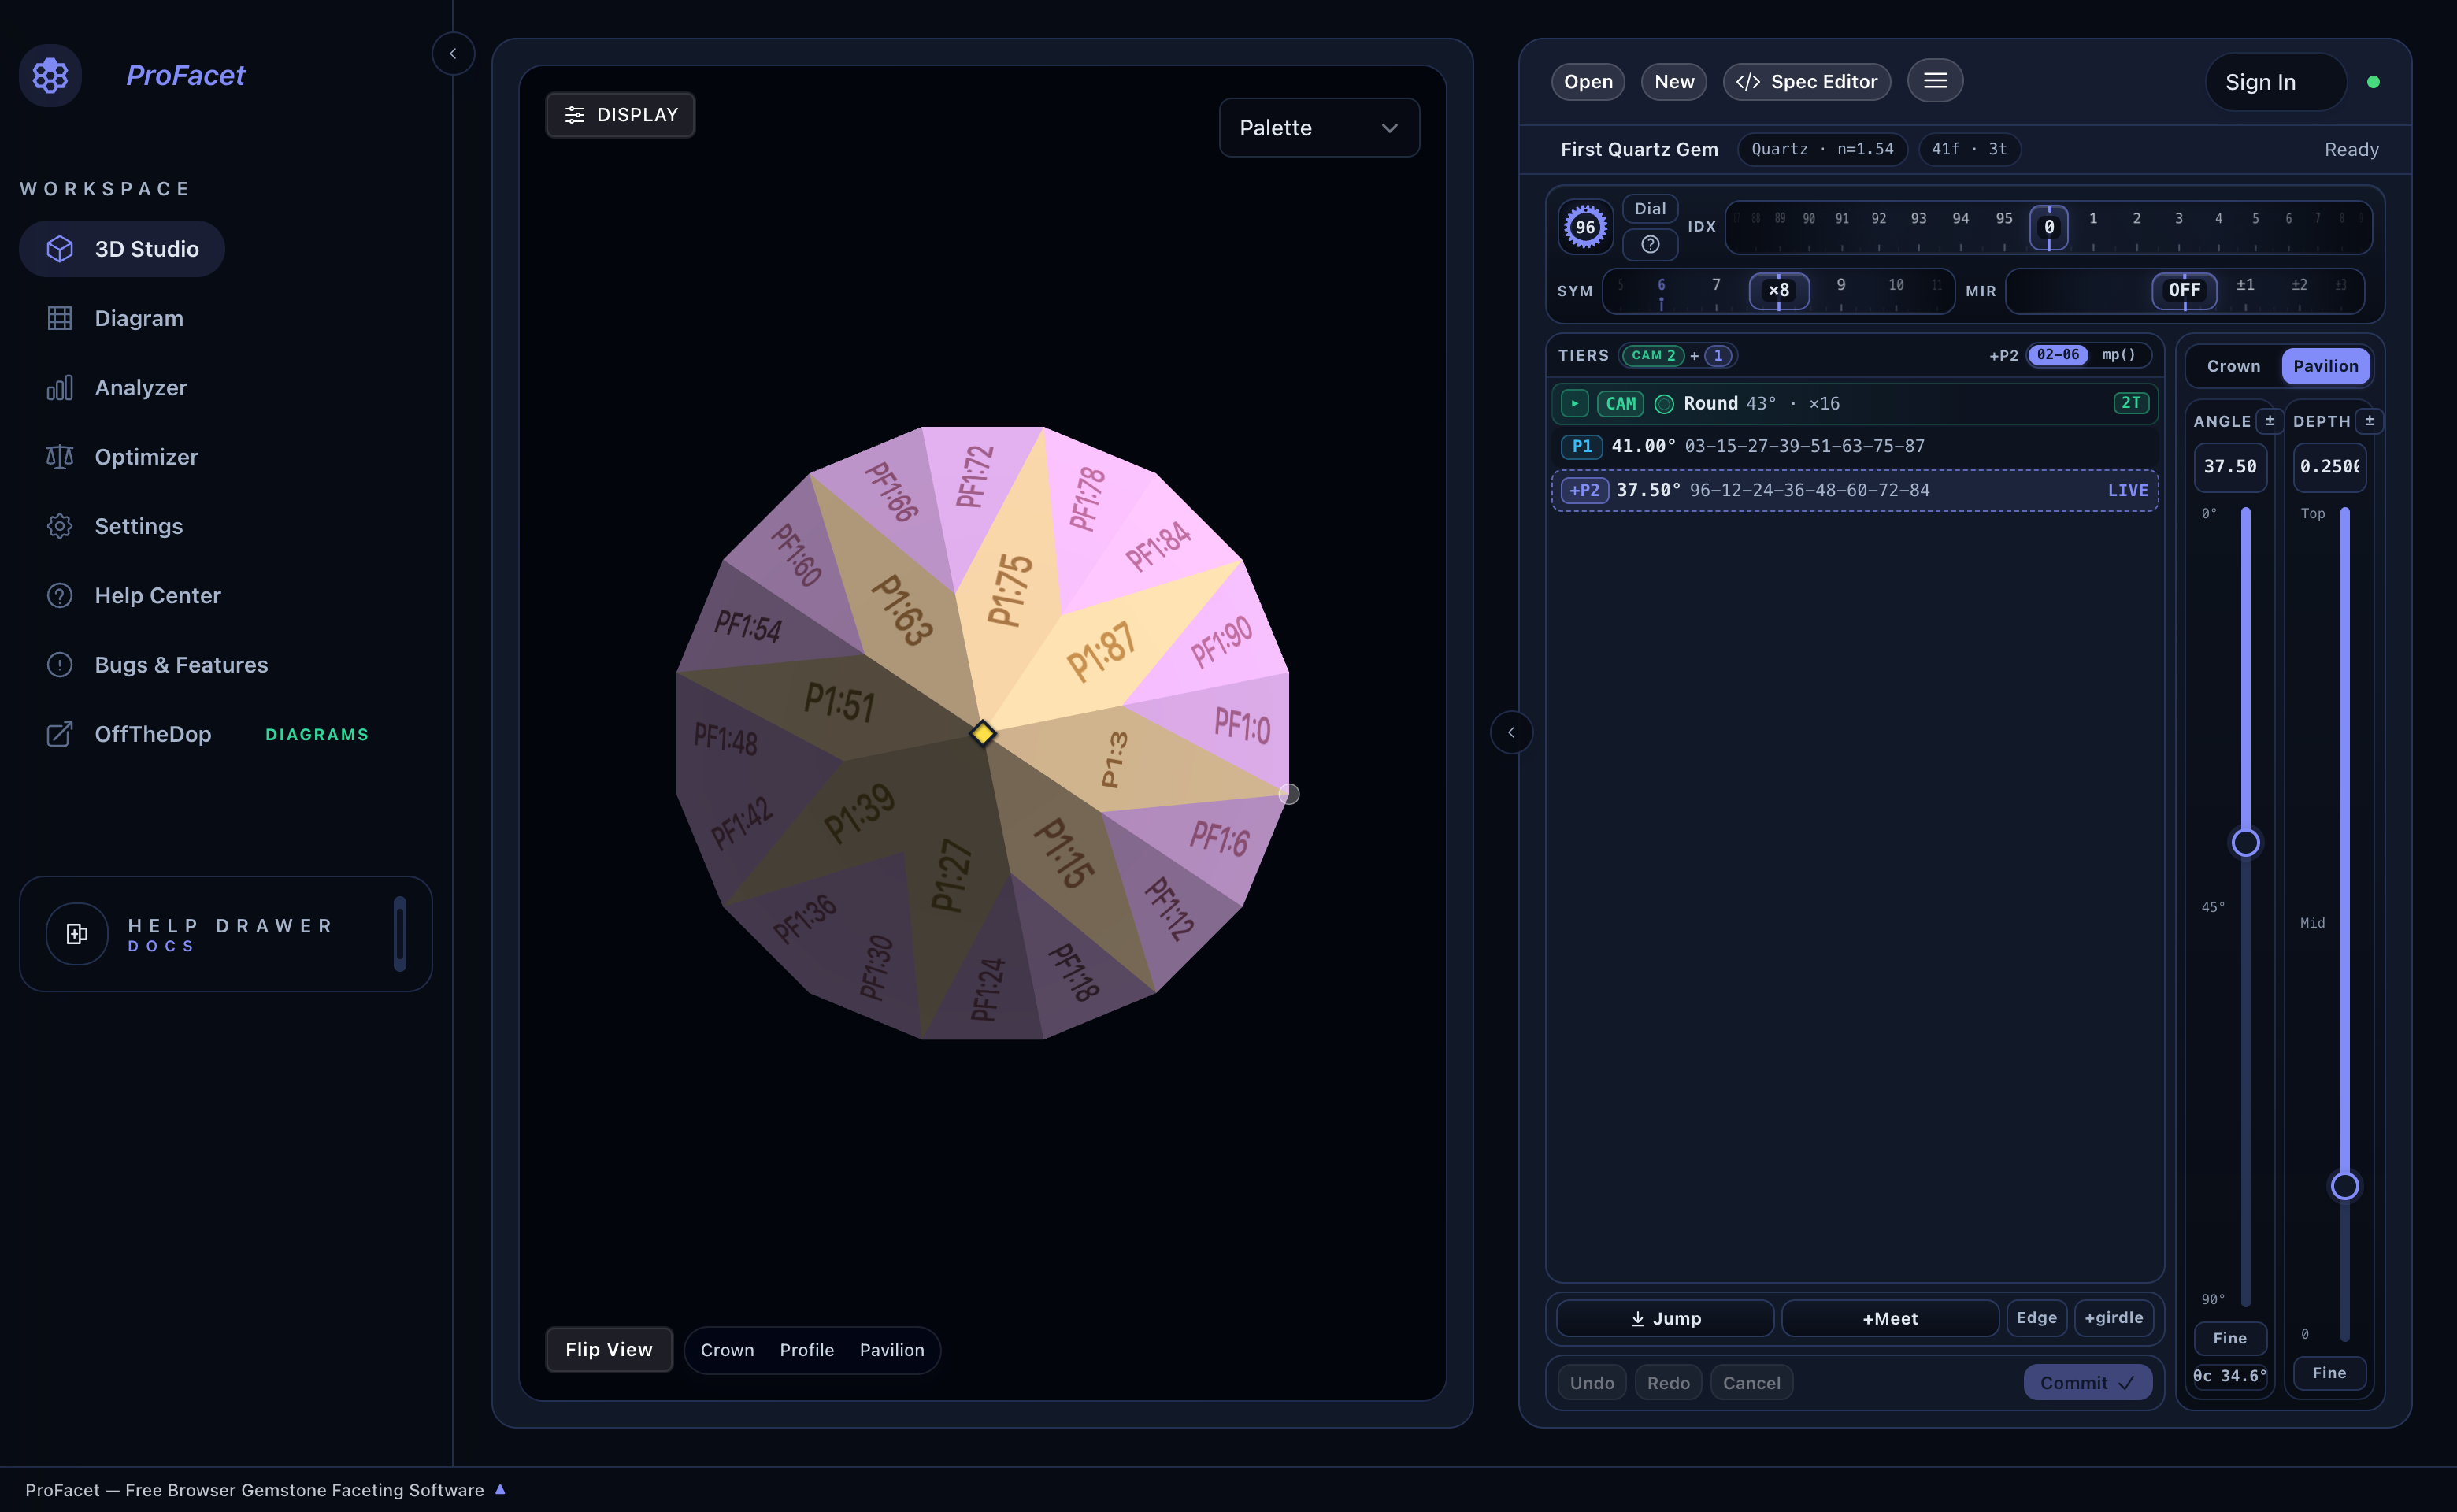
Look at the 3D viewport: your 8 kite-shaped P1 pavilion mains now meet cleanly at the center, while 16 temporary preform triangles (PF1) remain around the outer rim.
Step 3: Cut the 16 Mirrored Pavilion Breaks (P2) Meeting the Girdle (gp())
Next, we cut 16 steeper Pavilion Break facets (P2) at 42.40° to cut away every remaining temporary PF1 preform facet and establish a level, scalloped 16-facet girdle:
- In the Precision Dial Deck, configure a mirrored 8-fold tier centered on the
P1mains (IDX = 3):IDX:3SYM:×8MIR:±3- How this works: At each of the 8 main positions (
03, 15, 27…),MIR ±3cuts two break facets (3 - 3 = 0and3 + 3 = 6, etc.), producing all 16 break facets (96-06-12-18-24-30-36-42-48-54-60-66-72-78-84-90) aligned with the 16 girdle facets!
- Set the vertical
ANGLEmast to42.40(steeper thanP1's41.00°, and slightly shallower thanPF1's43.00°so it slices deeper into the stone from the girdle rim and completely replaces all 16 temporaryPF1facets). - Click
↓ Jumpand then+MeetsoP2locks directly onto the outer girdle points (gp()). - Click
Commit ✓.
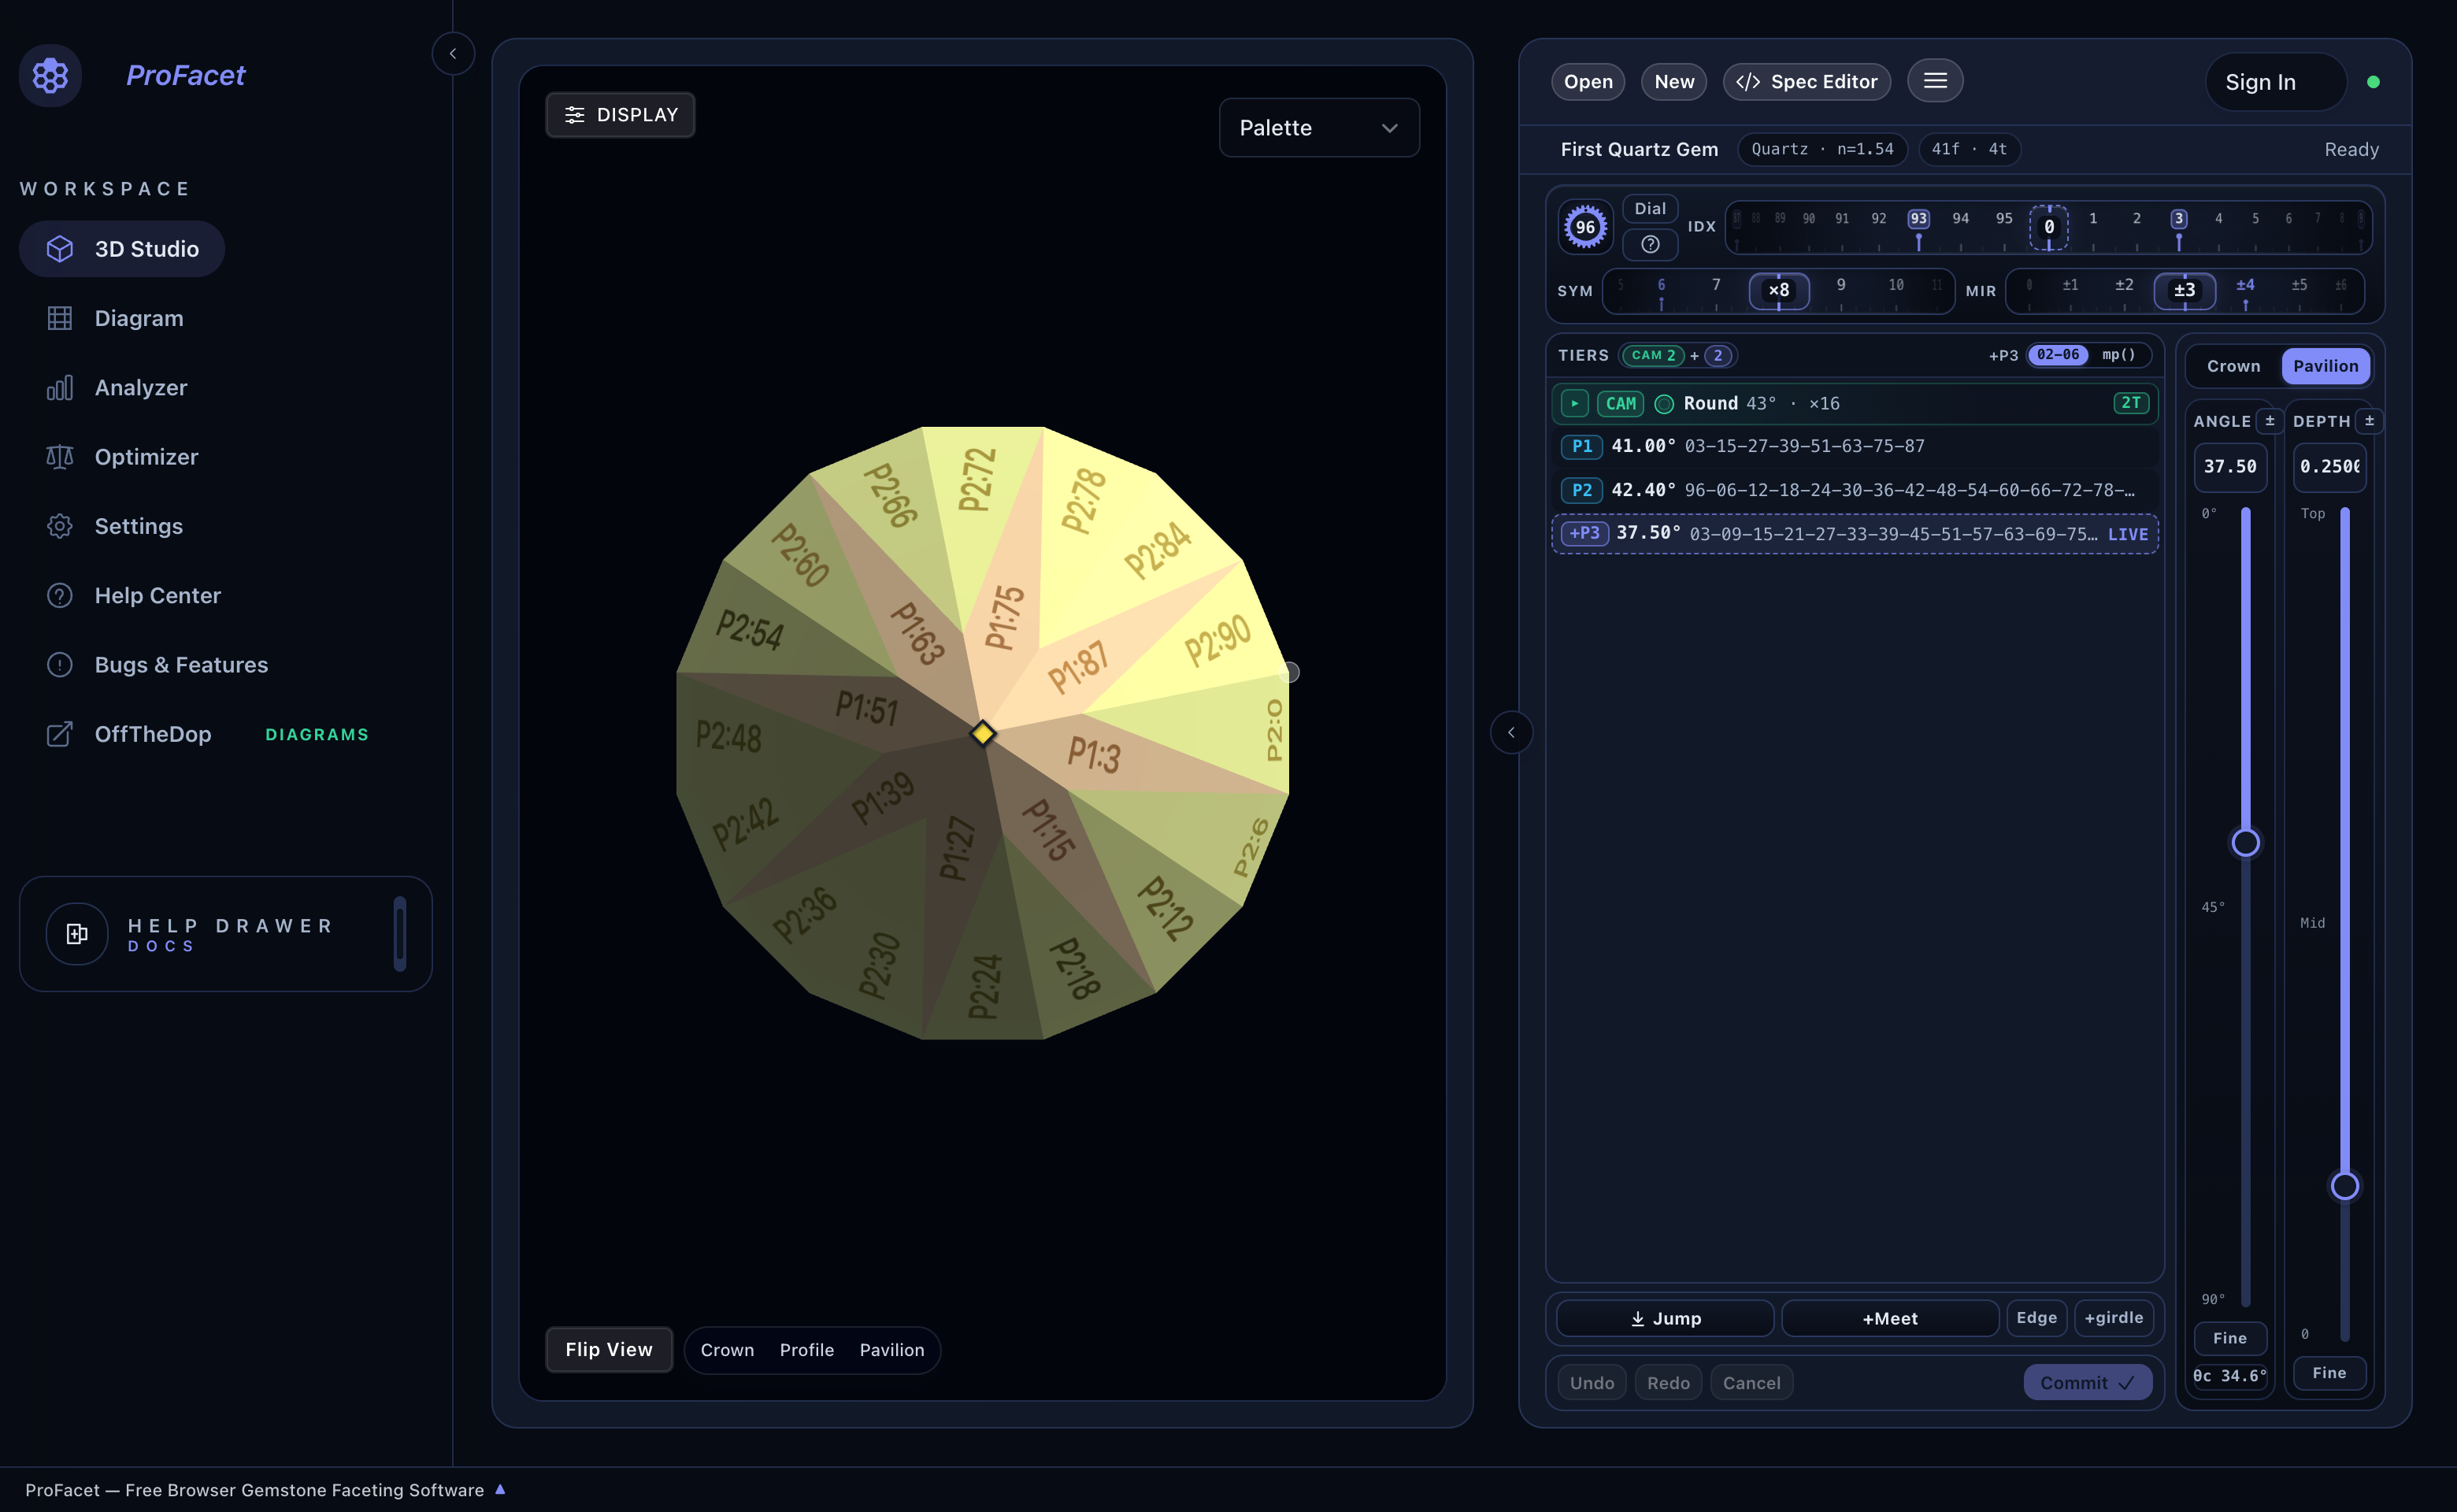
The Pavilion is now 100% finished—every temporary PF1 preform facet has been cleanly cut away, leaving 8 P1 Pavilion Mains framed by 16 P2 Pavilion Breaks!
Step 4: Flip to the Crown & Cut the Crown Breaks (C1) and Mains (C2)
Now let's flip the stone over to cut the upper Crown dome:
- Above the vertical sliders on the right, switch from
PaviliontoCrown. - At the bottom-left of the 3D viewport, click
Crownto look straight down at the top of the stone. - Cut the 16 Crown Breaks (
C1):- Set the drums to
IDX = 3,SYM = ×8,MIR = ±3(matching the 16 Pavilion Break and Girdle facets below). - Set
ANGLEto42.00. - Click the
+girdlebutton in the bottom action bar, then click↓ Jumpand+Meet(gp() + girdle). - Why
+girdle? The very first Crown tier that touches the Pavilion girdle needs+ girdleso ProFacet leaves a clean vertical girdle band (3%of stone width by default) between the Pavilion and Crown instead of pinching the girdle to a knife-edge. - Click
Commit ✓.
- Set the drums to
- Cut the 8 Crown Mains (
C2):- Set the drums to
IDX = 3,SYM = ×8,MIR = OFF(matching the 8 Pavilion Mains at03-15-27-39-51-63-75-87). - Set
ANGLEto35.00. - Click
↓ Jumpand+Meetto lockC2to the girdle corners (gp()). - Click
Commit ✓.
- Set the drums to
Step 5: Cut the 8 Star Facets (C3) & Polish the Table (T)
Finally, we add the 8 shallow Star facets (C3) and the flat 0.00° Table (T):
- Cut the 8 Star Facets (
C3):- Set
IDX = 9(halfway between the Crown Mains at3and15),SYM = ×8,MIR = OFF. - Set
ANGLEto22.00. - Click
↓ Jumpand+MeetsoC3meets the upper tips of the Crown Breaks (mp(C1)). - Click
Commit ✓.
- Set
- Cut the Flat Table (
T):- Set
IDX = 0,SYM = ×1,MIR = OFF. - Set
ANGLEto0.00. - Click
↓ Jumpand+Meetso the table meets the inner star/bezel tips (mp(C2)). - Click
Commit ✓.
- Set
- Inspect Your Finished 73-Facet Crown in
PaletteMode:- Keep the viewport in
Palettemode withFacet Infoenabled to verify that all 33 crown facets—16C1Crown Breaks, 8 kite-shapedC2Crown Mains, 8 triangularC3Stars, and the central octagonalTTable—meet at razor-sharp vertices. (Whenever you want to preview optical brilliance and spectral dispersion, you can toggle the top-right shading dropdown fromPalettetoRaytracedorBDPT.)
- Keep the viewport in
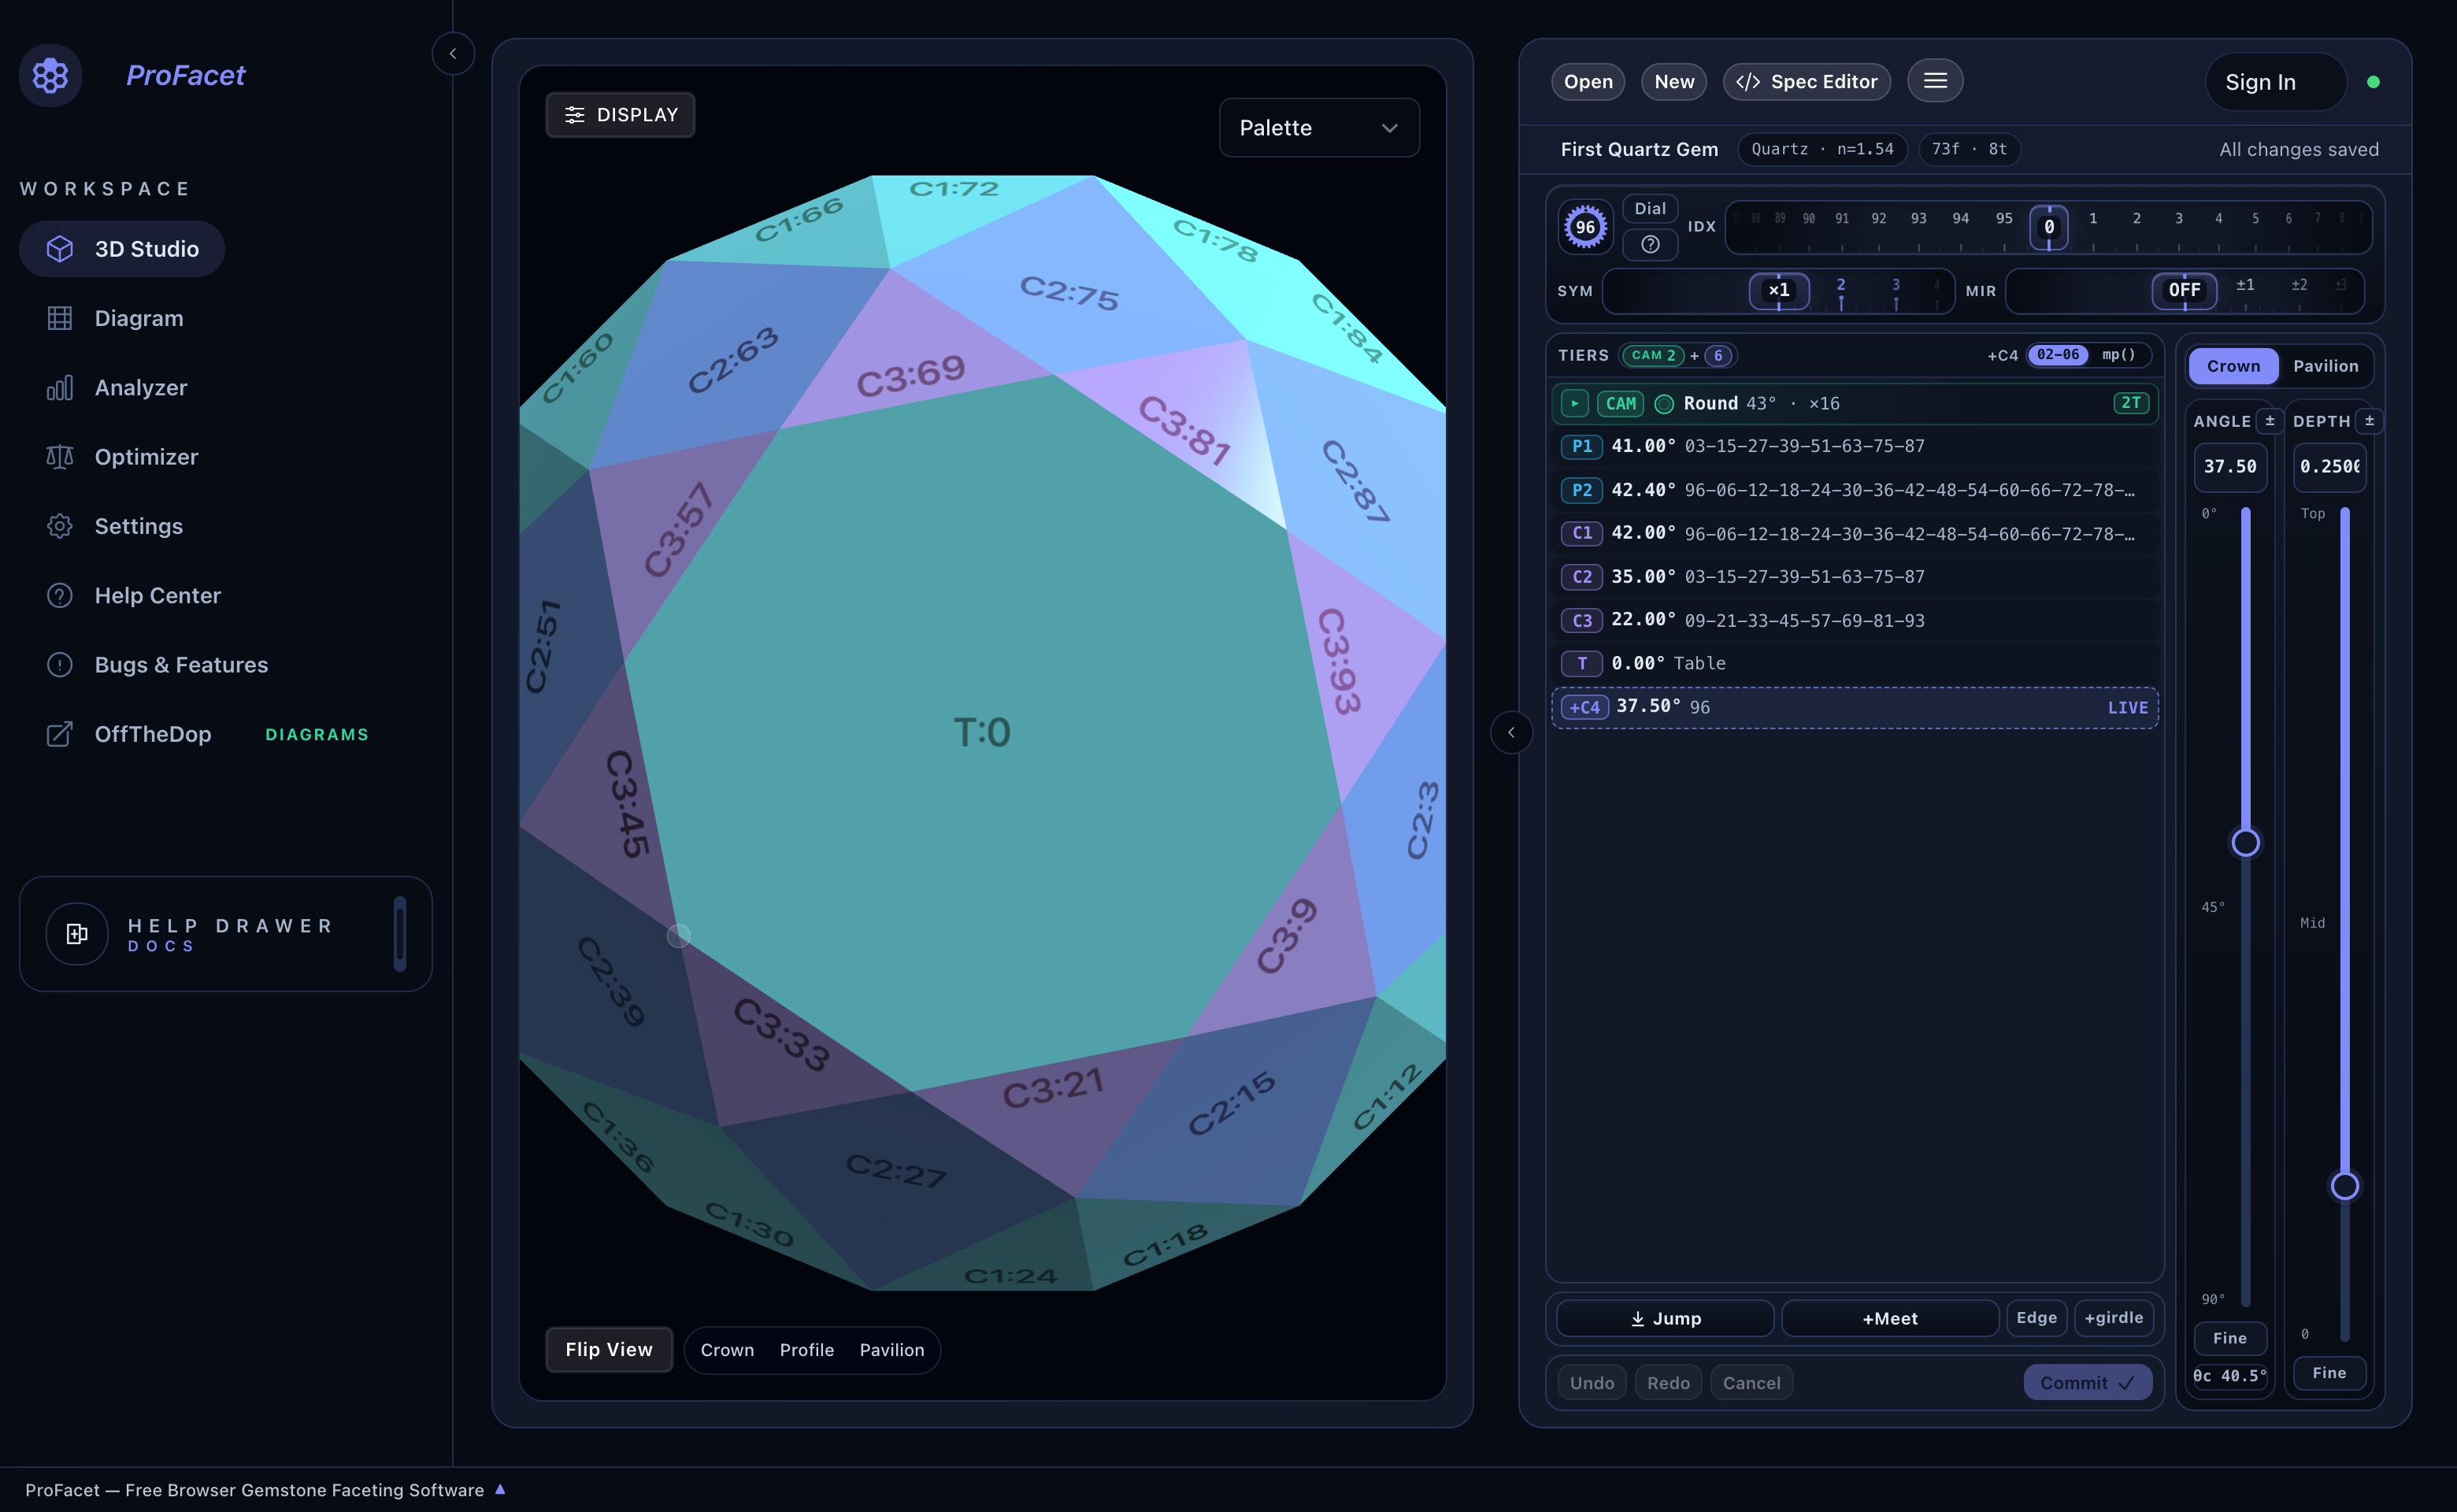
In Chapter 3: Inside the Interactive Slicer — Dials, Masts & Meetpoints, we will explore every advanced capability of the Slicer, including in-place tier editing, explicit tooth lists, and Edgepoint (Edge) mode.
Chapter 3: Inside the Interactive Slicer — Dials, Masts & Meetpoints
In Chapter 2, you used the Interactive Slicer to cut a Round Brilliant. Now let’s open the hood on every dial, button, and mode inside the Slicer so you can design or modify any gemstone—from simple step cuts to intricate asymmetric fantasy cuts—without touching the keyboard.
[!IMPORTANT] Always Slice in
PaletteorMonoView Mode The Slicer’s translucent 3D cutting-plane disc, vertex depth-snap guides, and clickable golden meetpoint diamonds (♦) are displayed inPaletteandMonomodes. When the viewport is set toRaytraced,ASET, orBDPT, ProFacet shows a yellow reminder banner at the bottom of the Slicer (Interactive slicer only works in Monochrome or Palette mode).
1. The Top Precision Dial Deck
The top bar of the Slicer is your digital index head. It controls the gear tooth count and how your active cut repeats around the 360° dop axis:

A. The Gear Hub (96)
- Click the machined Gear Wheel on the far left to cycle through standard faceting machine gears:
32,64,72,80,96(default), and120. - When you switch gears, ProFacet updates the tooth ticks on the
IDXandMIRdrums and recalculates the valid divisors on theSYMdrum automatically.
B. Dial Mode vs. List Mode
DialMode (Default): Uses the three horizontal cylindrical Vernier drums (IDX,SYM,MIR) to generate symmetric tooth loops.ListMode (Explicit Index List): Click theDialbutton to switch toListmode whenever you want to cut an asymmetric stone or an arbitrary subset of teeth (such as[0, 24, 48]without72). InListmode, you can type tooth numbers directly or click individual teeth around a visual gear ring.?Button (Symmetry Assistant): Opens the Symmetry Assistant to reverse-engineerIDX,SYM, andMIRfrom any printed tooth sequence.
C. The Three Vernier Drum Dials (IDX, SYM, MIR)
You can click and drag any drum horizontally, scroll your mouse wheel while hovering over a drum, or click any visible number on the drum scale to snap to it:
| Drum | Full Name | Range | How It Shapes the Tier |
|---|---|---|---|
IDX | Base Index | 0 to Gear - 1 | Selects the reference tooth on the gear (0 = tooth 96 at top dead center). For a mirrored tier (MIR > 0), IDX sits at the symmetry axis halfway between the mirrored pair. |
SYM | Symmetry Fold | Divisors of Gear (×1, ×2, ×3, ×4, ×6, ×8, ×12, ×16…) | Repeats the reference cut N times around the circle in equal angular steps of Gear / N teeth. |
MIR | Mirror Delta (±M) | OFF, ±1, ±2 … ±(Gear/2 - 1) | The ± delta index (written as m M in FSL xN m M) that splits each symmetry axis stop IDX into two mirrored cuts at IDX - M and IDX + M. For example, on a 96 gear, IDX = 0, SYM = ×4, MIR = ±6 (0 @ ... x4 m 6) cuts 8 facets at 90, 06, 18, 30, 42, 54, 66, 78. |
2. The Two-Column Slicer Workbench
Beneath the Dial Deck, the Slicer is split into the Tiers Table & Action Bar on the left and the Vertical Angle & Depth Masts on the right:
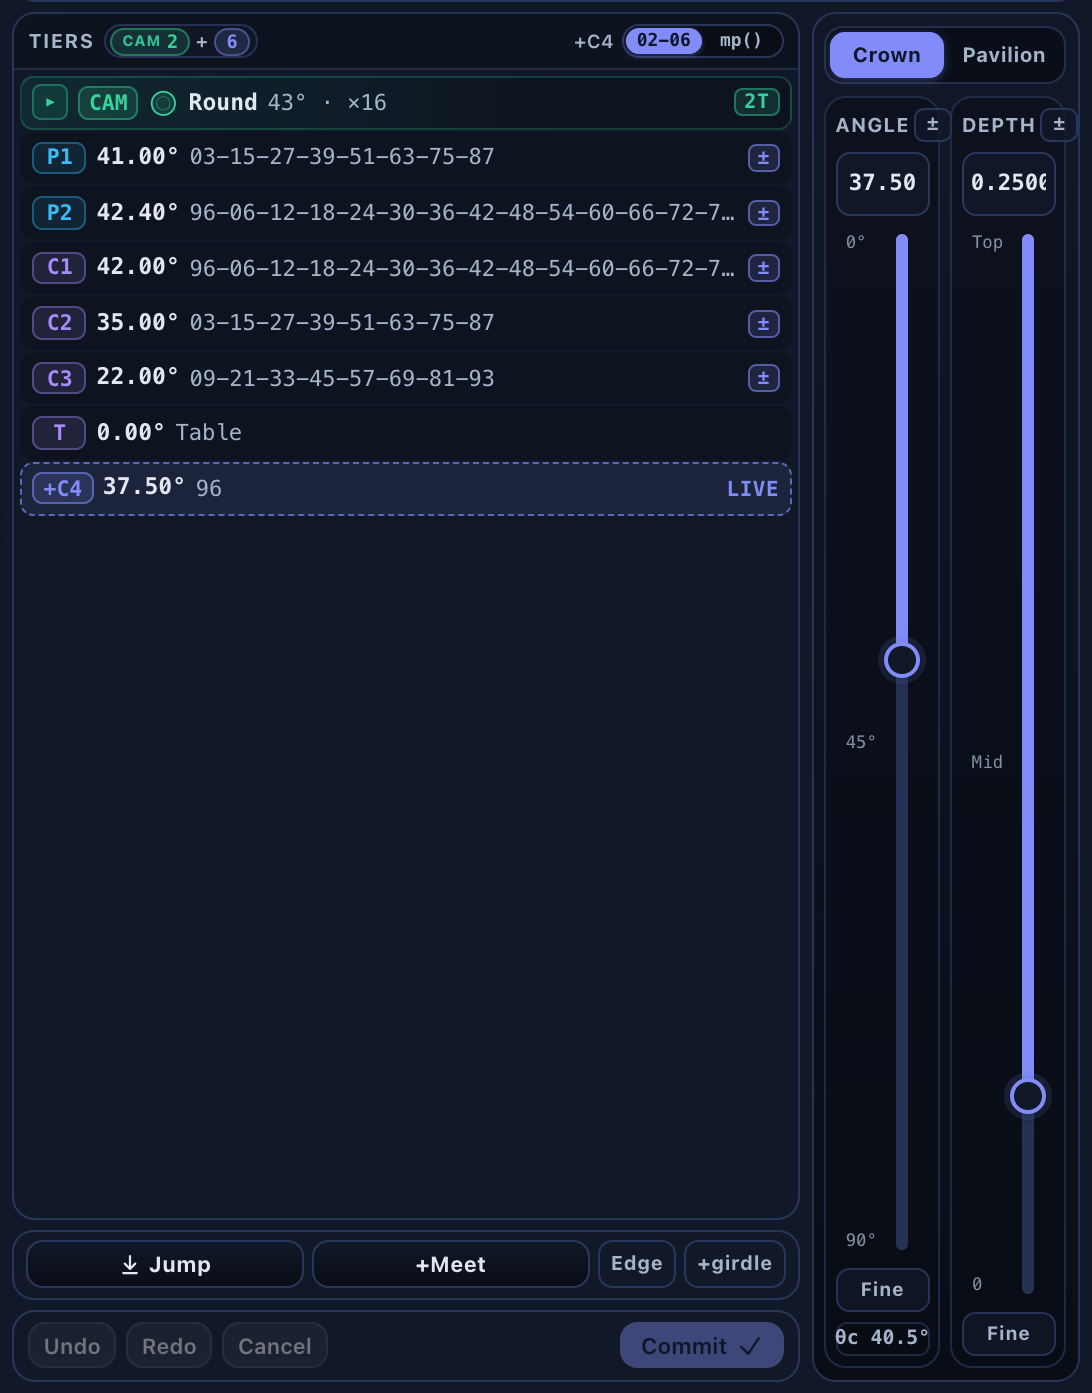
Left Column: The Tiers Table
- Header Bar (
TIERS&02-06 | mp()Switch):CAM 2 + 6Badge: Shows the count of CAM preform tiers (2) plus permanent faceted tiers (6).02-06vs.mp()Toggle:02-06(Cutter View): Displays the exact sequence of gear teeth (96-12-24-36-48-60-72-84) you dial at the machine.mp()(Formula View): Displays the symbolic FSL depth/meetpoint target (: gp() + girdle x8 m 3) so you can verify how each tier is anchored geometrically.
- The Green
CAMRow:- Summarizes your stone's starting outline (
Round 43° · ×16,RectTr 1.4× · 43° · tr 0.28, etc.). - Click the green
CAMrow at any time to open the CAM Preform Studio and change the stone's shape, aspect ratio, or corner truncation!
- Summarizes your stone's starting outline (
- In-Place Editing of Existing Tiers (
P1,P2,C1…):- Click any committed tier row in the table to edit it in-place! The row highlights, and its angle, depth, meetpoints, and drum dials load into the Slicer controls. Adjust the angle or meetpoint and click
Commit ✓to update that tier (and automatically recompute all downstream tiers that depend on it!), or clickCancelto discard your changes. - The
±Optimization Toggle: Click the±button on the right edge of any tier row to mark (or unmark) that tier's angle with a+/-optimization range for the GPU Optimizer.
- Click any committed tier row in the table to edit it in-place! The row highlights, and its angle, depth, meetpoints, and drum dials load into the Slicer controls. Adjust the angle or meetpoint and click
- The Dashed
+LIVERow:- The bottom dashed row (
+C4 37.50° 96 LIVE) shows the uncommitted tier you are currently previewing on the 3D stone.
- The bottom dashed row (
3. How ↓ Jump, +Meet, and +girdle Work Together
At the bottom of the Tiers table sit four geometry buttons that replace manual depth guesswork:
| Button | What It Does Geometrically |
|---|---|
↓ Jump | Starts from outside the stone and slides your cutting plane inward along its normal vector until it touches the next distinct group of vertices on the 3D mesh. Click ↓ Jump repeatedly to step deeper from one vertex ring to the next! |
+Meet | Converts the current cutting depth into a symbolic meetpoint expression (cp(), gp(), or mp(TierA, TierB)). You can also click any golden diamond marker (♦) directly on the 3D stone to add or remove a meetpoint target! |
Edge | Switches to Edgepoint (ep) Mode (detailed below) for placing a cut at a fractional ratio (0.00–1.00) along an existing facet ridge. |
+girdle | Appends + girdle to a Crown tier's depth target so the first Crown tier starts above the Pavilion girdle by the stone's girdle thickness (0.03 by default). |
4. Edgepoint (Edge) Mode — Cutting Fractionally Along a Ridge
What if you are designing a step cut, a portrait stone, or a fantasy cut where a new tier does not meet an existing corner, but instead needs to slice 40% or 50% of the way along an existing ridge between two facets?
Clicking Edge opens the Edgepoint (ep) Panel:
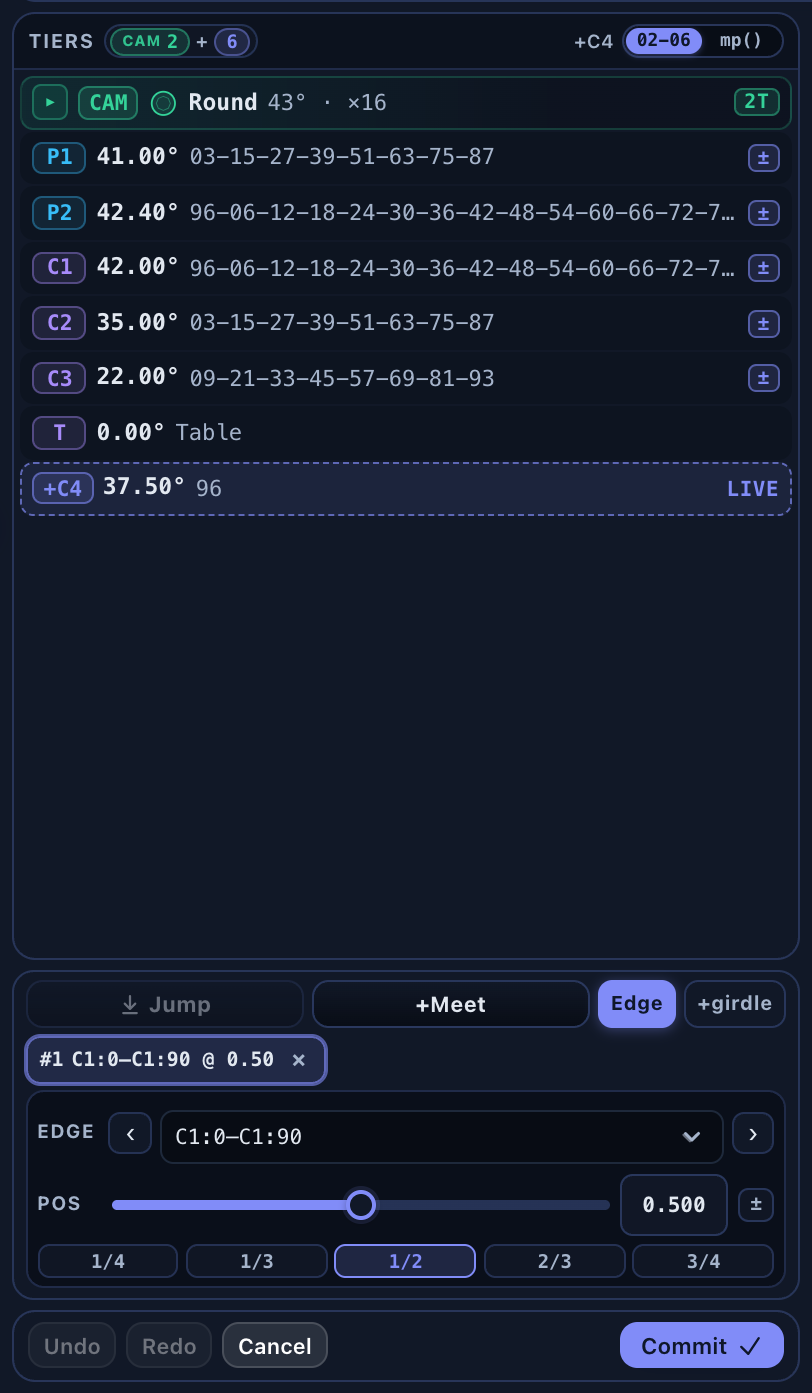
- Click
Edgein the bottom action bar. - Select the two adjacent facets (
Facet 1andFacet 2) that share the ridge—or click the ridge directly in the 3D viewport. - Drag the
Ratioslider (0.00to1.00) to position the cut anywhere along that ridge (0.50= exact midpoint). - Click
Commit ✓—ProFacet writes a parametricep(edge(Facet1, Facet2), ratio)expression into your script that stays locked to that proportional position even if the stone is resized or optimized!
5. Right Column: Crown | Pavilion & Vertical ANGLE / DEPTH Masts
Crown | PavilionSwitch: Determines whether0°–90°angles cut from above (Crown,+Z) or from below (Pavilion,-Z).ANGLEMast (0.00°–90.00°):- Drag the vertical slider thumb, type an exact number into the top readout box, or click
Fineat the bottom of the mast to open a0.01°precision jog wheel. θcCritical Angle Pill: Displaysarcsin(1 / RI)in degrees (θc 34.6°for Sapphire,θc 40.5°for Quartz) right at the base of theANGLEmast.
- Drag the vertical slider thumb, type an exact number into the top readout box, or click
DEPTHMast (Top–0):- Drag the vertical depth thumb whenever you want to position a cut freely in space (Style 1: Angle + Depth) or preview how deep a cut will go before clicking
↓ Jumpor+Meet.
- Drag the vertical depth thumb whenever you want to position a cut freely in space (Style 1: Angle + Depth) or preview how deep a cut will go before clicking
Next, let’s explore how to change the outer shape of your stone into Ovals, Emeralds, Pears, Cushions, Hearts, and Shields in Chapter 4: Shaping the Outline — The CAM Preform Studio.
Chapter 4: Shaping the Outline — The CAM Preform Studio
Cutting a round stone is straightforward because every girdle facet sits at the exact same distance from the center axis. But how do you establish the girdle outline of an Oval, Emerald Cut (Truncated Rectangle), Pear, Marquise, Cushion, Heart, Trillion, or Shield?
If you tried to cut a 90° girdle directly by guessing raw micrometer depths for 16 different facets around an oval, one small slip would ruin the symmetry of the stone. Instead, master cutters use a remarkably elegant geometric technique called the Centerpoint Angle Method (CAM).
1. What Is the Centerpoint Angle Method (CAM)?
In a CAM preform, you establish the stone's outer perimeter in two simple steps:
- Temporary Centerpoint Pyramid (
PF1, PF2, ...): You cut temporary pavilion facets that all meet at the central point (cp()). Because all of these facets share the exact same vertical height fromcp()to the equator (z = 0), a facet cut at a steeper angle reachesz = 0closer to the center (forming the narrow width of an oval), while a facet cut at a shallower angle reachesz = 0farther from the center (forming the long tips of an oval)! - Vertical
90°Girdle Cut (G1, G2, ...): You set your mast to90.0°and cut each girdle facet until it touches the equator line of its correspondingPFfacet (mp(PF1),mp(PF2)…). - Permanent Pavilion Cuts (
P1, P2, ...): Once the90°girdle is locked in, your permanent Pavilion tiers cut to: gp()(the girdle corners) and: cp(), completely grinding away the temporaryPFpreform facets!
2. Using the Visual CAM Preform Studio
You never have to calculate CAM preform angles by hand. In the Interactive Slicer, click the green CAM row at the top of the TIERS table to open the CAM Preform Studio:
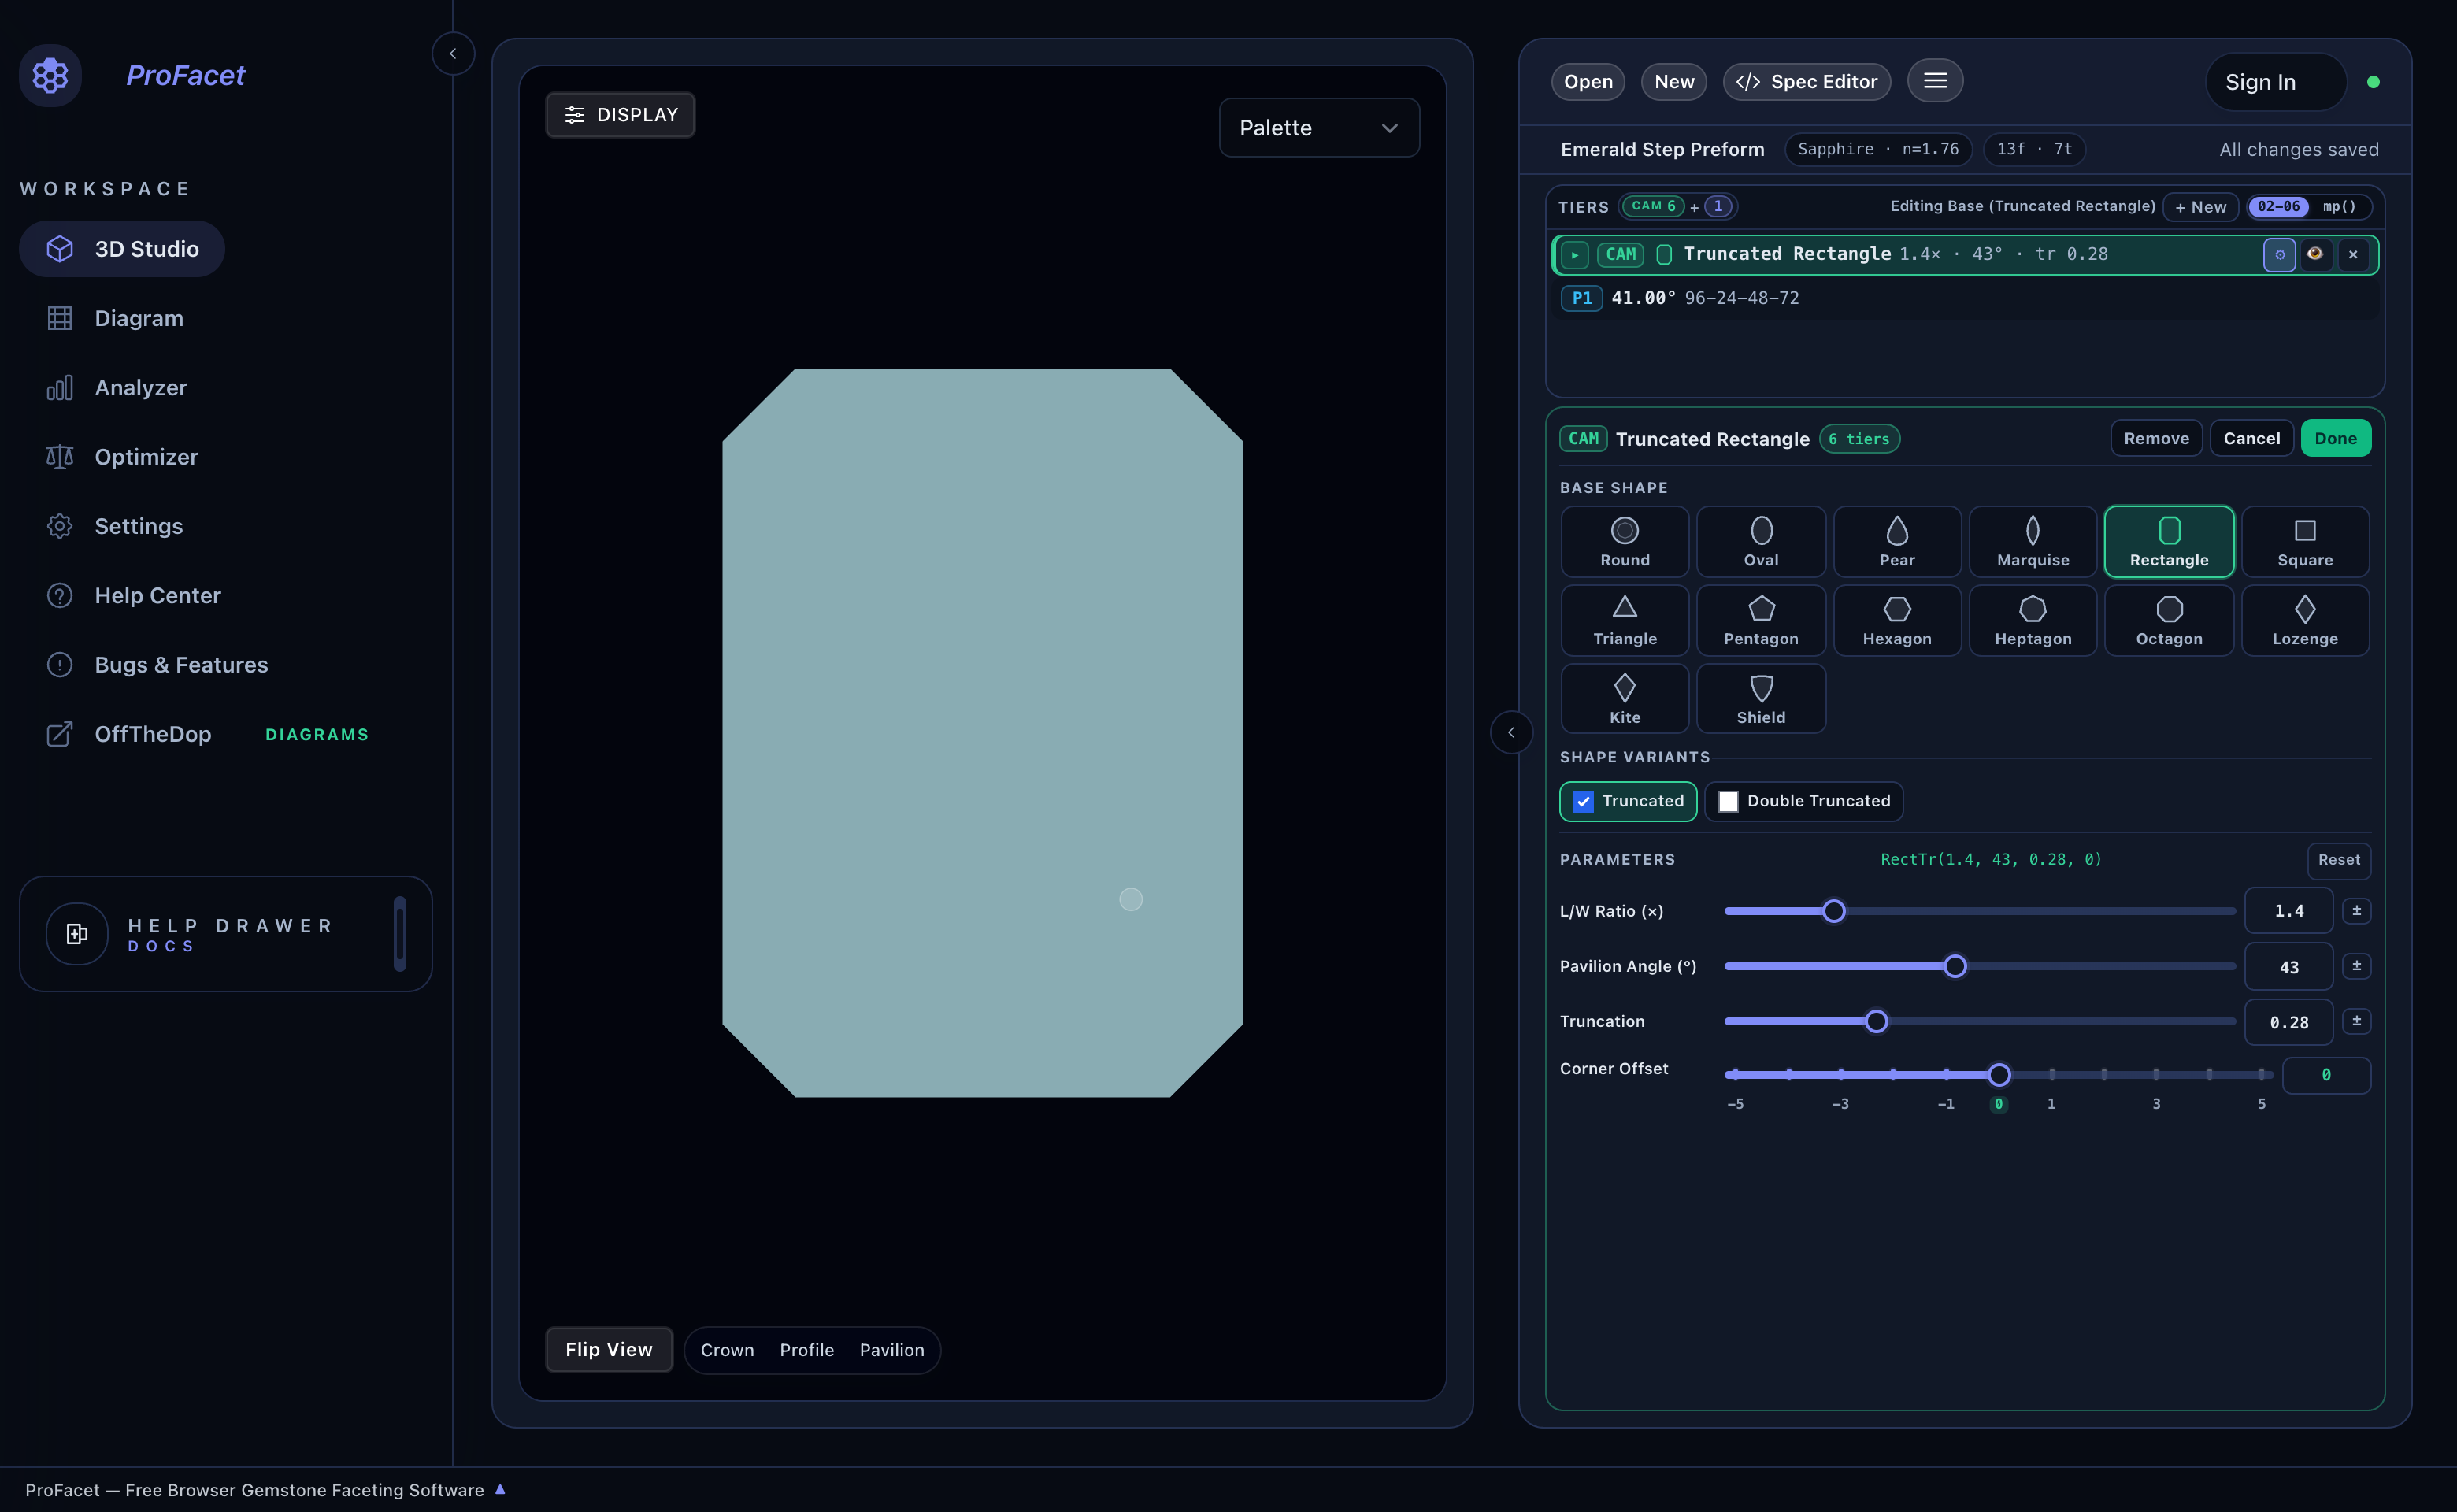
Inside the CAM Preform Studio, you can:
- Select Any of 12 Base Shape Families:
Round,Oval,Pear,Marquise,Rectangle,Square,Triangle,Pentagon,Hexagon,Heptagon,Octagon,Lozenge,Kite, orShield. - Enable Shape Modifiers: Check
Truncated(to bevel sharp corners, turning aRectangleinto an EmeraldRectTror aTriangleinto aTriangleTr),Double Truncated(RectDblTr), orCushion(to curve straight sides outward). - Drag Live Shape Sliders: Adjust
L/W Ratio (×),Pavilion Angle (°),Truncation,Cushion,Belly, orCorner Offset, and click±next to any slider if you want the GPU Optimizer to tune the stone's outline proportions! - Click
Doneto return to the Tiers table.
3. Live Interactive CAM Preform Explorer
Use the interactive widget below to experiment with all 28 built-in CAM Preform Functions right on this page. Pick any shape, drag its parameter sliders, and inspect both the 2D outline and the generated PF/G tiers:
4. Complete Reference of Built-In CAM Preform System Functions
Every CAM function below can be configured visually in the CAM Preform Studio or called directly in FSL and Lua:
Round, Oval, Pear, Marquise, Lozenge & Kite Families
| Function Signature & Defaults | Shape Description | Key Parameters |
|---|---|---|
Round(angle=43, sym=10) | Regular sym-sided circular preform (Round(43, 16) for standard 16-facet round). | angle: CAM angle (43°); sym: facet count (8, 12, 16, 24). |
Oval(angle=45, lwr=1.2, segmentsPerQuad=5) | Smooth elliptical outline walking segmentsPerQuad facets per quadrant. | angle: base CAM angle; lwr: length/width ratio (1.15–1.65); segmentsPerQuad: 2..8. |
Marquise(angle=43, lwr=1.80, segmentsPerQuad=4) | Pointed boat-shaped navette outline (gear divisible by 4). | angle: base angle; lwr: L/W ratio (1.25–2.50); segmentsPerQuad: 2..7. |
Pear(angle=43, lwr=1.55, segments=4) | Teardrop outline combining a rounded base with a pointed tip. | angle: base angle; lwr: L/W ratio (1.25–2.20); segments: 3..6. |
Lozenge(angle=43, lwr=1.60) | Four-sided diamond lozenge (gear divisible by 4). | angle: base angle; lwr: L/W ratio (1.05–2.60). |
Kite(angle=43, lwr=1.55, headRatio=0.34) | Asymmetric four-sided kite (gear divisible by 4). | angle: base angle; lwr: L/W ratio (1.15–2.40); headRatio: top-to-bottom split (0.20–0.44). |
Square & Rectangle (Step / Emerald / Cushion / Radiant) Families
| Function Signature & Defaults | Shape Description | Key Parameters |
|---|---|---|
Rect(lwr=1.5, angle=45) | Straight 4-sided baguette / rectangular preform (Rect(1.0, 43) or Round(43, 4) for a square). | lwr: L/W ratio; angle: long-side CAM angle. |
RectTr(lwr=1.5, angle=45, truncation=0.3, offset=0) | Classic 8-sided Emerald Cut (truncated rectangle). | lwr: L/W ratio; angle: base angle; truncation: corner bevel (0.15–0.45); offset: tooth nudge. |
RectDblTr(lwr=1.5, angle=45, first_truncation=0.3, second_truncation=0.2, offset=0) | 12-sided double-truncated rectangle with two-step corner chamfers. | lwr: L/W ratio; angle: base angle; first_truncation, second_truncation: outer/inner corner bevels. |
SquareTr(angle=42, truncation=0.3) / SquareTrMir(angle=42, truncation=0.5, offset=4) | Cut-corner square (Asscher / Radiant outline) and mirrored variant. | angle: base angle; truncation: corner bevel; offset: mirror index offset. |
SquareCurved(angle=45, c1=2, c2=4) | Curved-side square cushion using index offsets c1 and c2. | angle: base angle; c1, c2: curve tooth offsets. |
SquareCushTr(cushion=1, angle=45, truncation=0.4) / SquareCushTrMir(cushion=1, angle=45, truncation=0.4, offset=2) | Cut-corner square cushion (Barion / antique cushion) and mirrored variant. | cushion: side curve index offset; angle: base angle; truncation: corner bevel. |
Triangle, Shield & Polygon (Pent*, Hex*, Hept*, Oct*) Families
| Function Signature & Defaults | Shape Description | Key Parameters |
|---|---|---|
TriTr(truncation=0.25, angle=42) / TriTrMir(truncation=0.25, angle=42, offset=4) | Truncated 3-sided triangle (Trilliant) and mirrored variant. | truncation: corner bevel (0.15–0.45); angle: base angle; offset: mirror tooth offset. |
TriCurved(angle=45, c1=2, c2=4) | Curved-side 3-fold trilliant using index offsets c1 and c2. | angle: base angle; c1, c2: curve tooth offsets. |
TriCushTr(truncation=0.25, angle=42, cushion=1) / TriCushTrMir(..., offset=2) | Cushioned truncated triangle (FVS-90 style) and mirrored variant. | truncation: corner bevel; angle: base angle; cushion: side curve index offset. |
Shield(angle=45) | Mirrored 3-fold shield outline (gear divisible by 6). | angle: base CAM angle. |
Pentagon(angle=43), Hexagon(angle=43), Heptagon(angle=43), Octagon(angle=43) | Regular 5-, 6-, 7-, and 8-sided polygons (plus *Tr, *TrMir, *Curved, *CushTr, and *CushTrMir variants for each polygon family!). | angle: base CAM angle; truncation, offset, c1, c2 for truncated/curved/cushioned variants. |
Next, learn how to transcribe any printed book or magazine diagram into ProFacet in seconds using Chapter 5: Decoding Classic Diagrams — The Symmetry Assistant.
Chapter 5: Decoding Classic Diagrams — The Symmetry Assistant
Open any classic gem-cutting book, guild newsletter, or magazine diagram and you will see cutting tables where each tier lists a long string of ascending index numbers:
96-12-24-36-48-60-72-8402-10-14-22-26-34-38-46-50-58-62-70-74-82-86-9404-08-16-20-28-32-40-44-52-56-64-68-76-80-88-92
When you are transcribing that printed sheet into ProFacet’s Interactive Slicer (or writing an FSL script), how do you convert 04-08-16-20... into the three drum dials (IDX, SYM, and MIR) without pausing to do mental math?
ProFacet’s Symmetry Assistant solves this for you instantaneously.
1. Using the Symmetry Assistant (? Button)
- In the top-left corner of the Slicer's Precision Dial Deck, click the
?button directly beneathDial. - The Symmetry Assistant (
ADVANCED TOOLS · REVERSE SOLVER) dialog opens for your active gear:
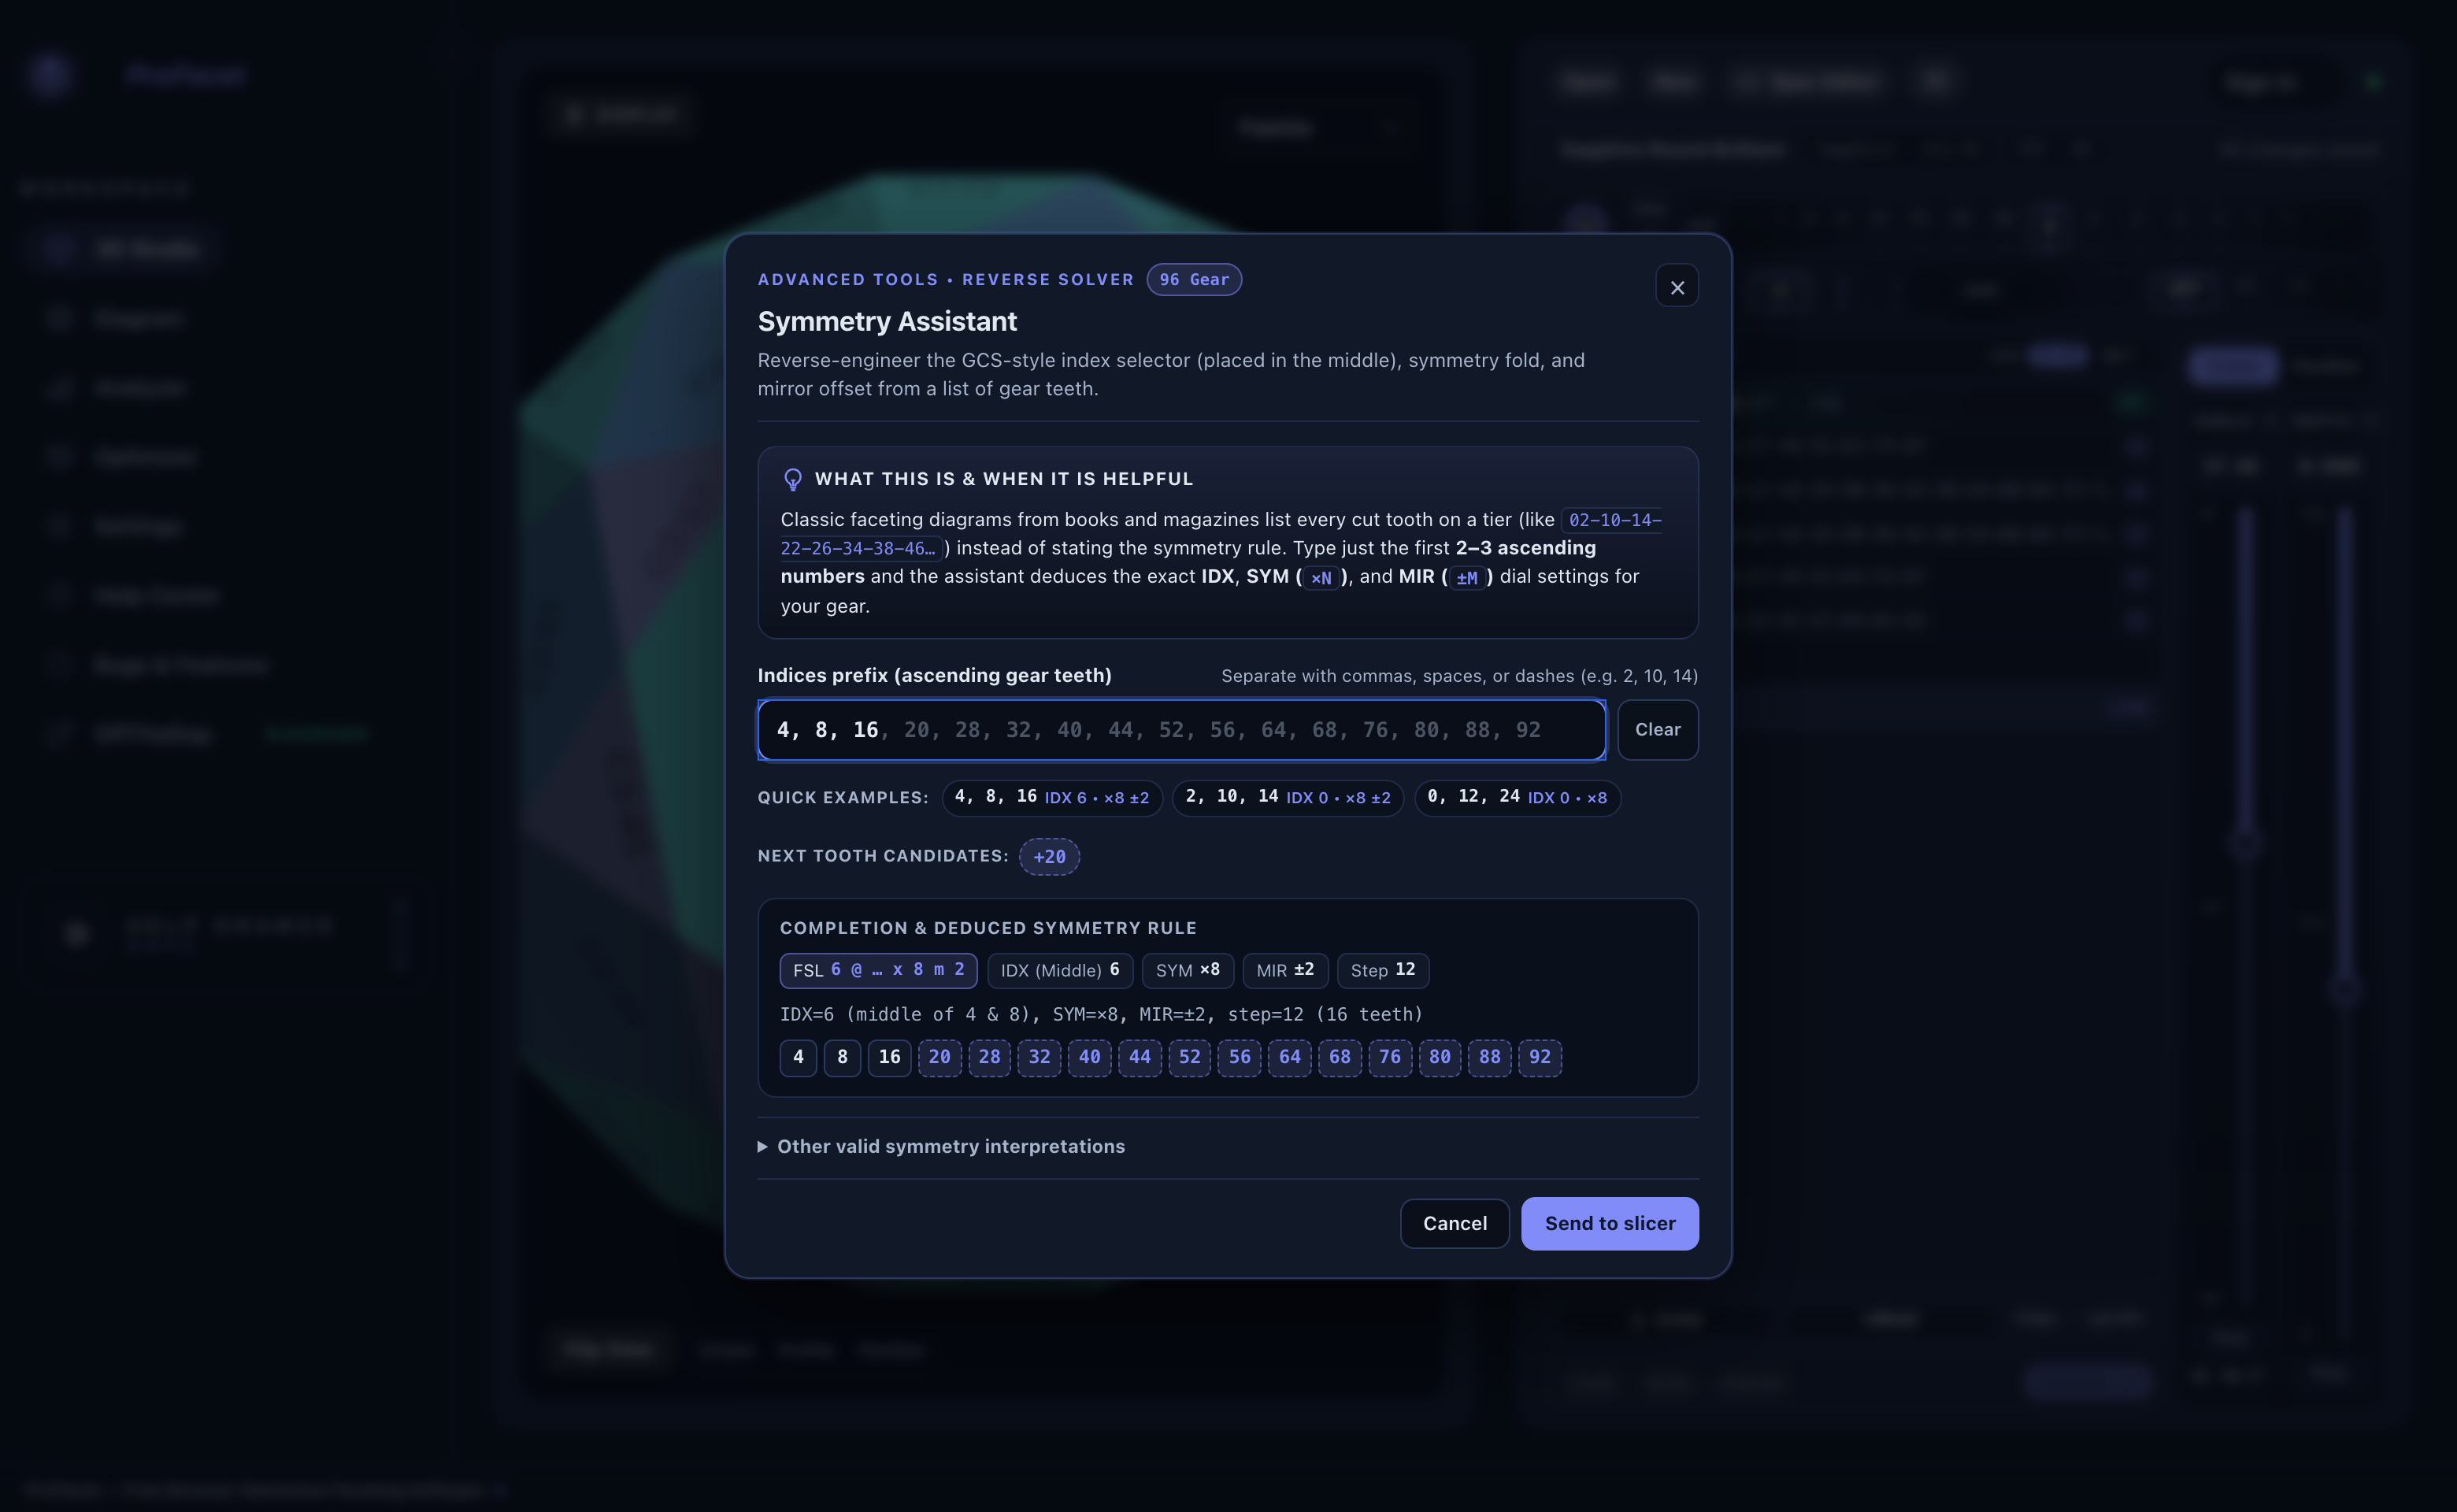
- Type just the first 2 or 3 ascending tooth numbers from your printed diagram into the
Indices prefixinput (for example,4, 8, 16or02-10-14-22), or click one of the Quick Examples pills. - As you type, the Symmetry Assistant:
- Completes the entire 360° tooth loop in ghost text and individual tooth chips (
4, 8, 16, 20, 28, 32, 40, 44, 52, 56, 64, 68, 76, 80, 88, 92) so you can verify that it matches your printed diagram. - Displays the exact FSL rule (
FSL 6 @ ... x 8 m 2) and dial settings (IDX (Middle) 6,SYM ×8,MIR ±2,Step 12). - Offers Next Tooth Candidates if only 1 or 2 teeth have been entered.
- Completes the entire 360° tooth loop in ghost text and individual tooth chips (
- Click
Send to slicer—ProFacet sets yourIDX,SYM, andMIRdrums to that exact symmetry rule immediately!
2. The Simple Logic Behind IDX, SYM, and MIR
Why did 4, 8, 16, 20, 28, 32... translate to IDX = 6, SYM = ×8, MIR = ±2?
- Look at the first pair of teeth (
4and8):- The symmetry axis sits right in the middle of the pair:
IDX = (4 + 8) / 2 = 6. - The distance from the middle (
6) out to4and8isMIR = ±2(6 - 2 = 4and6 + 2 = 8).
- The symmetry axis sits right in the middle of the pair:
- Look at the next pair (
16and20):- Its middle is
(16 + 20) / 2 = 18. - The step from the first pair's middle (
6) to the second pair's middle (18) is18 - 6 = 12teeth. - On a
96gear, stepping by12teeth repeats96 / 12 = 8times around the circle:SYM = ×8.
- Its middle is
[!TIP] Mirror Delta (
xN m M) vs. Zero-Axis Mirror Shorthand (xxN) in FSL InIDX @ angle : ... xN m M,IDXis the mirror axis (center) and the numberMaftermis the±delta index (IDX - MandIDX + M). By contrast, in the classic shorthandM @ angle : ... xxN,Mis the actual cut tooth, mirrored across index0(0 ± M).
- That means
0 @ 43.0 : gp() x8 m 3(mirror axis0with±3delta, cutting03-09-15-21...) is 100% equivalent to3 @ 43.0 : gp() xx8!- Be careful:
3 @ 43.0 : gp() x8 m 3places the mirror axis at3with a±3delta (3 - 3 = 0and3 + 3 = 6), which cuts00-06-12-18...instead!
3. Quick Lookup Table: Common 96-Gear Printed Sequences
Printed Tooth Sequence (96 Gear) | Facet Count | IDX (Axis) | SYM | MIR (Delta) | FSL Syntax (xN m M / xxN) |
|---|---|---|---|---|---|
96-12-24-36-48-60-72-84 | 8 | 0 | ×8 | OFF | 0 @ angle : ... x8 |
06-18-30-42-54-66-78-90 | 8 | 6 | ×8 | OFF | 6 @ angle : ... x8 |
03-09-15-21-27-33-39-45-51-57-63-69-75-81-87-93 | 16 | 0 (or 6) | ×8 | ±3 | 0 @ angle : ... x8 m 3 (or 3 @ angle : ... xx8) |
02-10-14-22-26-34-38-46-50-58-62-70-74-82-86-94 | 16 | 0 (or 6) | ×8 | ±2 (or ±4) | 0 @ angle : ... x8 m 2 (or 2 @ angle : ... xx8) |
04-08-16-20-28-32-40-44-52-56-64-68-76-80-88-92 | 16 | 6 (or 0) | ×8 | ±2 (or ±4) | 6 @ angle : ... x8 m 2 (or 4 @ angle : ... xx8) |
96-16-32-48-64-80 | 6 | 0 | ×6 | OFF | 0 @ angle : ... x6 |
08-24-40-56-72-88 | 6 | 8 | ×6 | OFF | 8 @ angle : ... x6 |
04-12-20-28-36-44-52-60-68-76-84-92 | 12 | 0 (or 8) | ×6 | ±4 | 0 @ angle : ... x6 m 4 (or 4 @ angle : ... xx6) |
96-24-48-72 | 4 | 0 | ×4 | OFF | 0 @ angle : ... x4 |
12-36-60-84 | 4 | 12 | ×4 | OFF | 12 @ angle : ... x4 |
Next, let’s learn how to inspect your stone’s optical performance in real time using Chapter 6: Seeing Light — The 8 Viewport Shading Modes & Overlays.
Chapter 6: Seeing Light — The 8 Viewport Shading Modes & Overlays
A traditional CAD program only shows you the wireframe outline of a gemstone. ProFacet goes much further: its 3D Viewport integrates 8 real-time optical and geometric shading modes so you can switch at any moment between structural meetpoint inspection, photorealistic spectral rendering, and laboratory-grade angular light return maps.
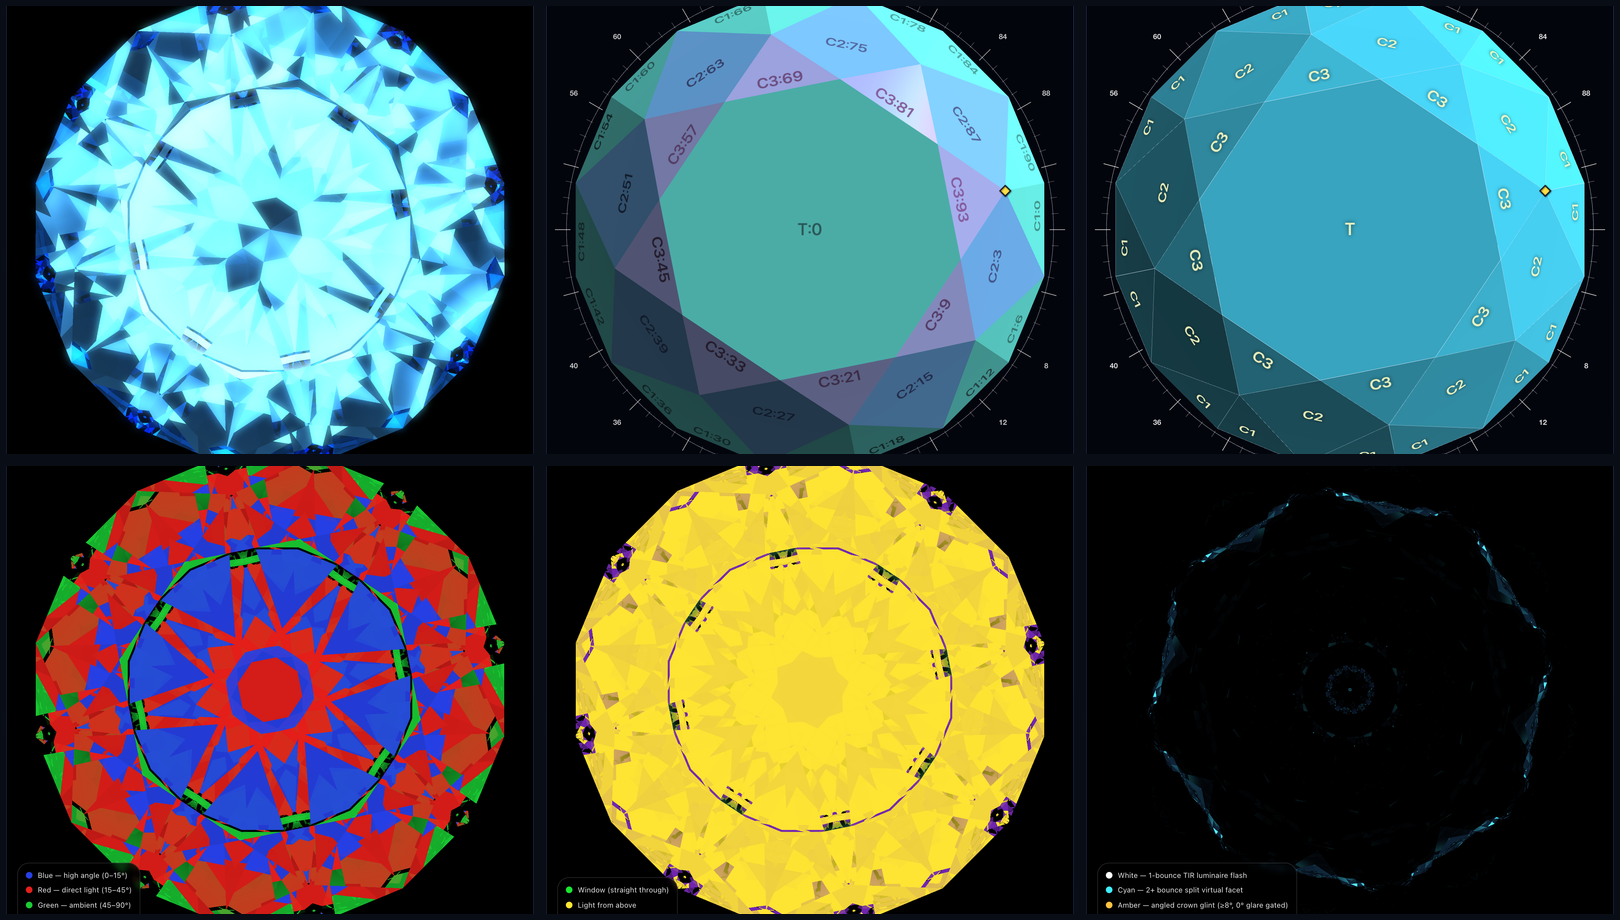
(Shown above, top row left to right: Raytraced, Palette + Facet Info, Mono + Wireframe. Bottom row left to right: ASET Angular Map, Window Leakage Map, Scintillation Flash Map.)
1. Geometric & Slicing Modes (Palette and Mono)
When you are cutting or editing facets in the Interactive Slicer, always use Palette or Mono:
Palette(Tier Color Palette): Assigns a distinct color to each tier (P1,P2,C1,C2,C3,T) while shading facets by surface angle. Makes it effortless to verify that all facets in a tier have equal size and clean meetpoints.Mono(Uniform Monochrome): Renders the entire stone in a clean metallic-slate finish. PairMonowith the Wireframe and Facet Info overlays for classic blueprint-style inspection.
[!NOTE] Why Doesn't the Slicer Disc Appear in
RaytracedMode? Physical raytracing traces multi-bounce internal light paths through a closed dielectric volume. To show the translucent Slicer cutting plane, vertex snap rings, and clickable golden meetpoint diamonds (♦), switch the view dropdown toPaletteorMono.
2. Photorealistic Optical Renderers (Raytraced and BDPT)
Raytraced(Real-Time Spectral Whitted Raytracer):- Runs interactively at 60 FPS as you orbit the stone.
- Simulates Snell's law refraction, Total Internal Reflection (TIR), Fresnel polarization reflectance, Cauchy spectral dispersion (splitting white light into rainbow fire), Beer-Lambert body color absorption (
colorandabsorption), and optional Bloom Glow.
BDPT(Bidirectional Path Tracer):- Connects light paths simultaneously from the luminaire environment and from the camera eye to resolve subtle multi-bounce caustics, internal facet reflections, and studio lighting realism.
- Hold the camera still for a few seconds in
BDPTmode to watch the progressive sample accumulator converge to a noise-free photograph.
3. Diagnostic Optical Maps (ASET, Window, Fire, Scintillation)
How do professional gemologists and optical designers diagnose why one cut looks lively and brilliant while another looks dark or glassy? They use four specialized false-color diagnostic maps. When you select any of these modes, ProFacet automatically displays a live color legend in the bottom-left corner of the viewport:
A. ASET (Angular Spectrum Evaluation Tool)
Maps every pixel on the crown to the hemisphere elevation angle of the light ray that exited toward your eye:
| ASET Color | Source Angle Zone | Optical Meaning & What to Look For |
|---|---|---|
| 🔴 Red | 15° – 45° (Direct High-Angle Light) | Primary Brilliance. Rays entering from overhead room lighting that reflect cleanly back to your eye. Aim for rich, symmetrical Red coverage across the table and crown. |
| 🔵 Blue | 0° – 15° (Viewer Obscuration) | Structured Contrast. Steep rays blocked by the viewer's own head and camera lens. Balanced Blue zones (such as crisp dark arrows in a Round Brilliant) create the high-contrast checkerboard pattern that makes neighboring Red facets "pop"! |
| 🟢 Green | 45° – 90° (Low-Angle Horizon Light) | Secondary Ambient Return. Grazing light entering from near the horizon. |
| ⚫ Black | Back Hemisphere / Dead Zone | Light Leakage (Windowing). Rays that leaked straight out the bottom of the pavilion instead of reflecting upward. Aim to eliminate Black in the center of the stone! |
B. Window (Light Leakage Isolation Map)
Dedicated specifically to hunting down pavilion light leakage as you tilt and orbit the stone:
- 🟢 Bright Green (
Window — straight through): Marks exact regions where your line of sight passes straight through the bottom of the pavilion! If you see Green under the table at0°tilt, your Pavilion main angles are below the material's critical angle (θc). - 🟡 Yellow (
Light from above): Healthy internal reflection returning light from the upper hemisphere. - 🟣 Purple (
Light from below): Secondary rays entering through the pavilion from behind yet exiting the crown at oblique angles.
C. Fire (Chromatic Dispersion Map)
Visualizes angular separation between red (650 nm) and violet (400 nm) wavelengths exiting the crown facets. High-intensity rainbow bands show which crown facets act as strong prisms when the stone rocks under point-source lighting.
D. Scintillation (Virtual Facet & Dynamic Flash Map)
Classifies every virtual facet by its internal bounce count and flash mechanism:
- ⚪ White (
1-bounce TIR luminaire flash): Bold, high-intensity primary flashes. - 🩵 Cyan (
2+ bounce split virtual facet): Finely divided multi-bounce virtual facets that produce rapid pinpoint sparkle during tiny hand movements. - 🟠 Amber (
Angled crown glint ≥ 8°): Surface reflections off angled crown facets (with0°flat table glare automatically gated out). - ⚫ Cobalt / Black (
Collector contrast / window): Dark contrast framing that separates bright flashes.
4. Display Overlays (⌄ Top-Left Menu) & Camera Presets
Click the ⌄ (Show display options) button in the top-left corner of the 3D viewport to toggle seven inspection overlays:
Facet Info: DrawsTier:Indexlabels (e.g.P1:0,C2:72) on every 3D facet.Wireframe: Overlays crisp geometric edge lines on any shading mode.Bottom Light: Toggles rear pavilion illumination in raytraced views.Antialiasing: Enables supersampled edge smoothing inRaytracedmode.Bloom Glow: Adds a soft optical starburst glow around intense highlights inRaytracedmode.Explosion: Radially separates all facets outward from the center of the stone so you can inspect tier structure visually.Orthographic View: Switches between realistic 3D perspective camera and distortion-free orthographic CAD projection.
At the bottom-left of the viewport, use Flip View and the Crown | Profile | Pavilion preset buttons to snap the camera to exact orthographic inspection angles with a single click.
Next, see how ProFacet quantifies all of these optical properties across 19 tilt angles—and optimizes your stone's angles automatically on the GPU—in Chapter 7: Optical Analysis & Automated GPU Optimization.
Chapter 7: Optical Analysis & Automated GPU Optimization
In Chapter 6, you saw how to inspect a stone visually at a single camera angle. In the real world, however, a gemstone is never static: as the wearer moves their hand, the stone rocks continuously through a -45° to +45° viewing arc. A cut that looks bright at 0° can suddenly open a massive window at 15° tilt!
ProFacet’s Optical Analyzer and GPU Performance Optimizer use WebGPU compute and instanced rendering shaders to evaluate your design across all 19 tilt angles simultaneously—and automatically search hundreds of angle combinations to find the highest-performing cut.
Part A: The WebGPU Optical Performance Analyzer
Click Analyzer in the left navigation rail (WORKSPACE) to run a full 19-angle optical sweep (-45° to +45° in 5° steps):
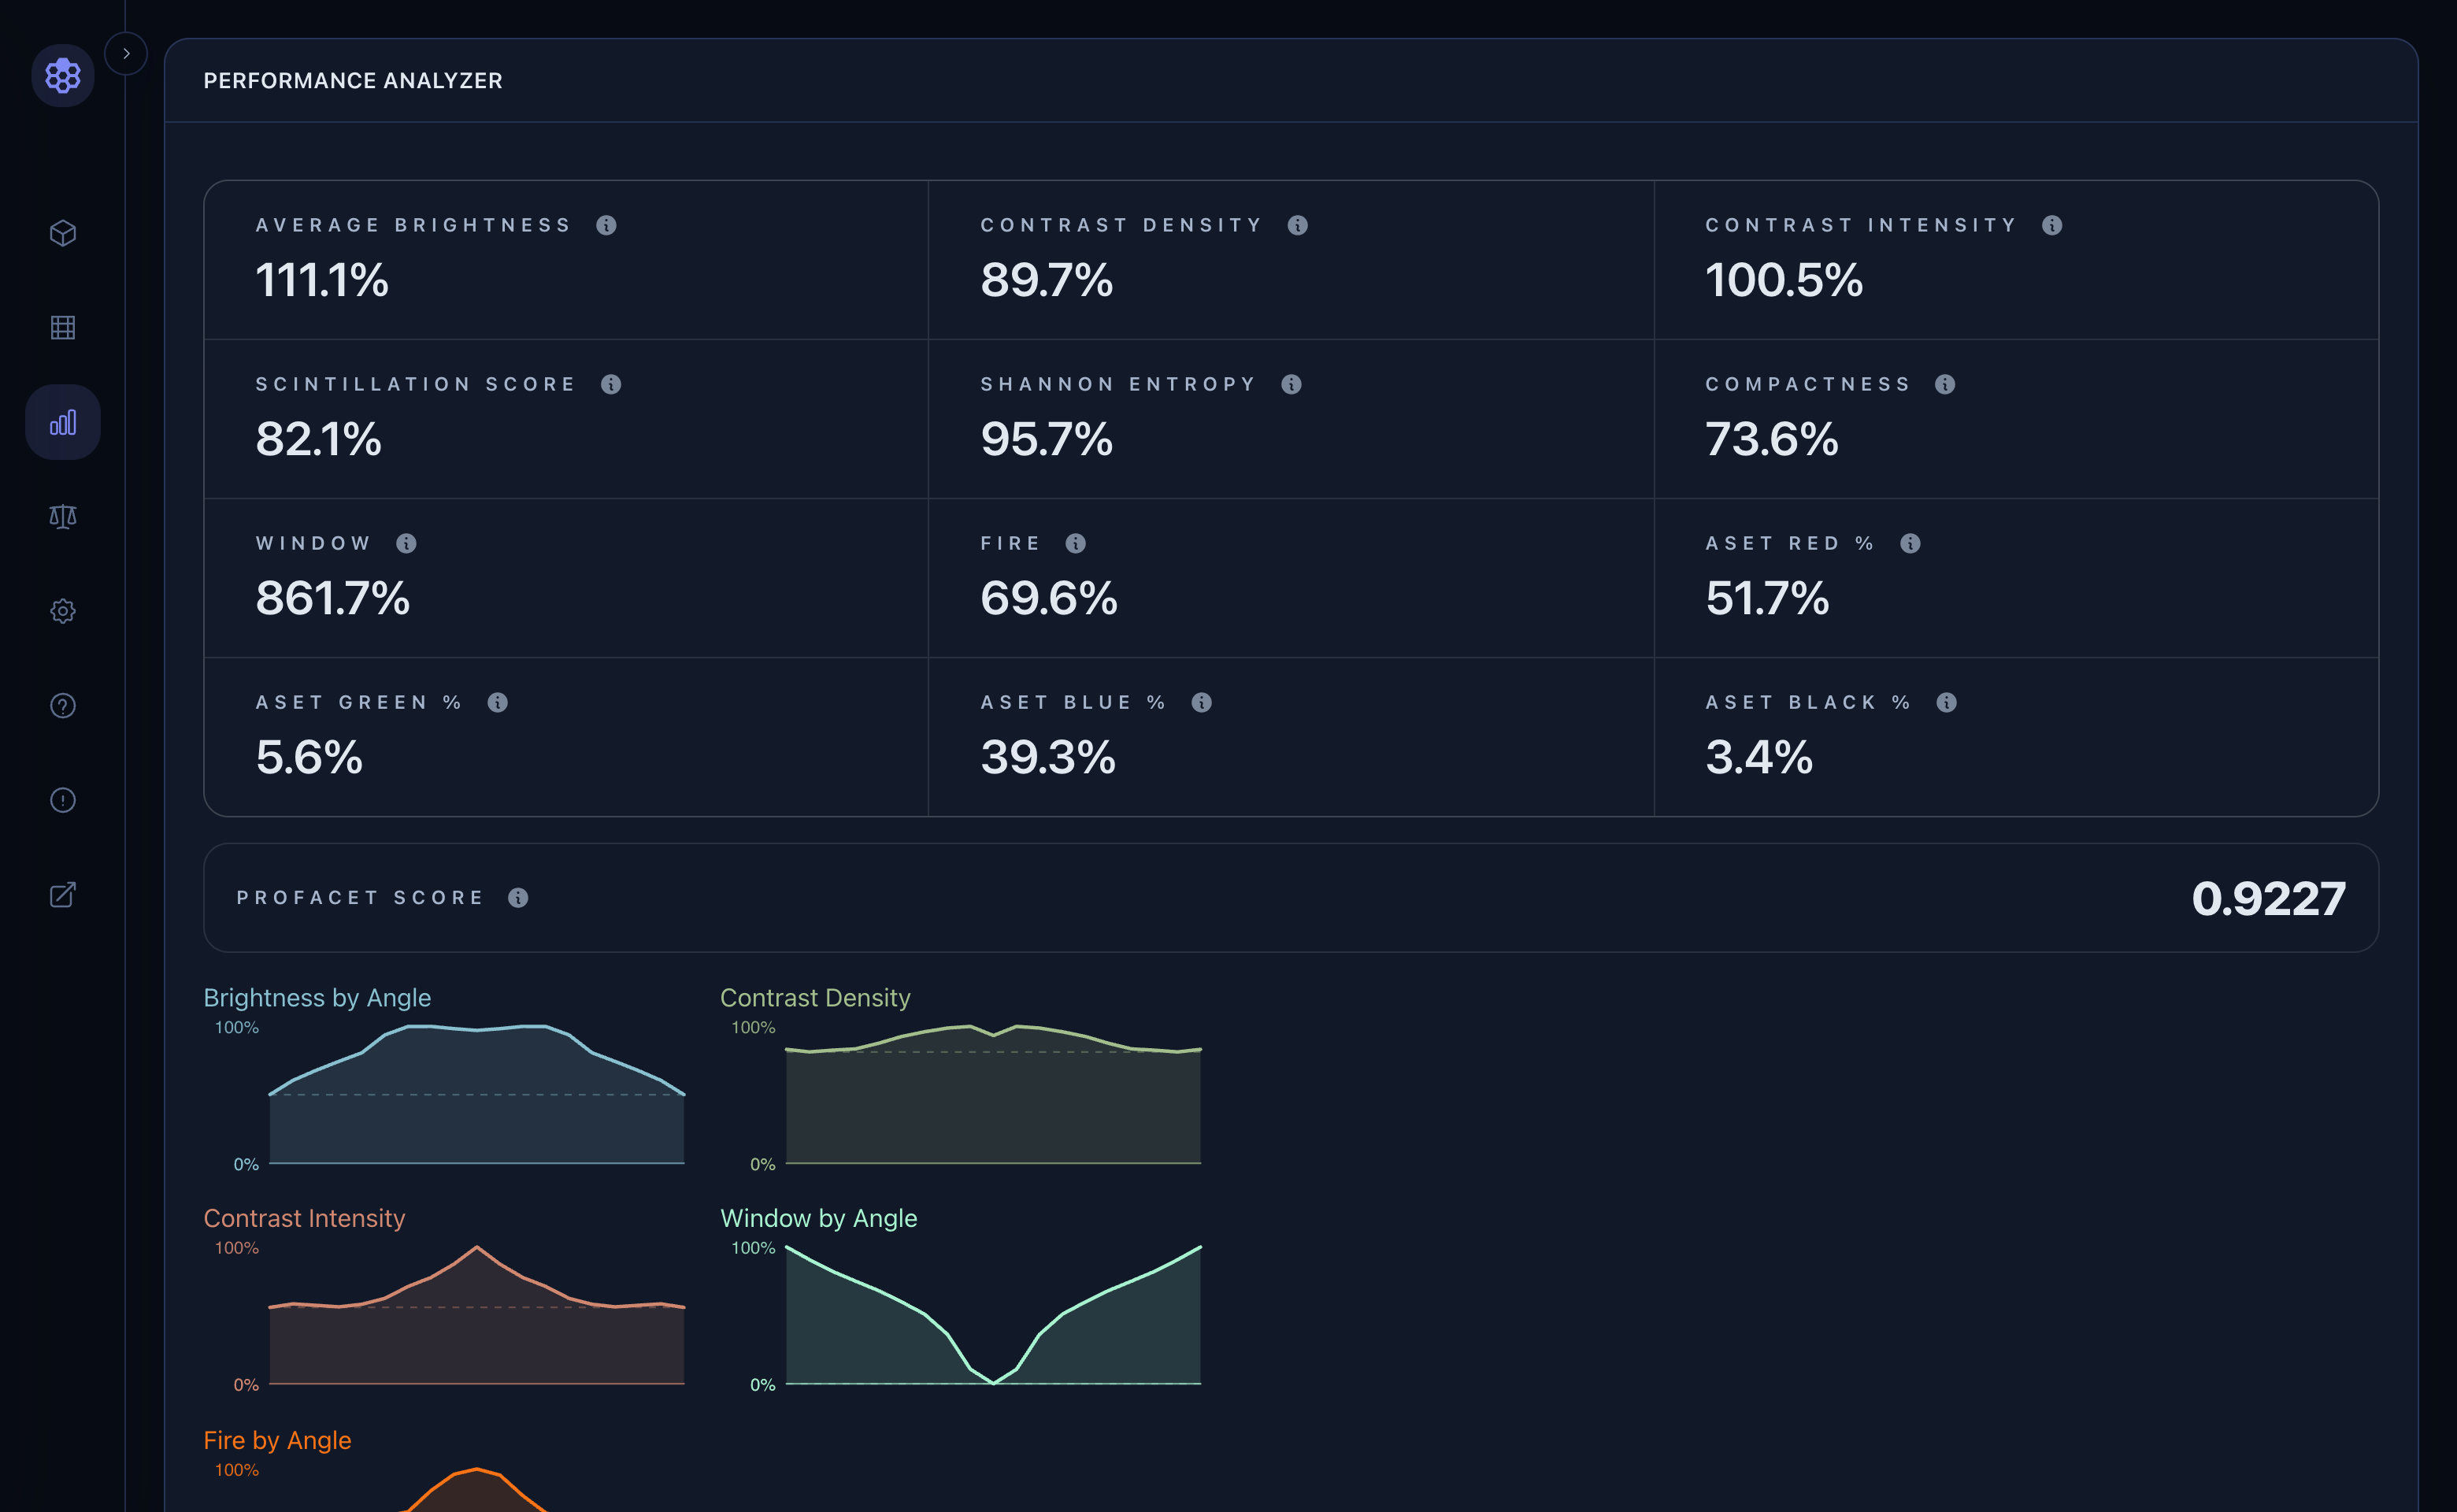
[!TIP] Process Your Design First (
Cmd/Ctrl + Enter) If you edited your script in the Spec Editor, pressCmd/Ctrl + Enter(or clickProcess 🚀) before switching toAnalyzerso the GPU analyzes your latest geometry.
1. How to Read the 12 Optical Metrics
All percentage metrics are calibrated against a Standard Round Brilliant (SRB) Quartz (RI = 1.54) reference stone (100% = SRB Quartz baseline):
| Metric | What It Measures | Ideal Target |
|---|---|---|
| Average Brightness | Tilt-weighted mean light return across -45°..+45° (emphasizing 0°..20° face-up angles). | > 100% (higher = brighter overall return). |
| Contrast Density | Spatial frequency of bright-to-dark virtual facet boundaries across the crown. | 80% – 110%+ (finely divided virtual facets rather than large flat mirrors). |
| Contrast Intensity | Local luminance contrast between neighboring bright and dark virtual facets. | 85% – 105%+ (crisp, bold visual "pop"). |
| Scintillation Score | Dynamic virtual-facet flash rate as the stone tilts from -45° to +45°. | Higher is better (lively, dancing sparkle under motion). |
| Shannon Entropy | Information-theoretic uniformity of virtual facet brightness distribution. | 85% – 100%+ (prevents dead or washed-out sectors). |
| Compactness | How evenly light return extends out to the girdle perimeter and corners. | 95% – 120% (keeps elongated tips and corners bright). |
| Window | Tilt-weighted light leakage straight through the pavilion. | Lower is better (minimize see-through pavilion leakage). |
| Fire | Angular dispersion (spectral separation of red to violet rays exiting the crown). | Higher is better (stronger rainbow flashes). |
| ASET Red / Green / Blue / Black % | Face-up (0°) angular spectrum breakdown. | Aim for high Red (35%–55%) balanced with Blue (20%–45%) contrast, moderate Green (10%–25%), and near-zero Black (< 3%). |
2. The Composite ProFacet Score (0.0000 – 1.0000)
Right below the 12 metric cards sits the overall ProFacet Score, which combines brilliance, contrast, scintillation, fire, ASET balance, and window avoidance into a single objective rating:
Material & Refractive Index (RI) | Good Score | Excellent / Showcase Score |
|---|---|---|
Quartz / Amethyst (RI 1.54) | ≥ 0.76 | 0.80 – 0.86+ |
Beryl / Tourmaline (RI 1.58 – 1.62) | ≥ 0.78 | 0.82 – 0.88+ |
Spinel / Sapphire / Ruby (RI 1.72 – 1.76) | ≥ 0.80 | 0.85 – 0.92+ |
Cubic Zirconia (RI 2.15) | ≥ 0.86 | 0.90 – 0.94+ |
Diamond (RI 2.42) & Moissanite (RI 2.67) | ≥ 0.88 – 0.90 | 0.92 – 0.96+ |
3. The 8 Angle-Response Sparklines & 20-Tile Inspection Grid
- 8 Tilt Sparklines: Plot Brightness, Contrast Density, Contrast Intensity, Window, Fire, Scintillation, Entropy, and Compactness continuously across
-45°to+45°. Look for a wide, flat Brightness by Angle curve and a Window by Angle curve that stays flat near0%across the central±20°viewing zone. - 20-Tile Visual Grid: Shows the face-up ASET map alongside 19 raytraced tilt renders (
-45°to+45°). Click any tile to inspect it full-screen and step through tilt angles with your keyboard arrow keys!
Part B: The Multi-Variable GPU Performance Optimizer
Why guess whether your Pavilion Mains should be 41.2° or 41.8°, or whether your Crown Mains should be 34.0° or 35.2°? Click Optimizer in the left navigation rail (WORKSPACE) to let your GPU optimize all of your angles simultaneously:

Step 1: Mark Angles or CAM Parameters as Optimizable (±)
- In the Slicer: Click the
±button on any tier row in the Tiers table, on the verticalANGLE/DEPTHmasts, or next to any slider in the CAM Preform Studio to toggle an optimization range (±1.5°,±2.0°, etc.) on that parameter. - (In Part II, you will also see how to write optimization ranges directly in FSL with
+/-and in Lua withval().)
Step 2: Select a Weight Preset & Girdle Protection
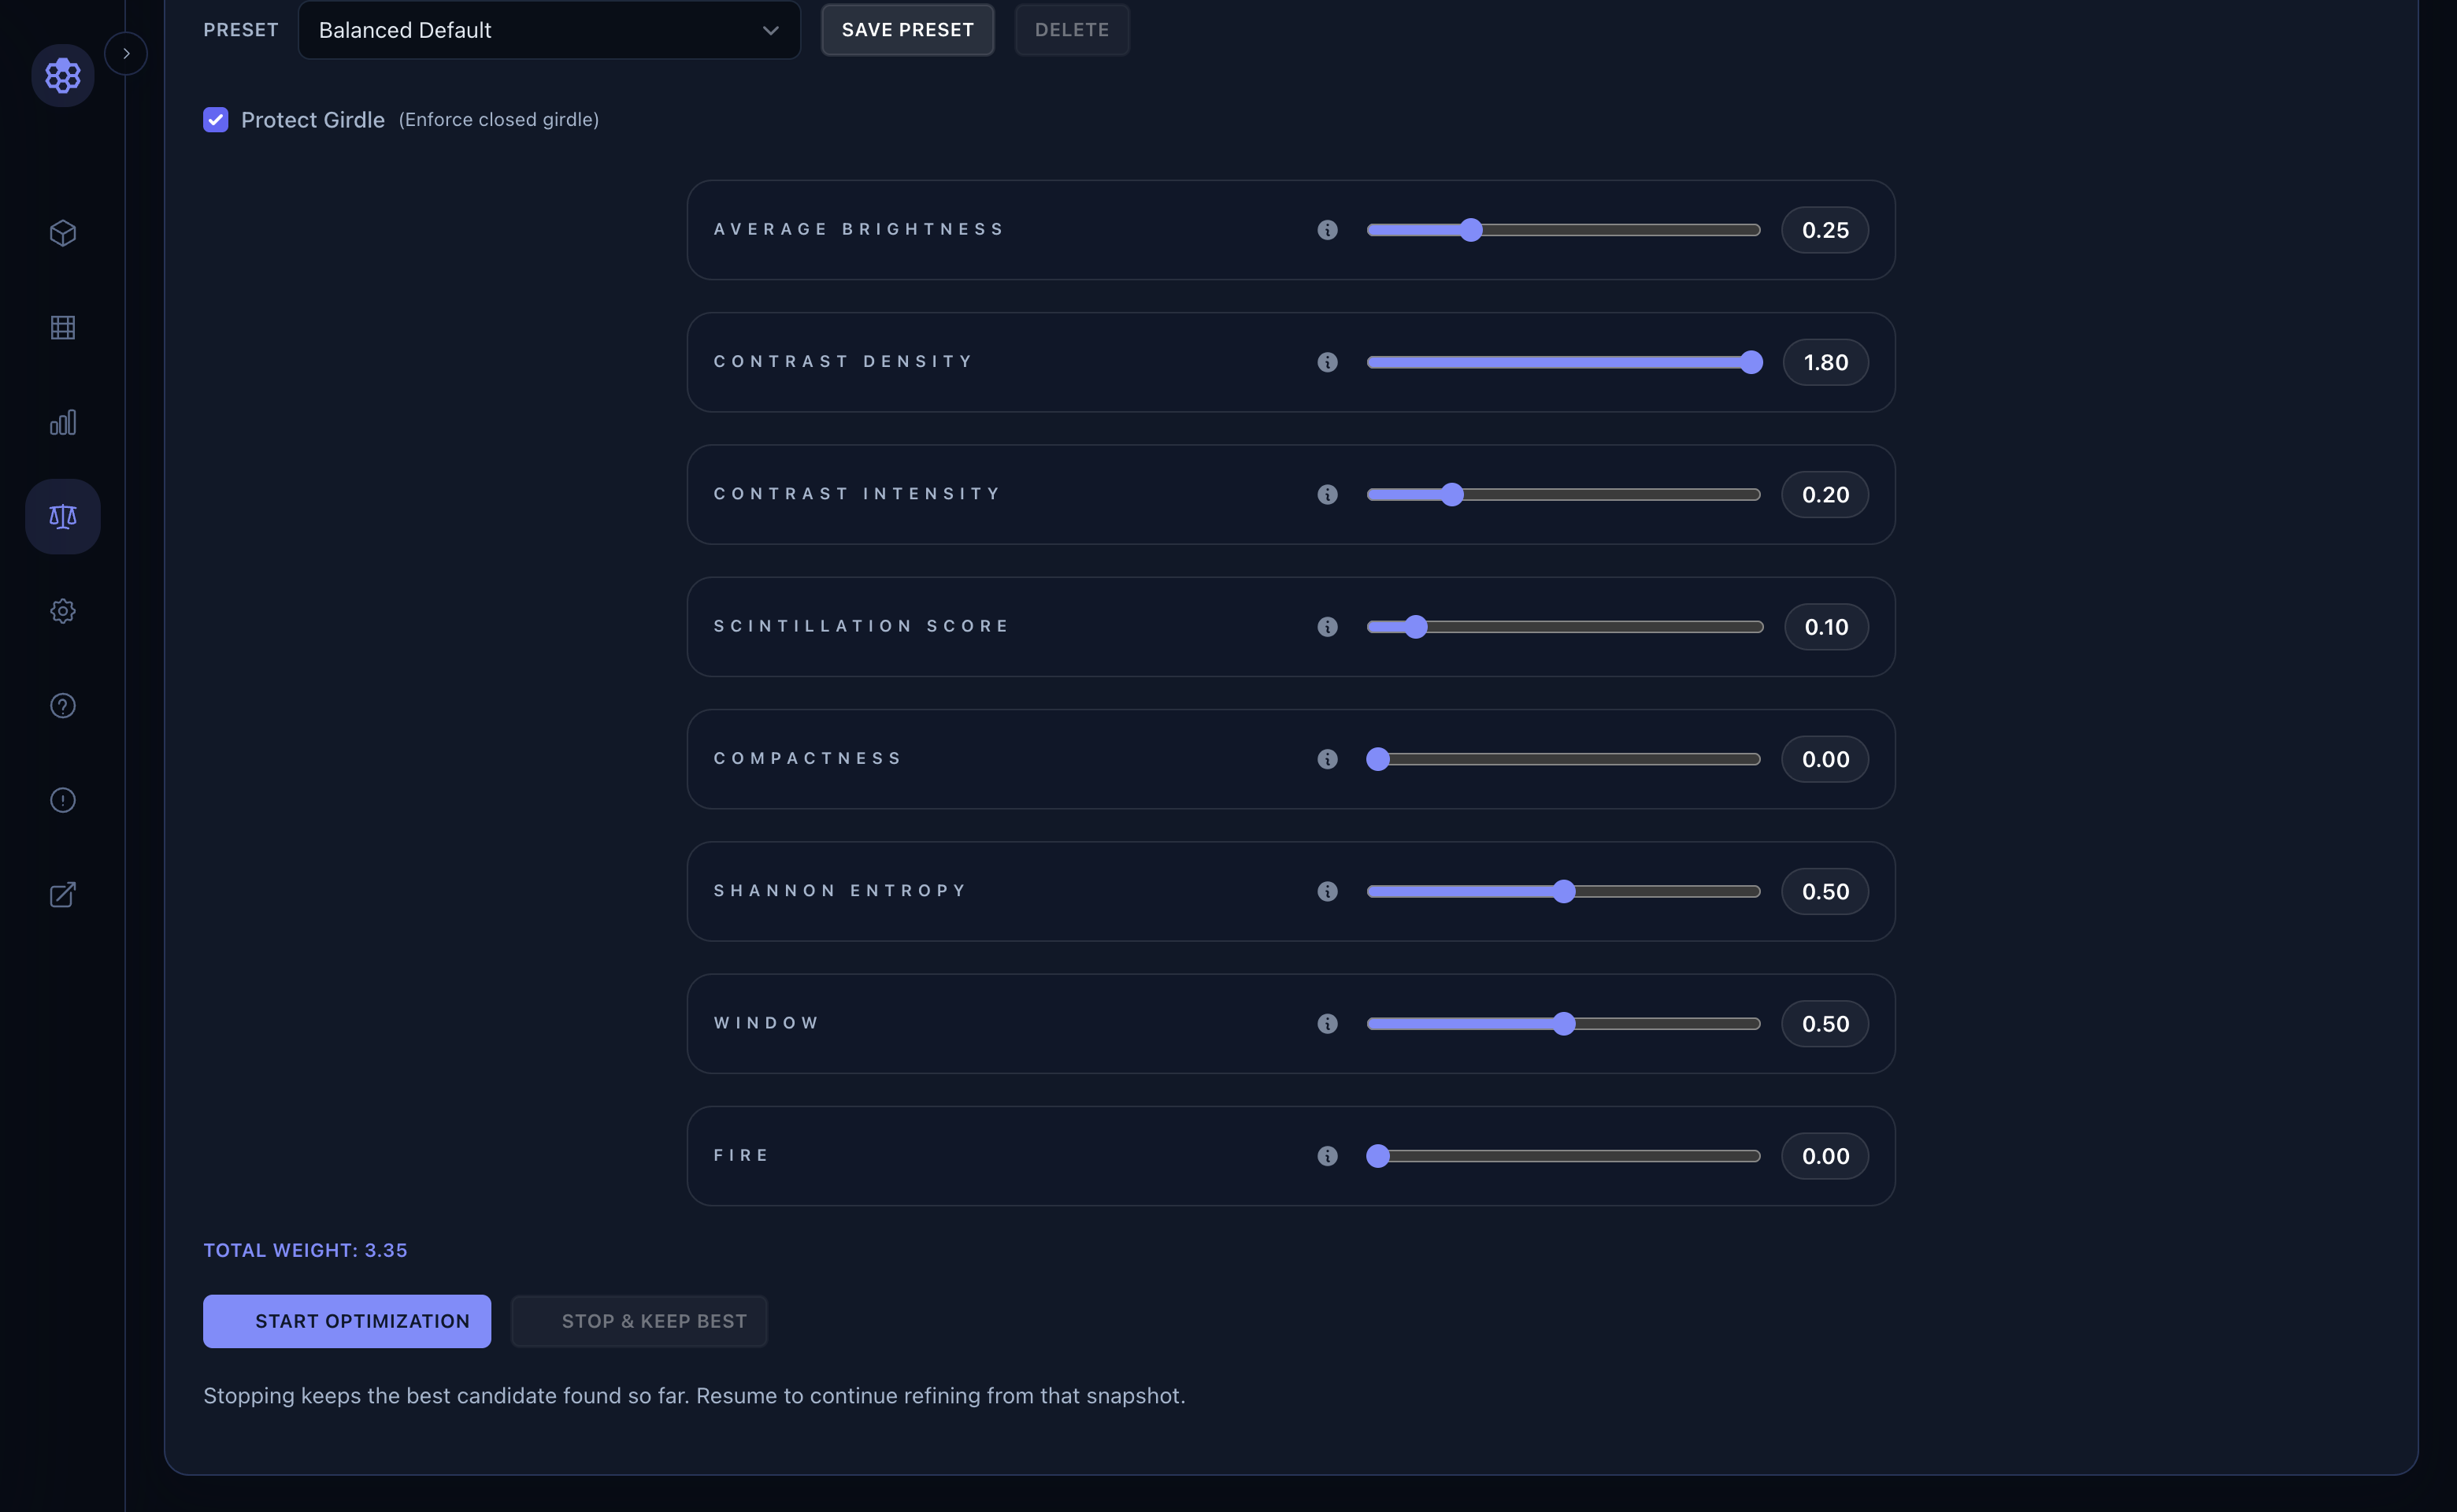
- Preset Selector: Pick
Balanced Default,Maximum Brilliance,High Fire & Dispersion,Zero Window (Low RI), or tune the individual metric sliders and clickSAVE PRESET. Protect Girdle (Enforce closed girdle): Check this box to forbid the optimizer from picking angle combinations where Crown and Pavilion facets cross each other and pinch the girdle open.- Custom Geometric Constraints (
assert): In Part II (Chapter 13 & Chapter 15), you will also see how addingassert(stone().tablePercentage > 50, "Table too small")in your script acts as a hard constraint that steers the GPU Optimizer away from undesirable proportions!
Step 3: Run, Compare & Apply In-Place
- Click
Start Optimization. ProFacet’s hybrid Nelder-Mead Simplex + Powell Direction-Set solver evaluates candidate geometries on the GPU and streams live improvements to the dashboard. - Switch to the 3D Studio and click the
Original | Optimizedcomparison toggle at the top of the viewport to A/B test the before-and-after stone inRaytraced,ASET, orWindowmode. - Click
Update Source In-Placeto write the winning angles directly into your script!
Next, let’s turn your optimized gemstone into a workshop-ready printed cutting sheet and explore file import, export, and Cloud Sync in Chapter 8: Printable Cutting Sheets, Import/Export & Cloud Workflow.
Chapter 8: Printable Cutting Sheets, Import/Export & Cloud Workflow
Once your gemstone design is sliced and optically tuned, ProFacet gives you everything you need to take it to the physical faceting bench, exchange files with legacy CAD software, manage a personal or cloud-synced library, and share cuts via self-contained URLs.
1. Generating Printable Cutting Instructions (Diagram View)
Click Diagram in the left navigation rail (WORKSPACE) to open the Printable Instructions generator:
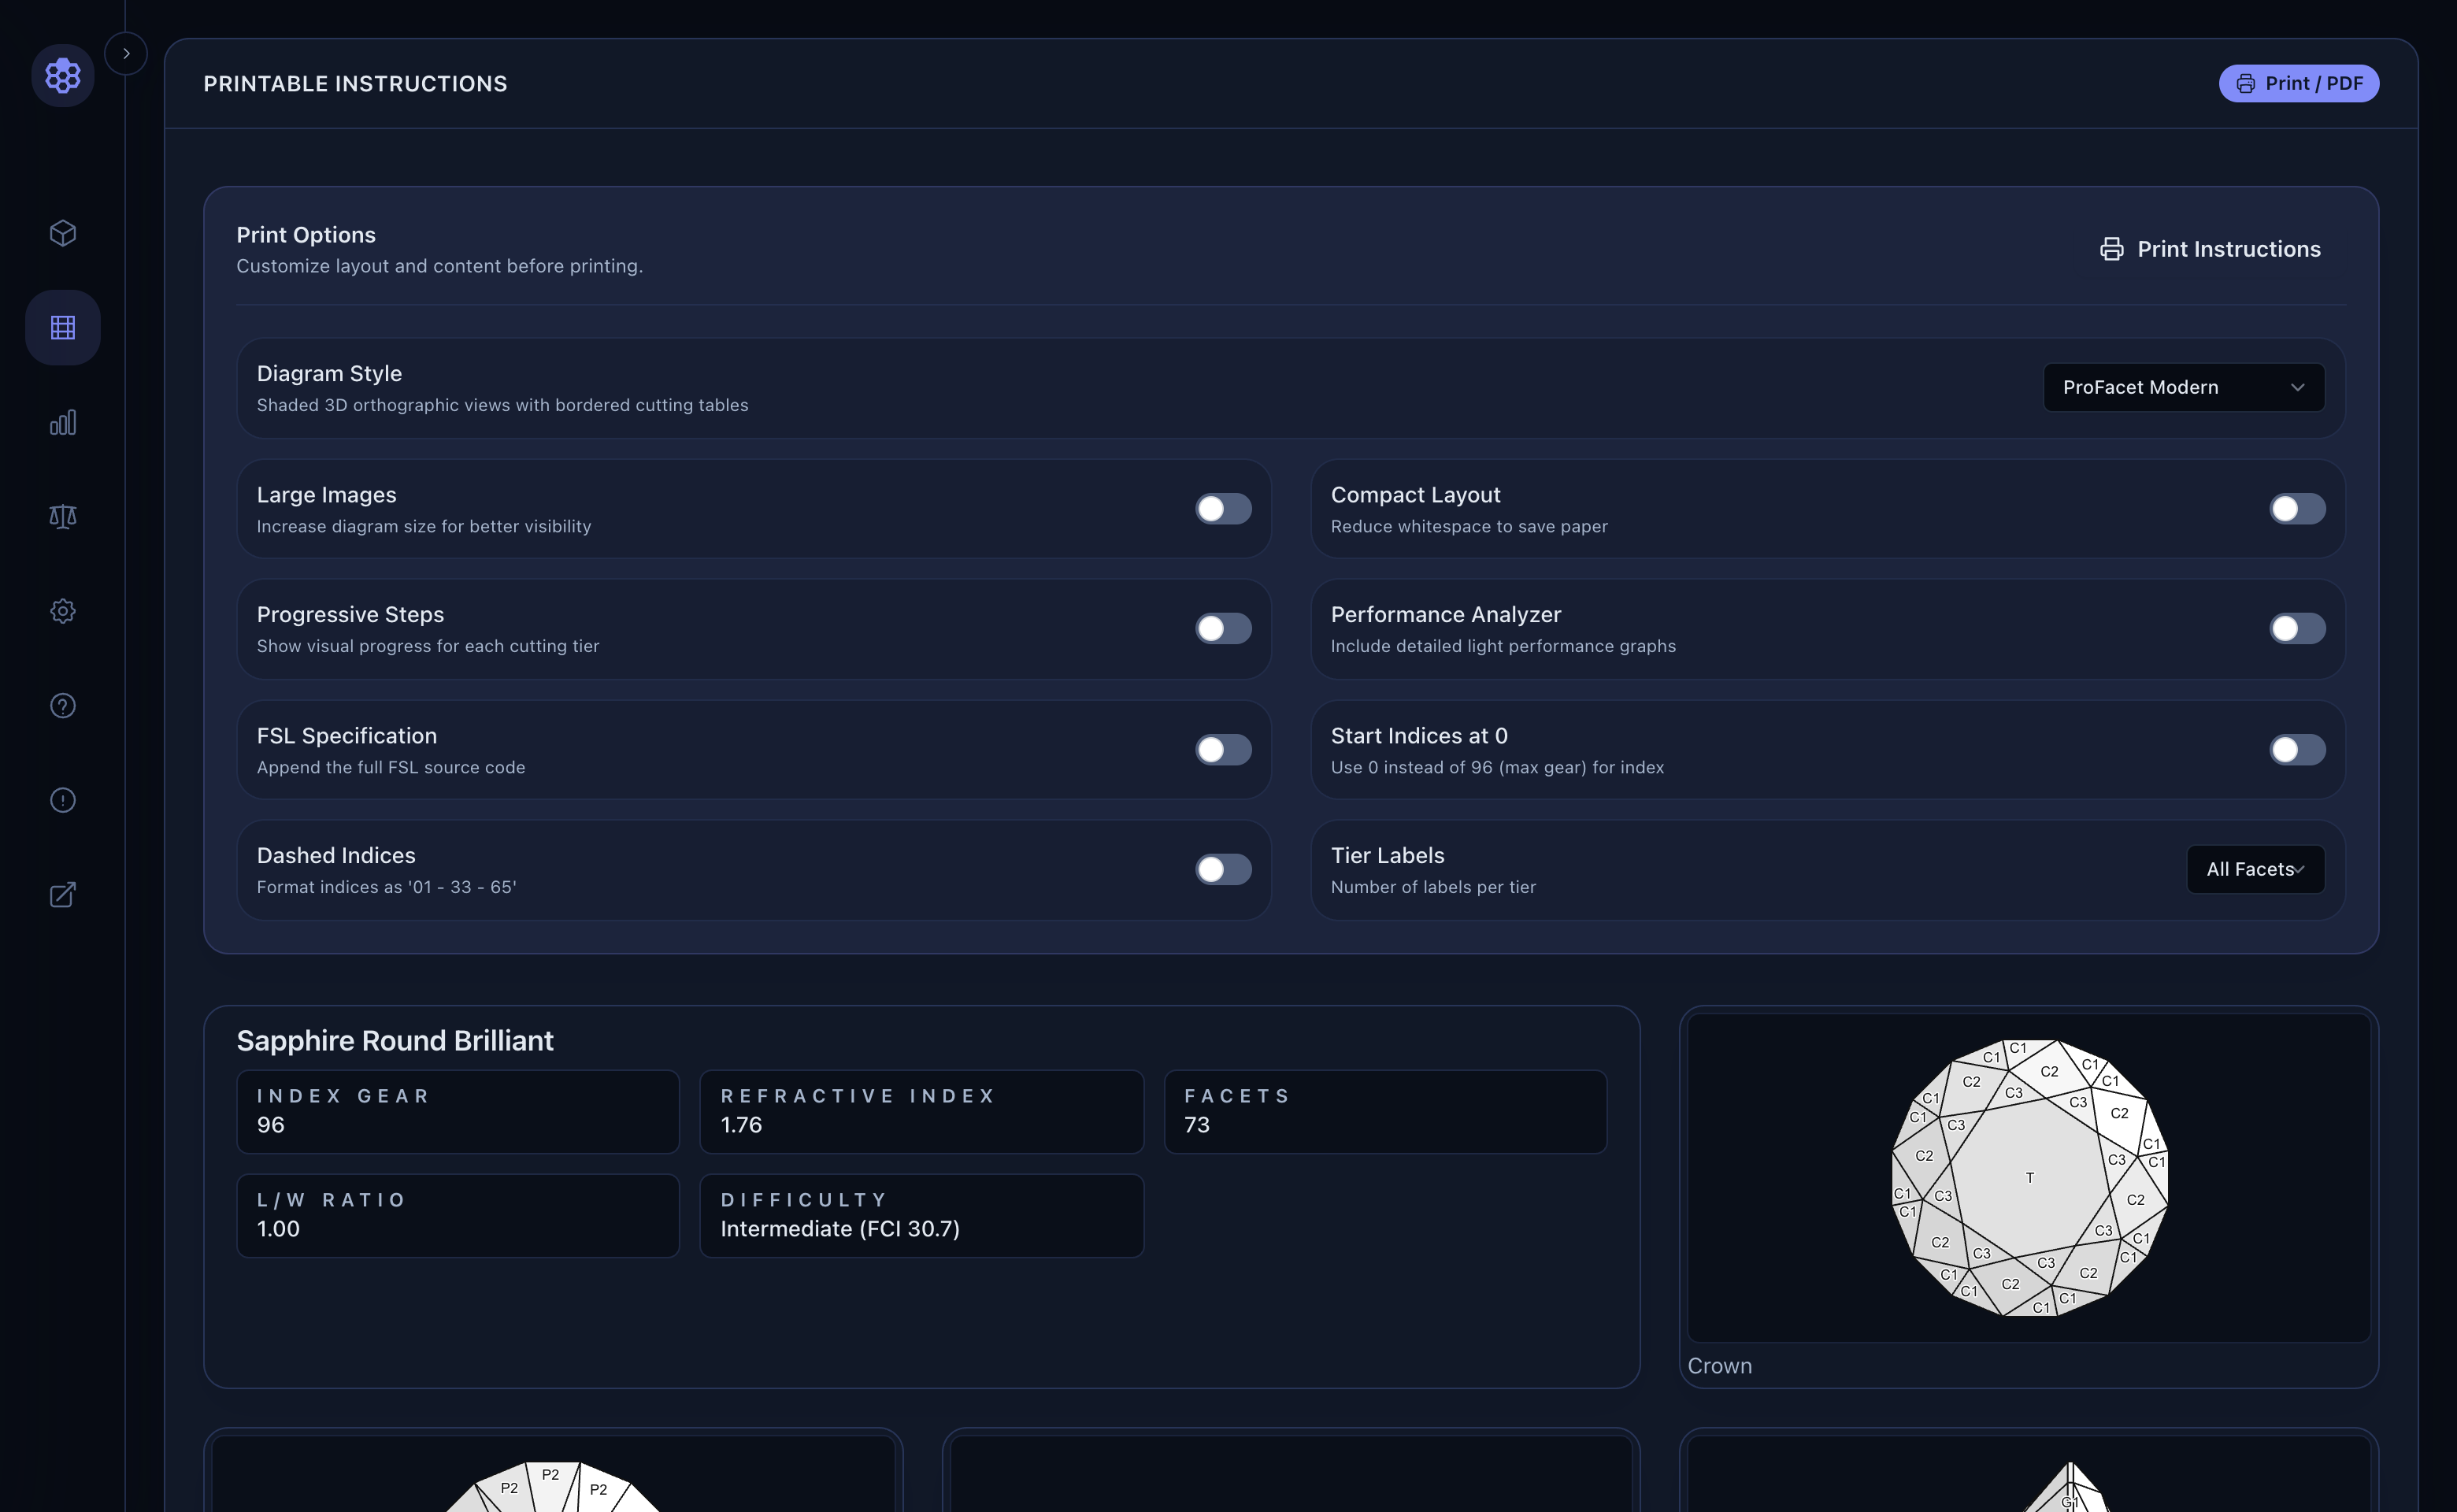
Customizing the Cutting Sheet (Print Options)
Before clicking 🖨 Print Instructions (which formats a clean, multi-panel cutting sheet for your printer or Save as PDF), configure the layout options to match how you like to cut at the bench:
Diagram Style: ChooseProFacet Modern(shaded orthographic Crown, Pavilion, and Profile diagrams with dark/light cards) or classic black-and-white line art for laser printers.Large Images&Compact Layout: Scale the orthographic diagrams larger for bench visibility, or tighten spacing to fit complex 15-tier stones onto a single page.Progressive Steps: Adds a step-by-step visual strip illustrating how the stone looks after each consecutive tier (P1 → P2 → C1 → C2…) is cut.Performance Analyzer&FSL Specification: Optionally append the optical tilt curves and raw.fslsource code to the bottom of your sheet.Start Indices at 0&Dashed Indices: Format index teeth starting from0or96(96 - 12 - 24 - 36).Tier Labels: Label All Facets, One Label per Tier, or No Labels on the orthographic drawings.
2. Importing & Exporting Industry File Formats (☰ Actions Menu)
Click the ☰ (Workspace Actions) button in the top-right toolbar of the 3D Studio to access file import, export, material switching, and random generation:
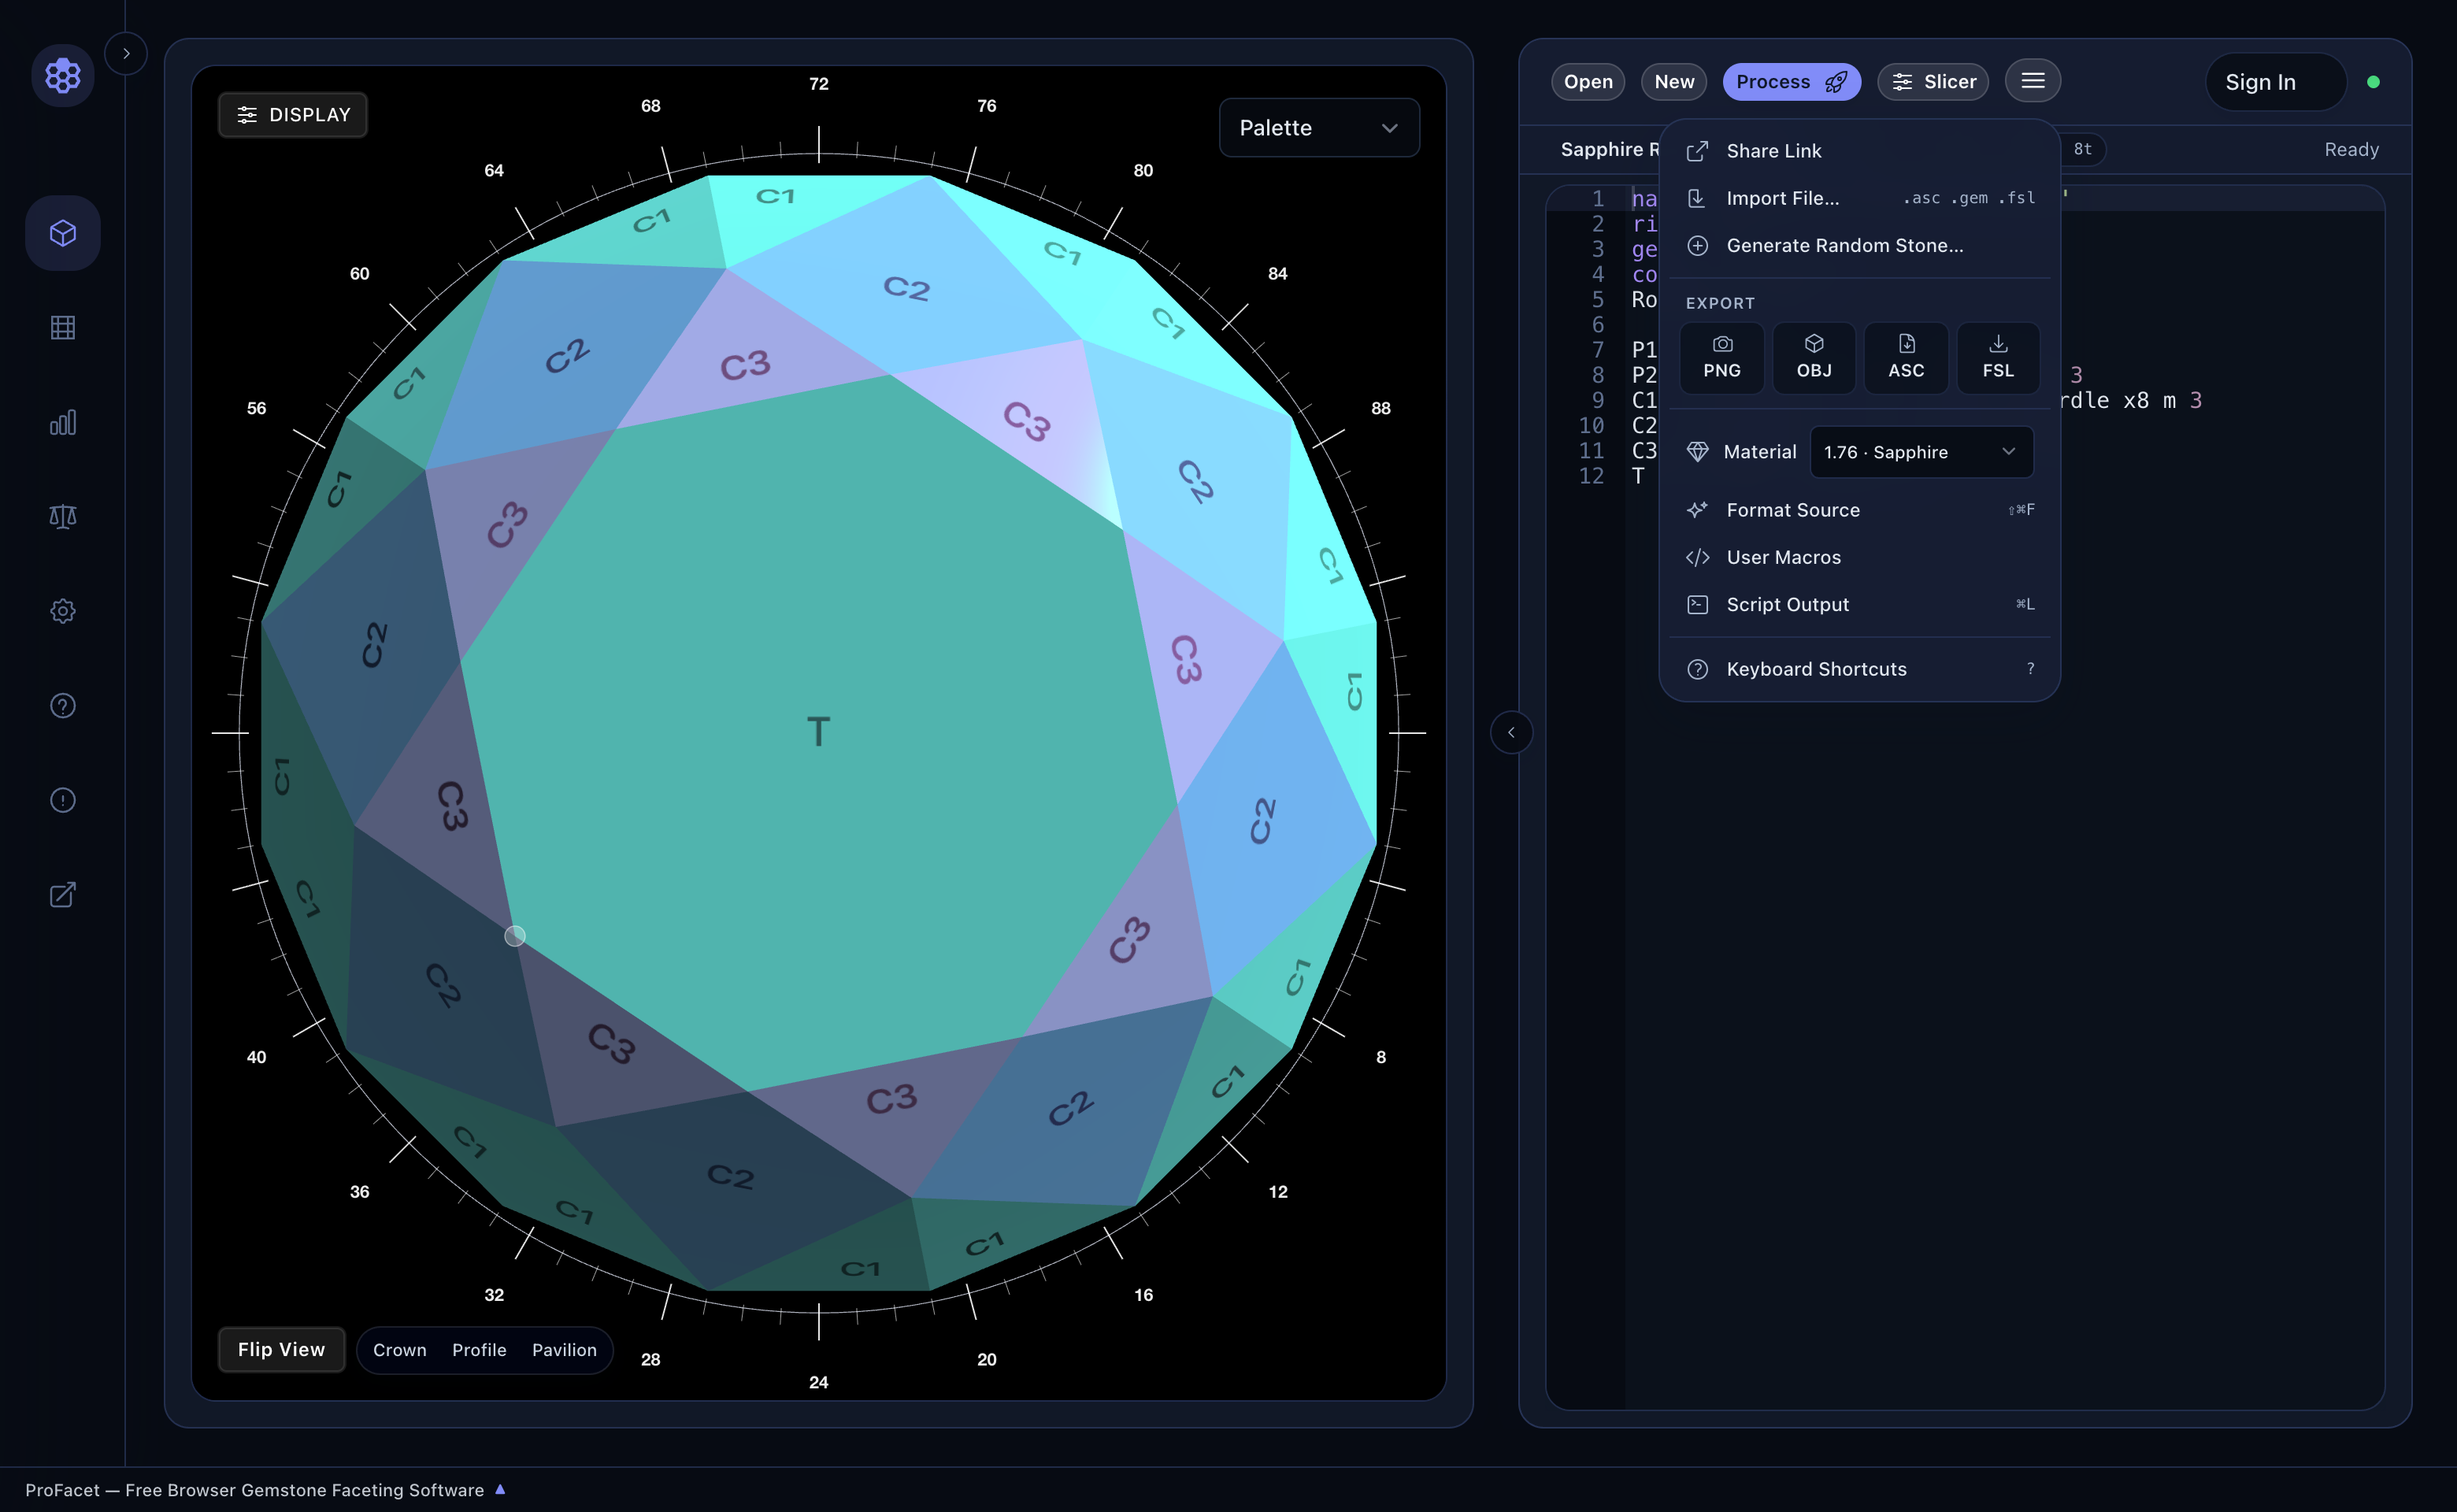
Importing .asc, .gem, .gcs, and .fsl Files
- Drag and Drop: Drag any GemCAD (
.asc), GemRay (.gem), Gem Cut Studio (.gcs), or ProFacet (.fsl) file from your computer and drop it directly onto the 3D Viewport! - Via Menu: Click
☰ → Import File...and select your file. ProFacet parses the legacy cut and translates its gear, refractive index, symmetry folds, and tiers into clean, editable FSL so you can raytrace or optimize it immediately.
Exporting PNG, OBJ, ASC, and FSL
Under the EXPORT bar in the ☰ menu:
PNG: Saves a high-resolution snapshot of the 3D viewport.OBJ: Exports the watertight 3D polyhedron mesh (.obj) for jewelry CAD (MatrixGold, Rhino, Blender) or external rendering.ASC: Exports a standard GemCAD.ascfile.FSL: Downloads your.fslspecification file.
3. Managing Your Design Library, 9 Starters & Cloud Sync (Open)
Click Open in the top-left of the right workspace pane to open the Open Design library modal:
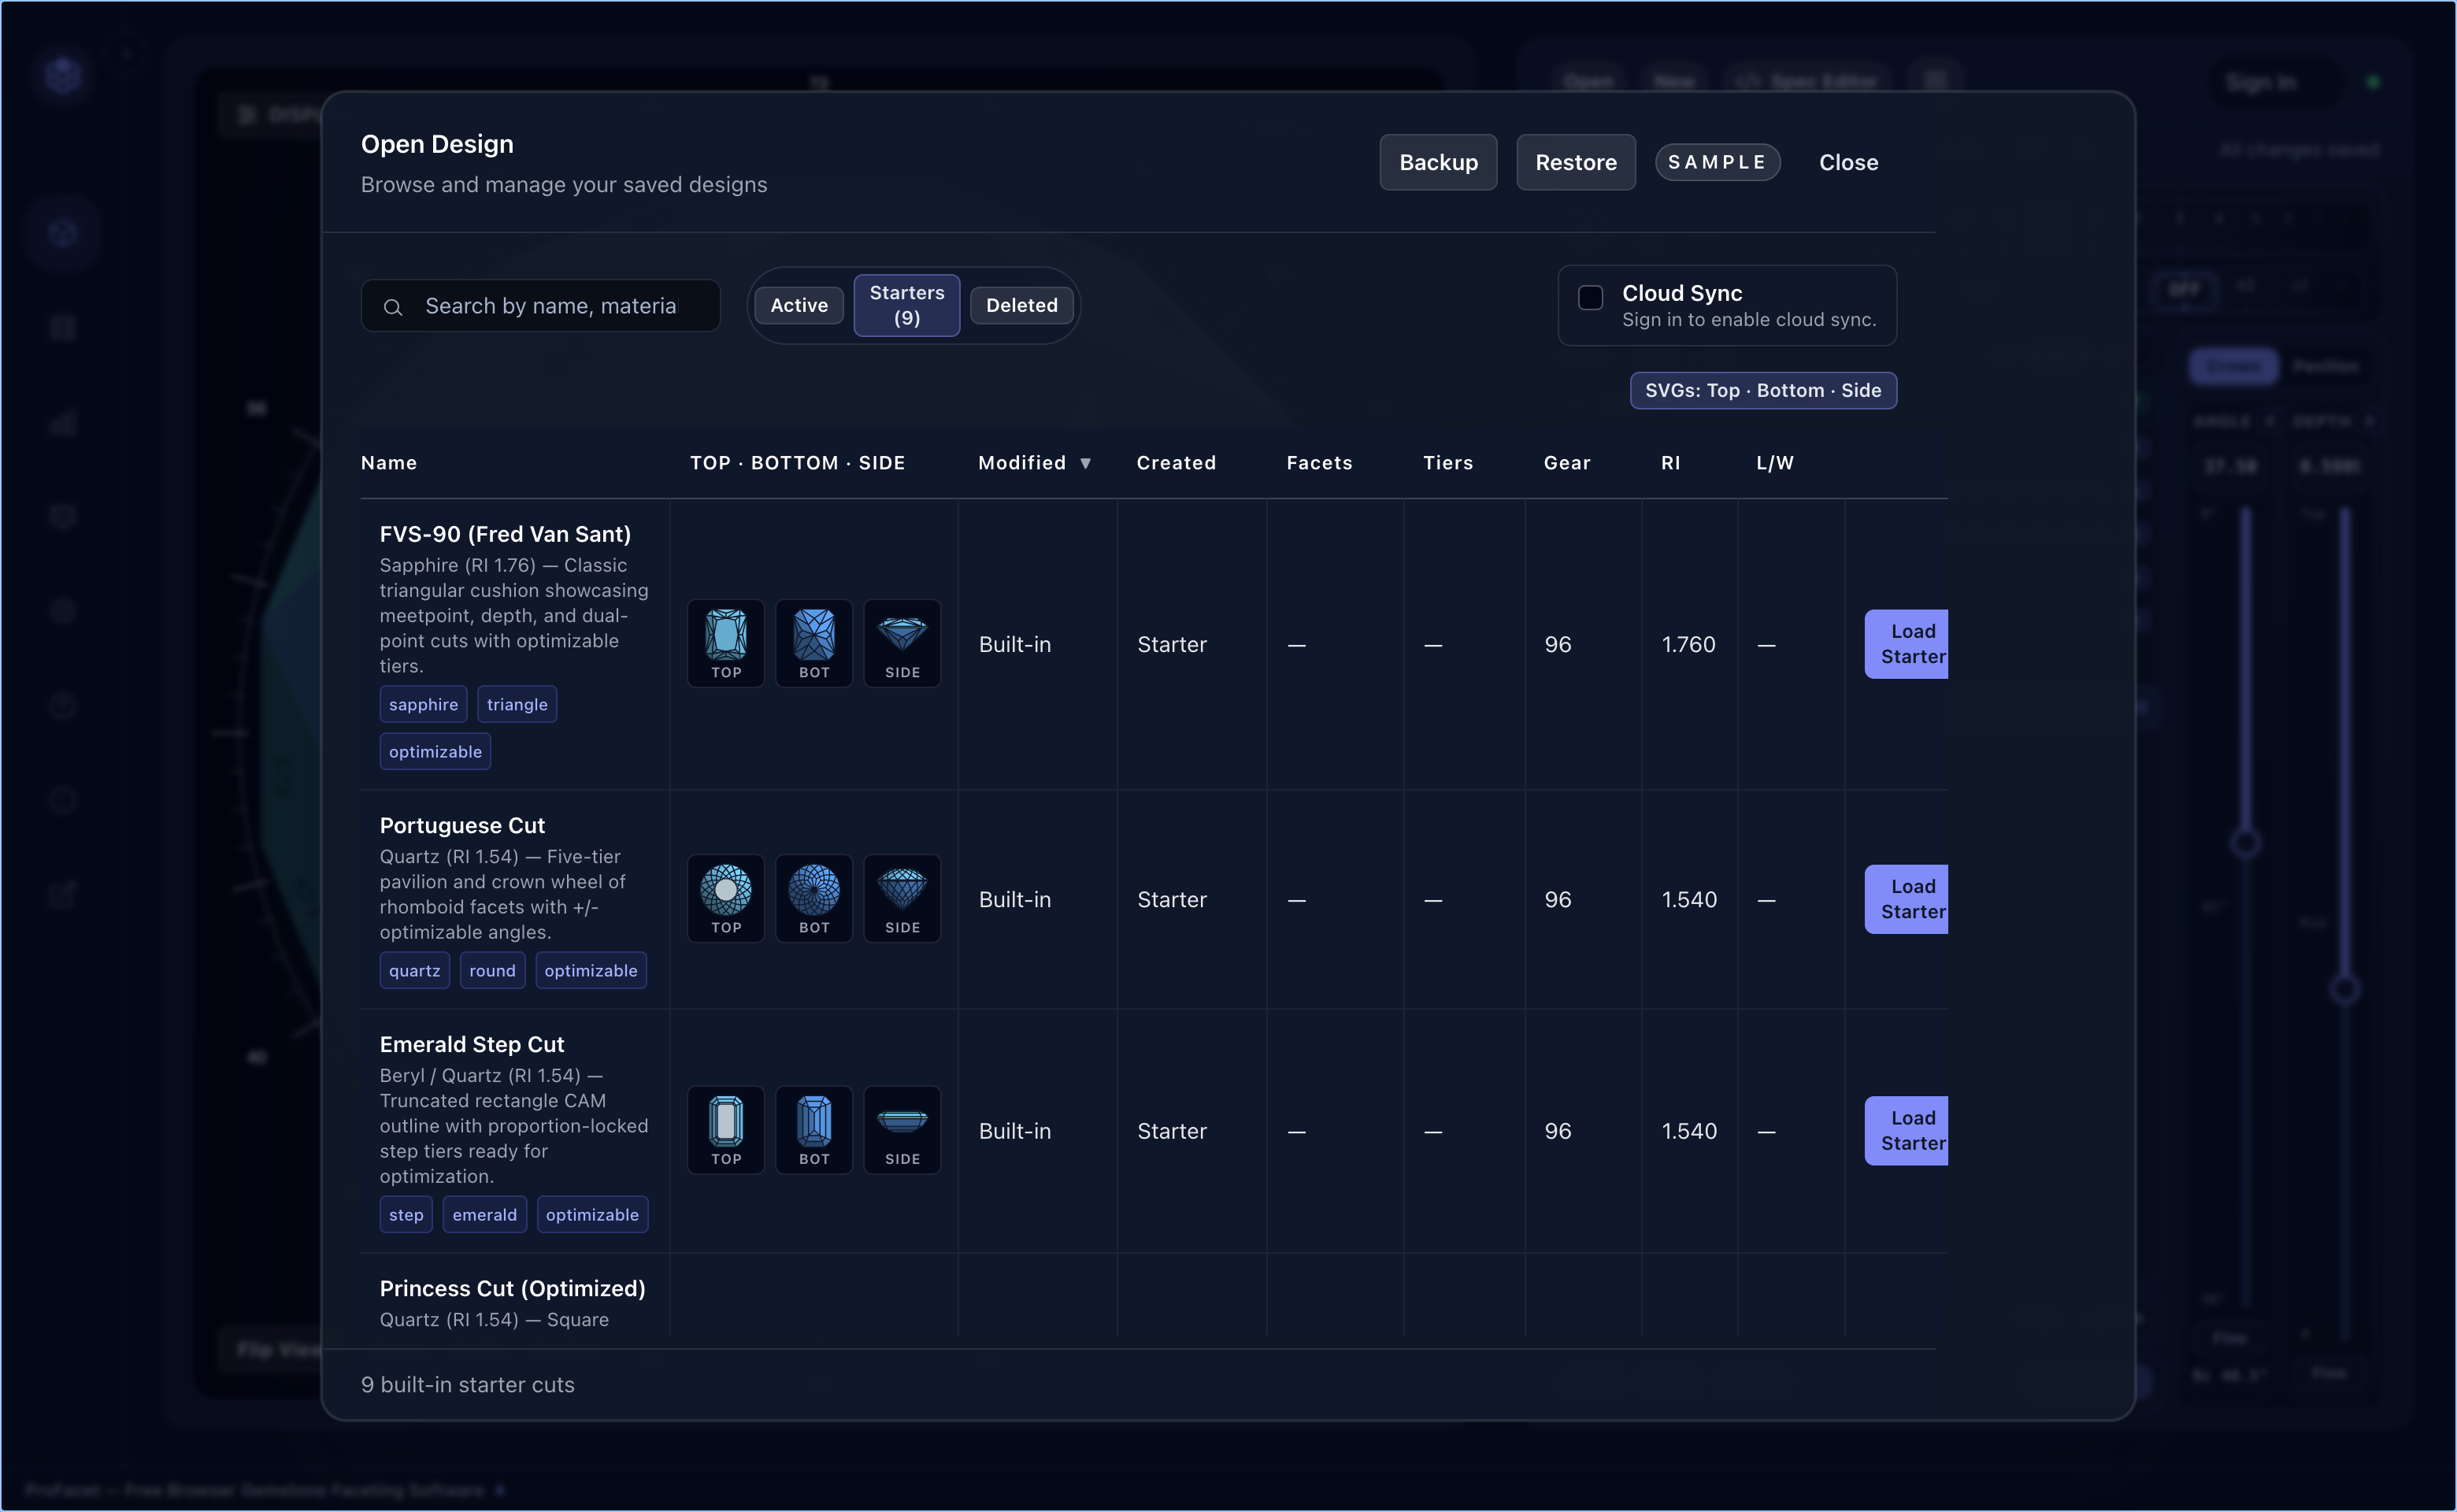
Active&DeletedTabs: Browse, search, filter by tag/material, or restore any of your saved designs, complete with live Top · Bottom · Side vector previews, facet/tier counts,Gear,RI, andL/Wratio.Starters (9)Tab: Load any of 9 curated reference designs (FVS-90 Sapphire Triangle, Portuguese Cut, Emerald Step Cut, Princess Cut, Standard Round Brilliant, and more) with a single click.- Local
Backup&Restore: Download your entire design library as a single.jsonbackup file anytime—even without an account. - Optional
Cloud Sync: ClickSign Into synchronize your designs and custom User Macros across all of your devices automatically, with full offline support.
4. Zero-Account Sharing via Self-Contained URLs (Share Link)
Want to send a design to a friend or post it online without attaching a file? Click ☰ → Share Link:
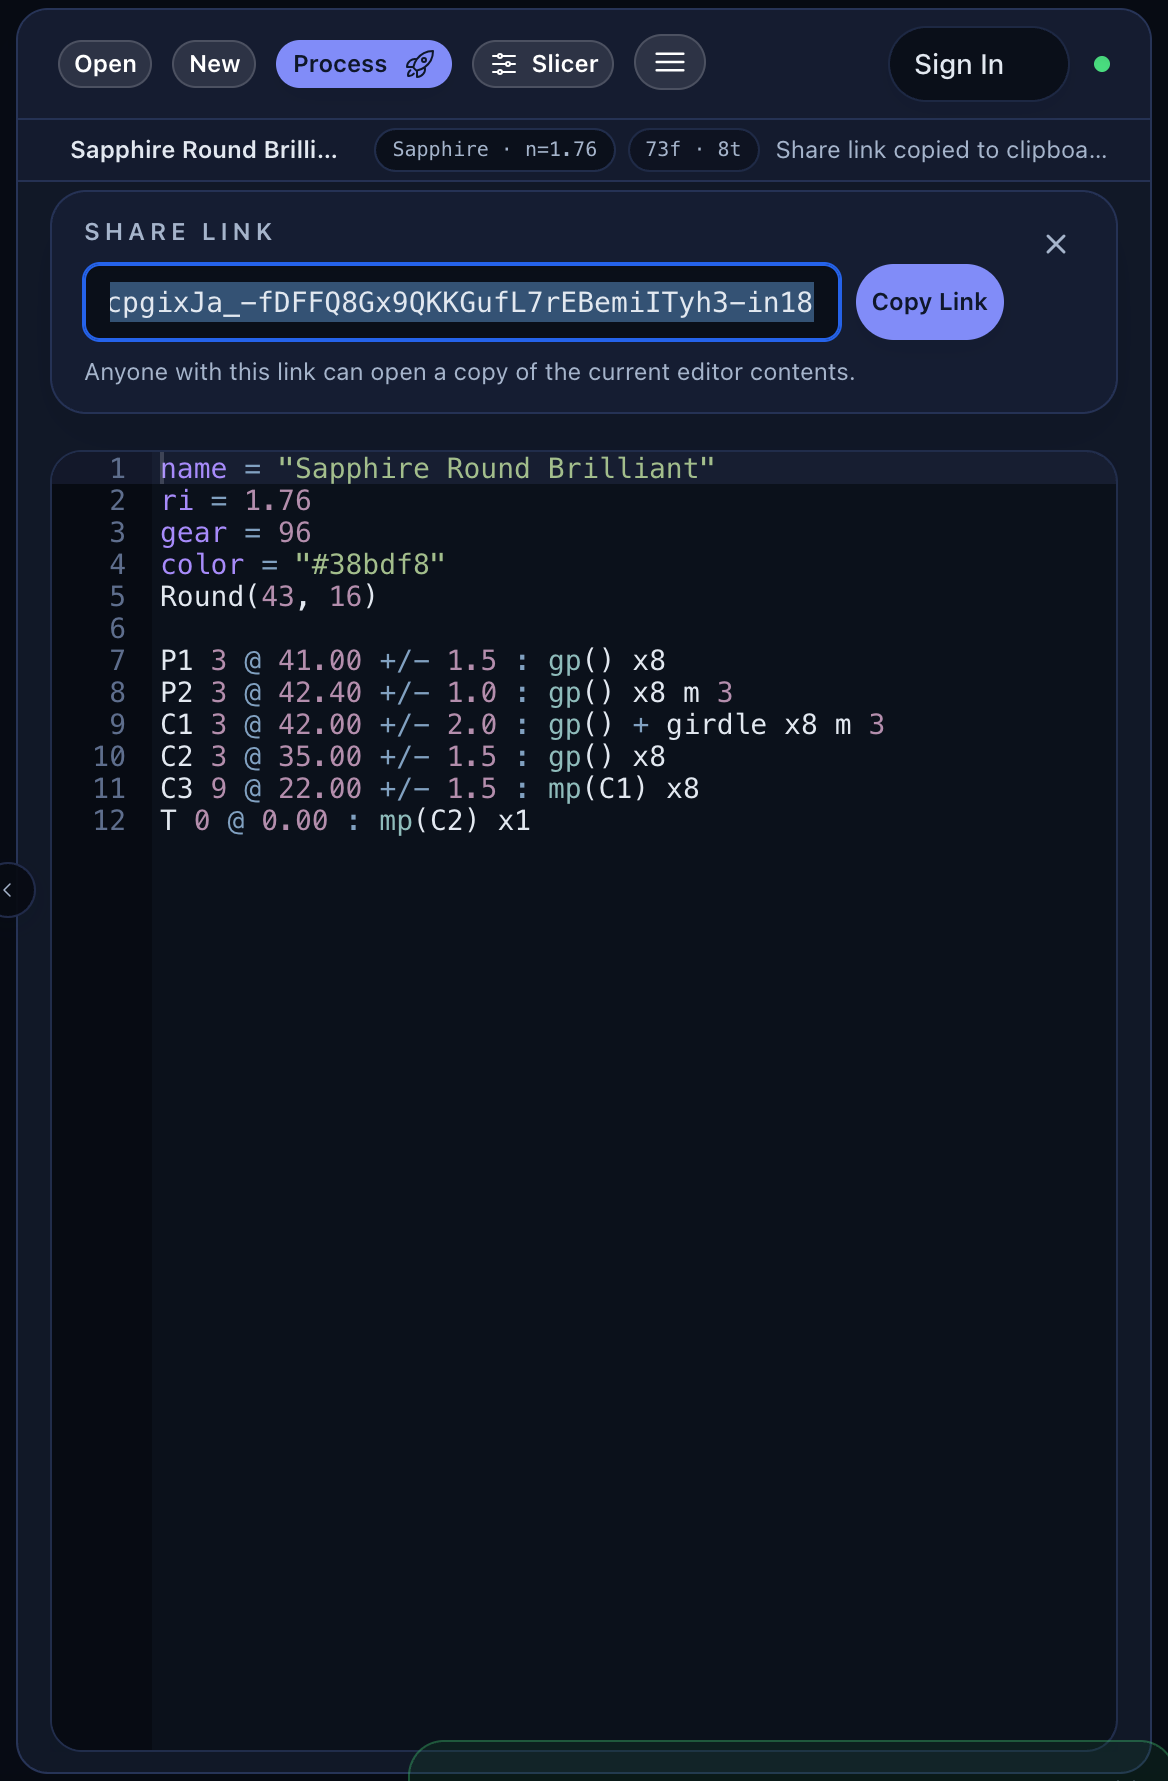
ProFacet compresses your entire FSL or Lua script directly into the URL query string (?fsl=...). Check Open in printable view if you want the link to open directly in the Printable Cutting Sheet view (?print=1&fsl=...), then click Copy Link. Because the design lives inside the URL itself, shared links never expire and require zero server storage!
End of Part I — Ready for Part II (FSL & Lua)?
Congratulations! You have completed Part I: The Visual Gem Cutter's Studio. You now know how to shape any preform, slice facets visually, decode classic diagrams, interpret ASET/Window/Scintillation maps, run GPU optimizations, and print shop-ready cutting instructions.
In Part II — FSL & Lua: Parametric & Algorithmic Gem Design, we go under the hood of the code that powers every stone in ProFacet. Turn the page to Chapter 9: The Dual Language Engine — FSL & Lua Side by Side!
Chapter 9: The Dual Language Engine — FSL & Lua Side by Side
Welcome to Part II: FSL & Lua — Parametric & Algorithmic Gem Design.
In Part I, you saw how every action in the Interactive Slicer builds a gemstone visually. Under the hood, ProFacet’s 3D geometry kernel is driven by a dual-language scripting engine that natively executes both FSL (Faceting Specification Language) and Lua.
Why does ProFacet offer two languages instead of one?
- FSL (Faceting Specification Language) is designed to look and read like a traditional gem-cutting diagram. Each line (
P1 0 @ 41.5 : cp() x8) states a single tier's index, mast angle, meetpoint target, and symmetry fold in fewer characters than any general-purpose language—while still giving you variables, 3D vectors, functional array pipelines (map,filter,reduce), and+/-GPU optimization hints. - Lua (
-- lua script) is a full, industry-standard imperative programming language withforandwhileloops, mutable tables,if/elseif/elsebranching, and standardmath.*functions. Whenever you want to write a procedural algorithm—such as a spiral vortex crown, a parametric step-cut generator with variable tier counts, or a mathematical sculpture—Lua gives you unrestricted programming power connected to the exact same 3D cutting engine and Optimizer.
1. How ProFacet Detects FSL vs. Lua
You can write either language right inside the Spec Editor (</> Spec Editor). ProFacet automatically detects which language your script is written in:
- FSL scripts use C-style comments (
// comment) and declarative@/:tier lines (P1 0 @ 41.5 : cp() x8). - Lua scripts start with a Lua comment (
-- lua script) and use standard Lua function calls (TierAP("P1", 0, 41.5, cp(), "x8")).
[!TIP] Always Start Lua Scripts with
-- lua scriptPlacing-- lua scripton line 1 guarantees that both the Spec Editor and the interactive playgrounds in this book immediately activate Lua syntax highlighting and the Lua runtime.
2. Line-by-Line Comparison: The Same Gemstone in FSL & Lua
Click between FSL and Lua in the top bar of the live playground below and click Run (Ctrl+Enter / Cmd+Enter) to see how identically the two languages construct a Sapphire Round Brilliant:
// 1. Stone & Machine Metadata
name  = "Sapphire Round Brilliant"
ri    = 1.76          // Corundum (Sapphire / Ruby)
gear  = 96            // 96-tooth index gear
color = "#38bdf8"

// 2. Pavilion & Girdle Tiers
P1 3 @ 43.00 +/- 1.0 : cp() xx8       // 16 mirrored pavilion breaks meeting cp()
G1 3 @ 90.00         : size xx8       // 16 vertical girdle facets at radius 1.0
P2 0 @ 41.50 +/- 1.5 : gp() x8        // 8 pavilion mains meeting the girdle

// 3. Crown & Table Tiers
C1 3 @ 42.00 +/- 2.0 : mp(P1, P2) + girdle xx8  // 16 crown breaks + girdle thickness
C2 0 @ 34.50 +/- 1.5 : gp() x8                  // 8 crown mains meeting the girdle
C3 6 @ 22.00 +/- 1.5 : mp(C1) x8                // 8 star facets meeting C1
T  0 @ 0.00          : mp(C2) x1                // 1 flat table meeting C2
-- lua script
-- 1. Stone & Machine Metadata
name("Sapphire Round Brilliant")
ri(1.76)
gear(96)
color("#38bdf8")

-- 2. Pavilion & Girdle Tiers
TierAP("P1", 3, val(43.00, 1.0), cp(), "xx8")
TierAD("G1", 3, 90.00,           size, "xx8")
TierAP("P2", 0, val(41.50, 1.5), gp(), "x8")

-- 3. Crown & Table Tiers
TierAP("C1", 3, val(42.00, 2.0), mp("P1", "P2"):add(girdle), "xx8")
TierAP("C2", 0, val(34.50, 1.5), gp(), "x8")
TierAP("C3", 6, val(22.00, 1.5), mp("C1"), "x8")
TierAP("T",  0, 0.00,            mp("C2"), "x1")
3. Anatomy of a Cut Statement in Both Languages
In FSL:
  C1     3     @  42.00 +/- 2.0   :   mp(P1, P2) + girdle   xx8
────── ─────  ────────────────── ─── ───────────────────── ─────
 Tier   Base    Angle (°) + Opt        Meetpoint Target +   Sym
 Name  Index      Search Hint            Girdle Offset     (Mir)
In Lua:
  TierAP( "C1",   3,   val(42.00, 2.0),   mp("P1", "P2"):add(girdle),   "xx8" )
          ─────  ───  ─────────────────   ───────────────────────────   ──────
          Tier   Base  Angle (°) + Opt      Meetpoint Target +          Mirrored
          Name  Index    Search Hint          Girdle Offset             Symmetry
4. The Complete FSL ↔ Lua Rosetta Stone
Keep this side-by-side cheat sheet handy as you read through Part II:
| Feature | FSL Syntax | Lua Syntax (-- lua script) |
|---|---|---|
| Comments | // Single-line comment | -- Single-line comment |
| Metadata Settings | name = "Star Ruby"ri = 1.76gear = 96color = "#e11d48" | name("Star Ruby")ri(1.76)gear(96)color("#e11d48") |
| Variables | pavAngle = 41.5girdle = Vector(0, 0, 0.04) | local pavAngle = 41.5local girdle = Point(0, 0, 0.04) |
| Optimizable Numbers | 41.5 +/- 1.542.0 +/- 2% | val(41.5, 1.5)val(42.0, "2%") |
| CAM Preforms | Round(43, 16)RectTr(1.4, 43, 0.28, 0) | Round(43, 16)RectTr(1.4, 43, 0.28, 0) |
| Style 1: Angle + Depth | P1 0 @ 41.8 : 0.25 x8 | TierAD("P1", 0, 41.8, 0.25, "x8") |
| Style 2: Angle + Point | P1 0 @ 41.5 : cp() x8 | TierAP("P1", 0, 41.5, cp(), "x8") |
| Style 3: Point-Pair | C1 0 : gp() + girdle : mp(C2) x8 | TierPP("C1", 0, gp():add(girdle), mp("C2"), "x8") |
| Mirrored Symmetry | P2 0 @ 43.0 : gp() x8 m 3(axis 0 with ±3 delta, or zero-axis shorthand P2 3 @ 43.0 : gp() xx8) | TierAP("P2", 0, 43.0, gp(), "x8 m 3")(or zero-axis shorthand TierAP("P2", 3, 43.0, gp(), "xx8")) |
| Explicit Tooth List | P3 [0, 24, 48] @ 42.0 : gp() | TierAP("P3", {0, 24, 48}, 42.0, gp()) |
| Frosted / Notes | G1 0 @ 90 : size x16 { frosted: true } | TierAD("G1", 0, 90, size, "x16", { frosted = true }) |
| Meetpoint Helpers | cp(), gp(), mp(P1, P2, !G1) | cp(), gp(), mp("P1", "P2", "!G1") |
| Edge Interpolation | ep(edge(C1:0, C1:6), 0.5) | ep(edge("C1:0", "C1:6"), 0.5) |
| 3D Primitives | Point(x, y, z), Vector(x, y, z), Plane(...) | Point(x, y, z), Vector(x, y, z), Plane(...) |
Inspect Stone (stone()) | s = stone(); print(s.tablePercentage) | local s = stone(); print(s.tablePercentage) |
| Assertions | assert(s.tablePercentage > 45, "Small table") | assert(s.tablePercentage > 45, "Small table") |
| Loops / Iteration | Math.range(0, 8, 1).forEach((i) => ...) | for i = 0, 7 do ... end |
5. Why Coding Your Cuts Changes Everything
When a gemstone is defined as a parametric script rather than a static list of vertices:
- One-Line Material Adaptation: You can compute the critical angle directly from
ri(crit = asin(1.0 / ri)) and express your Pavilion angles relative tocrit. Changeri = 1.54tori = 2.42and the entire Pavilion re-angles itself automatically! - Proportion-Locked Scaling: When you stretch an Oval from
1.25×to1.50×, tiers anchored withgp(),mp(),ep(), orsurface(u, v)automatically recompute their exact angles and depths so every meetpoint stays closed. - Instant Multi-Tier Generation: Use a 3-line FSL
.forEach()pipeline or a Luaforloop to generate a 10-tier Portuguese pavilion or a 64-facet geodesic dome without repeating yourself.
Next, let’s establish the exact 3D coordinate system, machine configuration settings, and symmetry rules in Chapter 10: Coordinate System, Machine Settings & Symmetry Rules.
Chapter 10: Coordinate System, Machine Settings & Symmetry Rules
Before writing custom cuts or math expressions, you need a rock-solid picture of three fundamentals: how the interpreter steps through your script, how the 3D coordinate system is oriented, and how gear teeth and symmetry modifiers map to angles around the dop.
1. Sequential Execution: Cut Order Matters!
Both the FSL and Lua interpreters act like a patient master cutter sitting at a physical machine: they start with a solid uncut block of rough crystal (centered at (0, 0, 0)) and execute your statements strictly from top to bottom.
[!IMPORTANT] You Can Only Aim at Corners That Already Exist on the Stone If Tier
C2tries to meetmp(C1)before TierC1has been cut, the interpreter will stop and report an error becauseC1does not exist on the polyhedron yet! Always cut your foundation tiers first, then cut the tiers that reference their corners.
Run the interactive example below to see how four sequential cuts carve a raw block into a finished stone—and try switching between FSL and Lua:
name   = "Sequential Cutting Order"
ri     = 1.76
gear   = 96
size   = 1.0
girdle = Vector(0, 0, 0.04)

// 1. Cut P1 first (meets at the bottom center point 0, 0, -1)
P1 0 @ 43.0 : cp() x8

// 2. Cut G1 second (creates the 8 corners where P1 meets G1)
G1 0 @ 90.0 : size x8

// 3. Now C1 can safely reference mp(P1, G1)!
C1 0 @ 36.0 : mp(P1, G1) + girdle x8

// 4. Finally, T references the inner slope of C1
T  0 @ 0.0  : 0.35 x1
-- lua script
name("Sequential Cutting Order")
ri(1.76)
gear(96)
local size = 1.0
local girdle = Point(0, 0, 0.04)

-- 1. Cut P1 first
TierAP("P1", 0, 43.0, cp(), "x8")

-- 2. Cut G1 second
TierAD("G1", 0, 90.0, size, "x8")

-- 3. Now C1 can safely reference mp("P1", "G1")!
TierAP("C1", 0, 36.0, mp("P1", "G1"):add(girdle), "x8")

-- 4. Finally, cut the flat Table
TierAD("T", 0, 0.0, 0.35, "x1")
2. The 3D Right-Handed Coordinate Frame
When you use explicit Point(x, y, z) or Vector(x, y, z) coordinates, how are the X, Y, and Z axes oriented inside the stone?
- Origin
(0, 0, 0): The geometric center of the uncut blank, typically sitting in the plane of the Pavilion girdle equator (z = 0). +ZAxis (Up/ Crown): Points straight up through the center of the Table. The Crown centerpoint is(0, 0, +1).-ZAxis (Down/ Pavilion): Points straight down through the Pavilion culet. Whencp()is used on a Pavilion tier (P1,PF1), it resolves to(0, 0, -1).+YAxis (Index 0 / 96): Points toward the top of the Crown/Pavilion diagram (12 o'clock).+XAxis (Index 24on a 96-gear): Points to the right (3 o'clock) when clockwise indexing (cw = true, the default) is active.- Standard Radius (
size = 1.0): By convention, preforms normalize the stone's narrow width radius to1.0(meaning a total stone width of2.0units from-1.0to+1.0). Therefore, agirdlethickness of0.03represents0.03 / 2.0 = 1.5%(or3%of radius).
3. Project & Machine Settings Reference
Place your stone metadata and machine configuration at the top of your script:
| Setting | FSL Example | Lua Example | Purpose & Default |
|---|---|---|---|
name | name = "Royal Cushion" | name("Royal Cushion") | Title displayed in the 3D Studio, file browser, and printed spec sheet. |
ri | ri = 1.76 | ri(1.76) | Material refractive index (1.54 default). Also readable as a numeric value (ri in FSL, ri() in Lua) inside formulas! |
gear | gear = 96 | gear(96) | Index gear tooth count (96 default; supports 32, 64, 72, 80, 96, 120, etc.). Can even be changed mid-script! |
cw | cw = true | cw(true) | Gear tooth direction: true (default) steps clockwise around the diagram; false steps counter-clockwise. |
color | color = "#38bdf8" | color("#38bdf8") | Hex body color used by the spectral raytracer and path tracer. |
absorption | absorption = 1.4 | absorption(1.4) | Beer-Lambert light absorption multiplier (1.0 default; higher values produce deeper, richer saturation). |
cube | cube = 5.0 | cube(5.0) | Resets the starting uncut rough blank to a cube of half-size 5.0 (essential for tall cuts like Briolettes that extend beyond the default ±2.0 blank). |
girdle | girdle = Vector(0, 0, 0.03) | girdle = Point(0, 0, 0.03) | Vertical offset vector added to the first Crown tier (+ girdle) to establish girdle thickness. |
notes | notes = "Cut in Sri Lankan sapphire" | notes("Cut in Sri Lankan sapphire") | Free-form cutter notes included on the printable sheet. |
tags | tags = "cushion, sapphire" | tags("cushion, sapphire") | Searchable keywords for the Open Design library. |
4. How Symmetry & Mirror Modifiers Work (xN, m M, xxN, and Lists)
Once you specify a tier's Base Index (IDX), you can replicate that facet around the gear in four ways:
A. Rotational Symmetry (xN in FSL / "xN" in Lua)
Divides the gear into N equal steps of Gear / N teeth starting at IDX:
P1 0 @ 41.5 : cp() x8on a96gear steps by96 / 8 = 12teeth:- Cuts teeth:
0 (96), 12, 24, 36, 48, 60, 72, 84(8 facets).
- Cuts teeth:
C3 6 @ 22.0 : mp(C1) x8starts at tooth6and steps by12:- Cuts teeth:
6, 18, 30, 42, 54, 66, 78, 90(8 facets).
- Cuts teeth:
B. Rotational + Mirror Delta Symmetry (xN m M in FSL / "xN m M" in Lua)
In IDX @ angle : target xN m M, your base index IDX is the mirror axis (center)—not a tooth that gets cut itself—and the number M after m is the ± delta index (±M teeth) added to and subtracted from each of the N rotational symmetry axes (axis - M and axis + M):
P2 0 @ 43.0 : gp() x8 m 3on a96gear:- Symmetry axes sit at
0 (96), 12, 24, 36, 48, 60, 72, 84. - Delta index
m 3cuts±3teeth around each axis (0 - 3 = 93and0 + 3 = 3,12 - 3 = 9and12 + 3 = 15, etc.):3, 9, 15, 21, 27, 33, 39, 45, 51, 57, 63, 69, 75, 81, 87, 93(16 facets).
- Symmetry axes sit at
P2 6 @ 42.2 : mp(P1) x8 m 2on a96gear:- Symmetry axes sit at
6, 18, 30, 42, 54, 66, 78, 90. - Delta index
m 2cuts±2teeth around each axis (6 - 2 = 4and6 + 2 = 8, etc.):4, 8, 16, 20, 28, 32, 40, 44, 52, 56, 64, 68, 76, 80, 88, 92(16 facets).
- Symmetry axes sit at
C. Zero-Axis Mirror Shorthand (xxN in FSL / "xxN" in Lua)
Unlike xN m M (where IDX is the un-cut mirror center and M is the ± delta index), in IDX @ angle : target xxN your base index IDX is an actual cut tooth, and xxN repeats IDX N times around the gear while reflecting every cut across index 0 (Gear - tooth, i.e., 0 - IDX and 0 + IDX).
Because xxN always mirrors across index 0, writing M @ angle : target xxN is a concise shorthand for centering the mirror axis at 0 with a ±M delta index (0 @ angle : target xN m M):
P2 3 @ 43.0 : gp() xx8is 100% equivalent toP2 0 @ 43.0 : gp() x8 m 3(andP2 6 @ 43.0 : gp() x8 m 3), cutting0 ± 3 = 93, 3repeated 8 times:3, 9, 15, 21, 27, 33, 39, 45, 51, 57, 63, 69, 75, 81, 87, 93.P2 4 @ 42.2 : mp(P1) xx8is 100% equivalent toP2 0 @ 42.2 : mp(P1) x8 m 4(orP2 6 @ 42.2 : mp(P1) x8 m 2), cutting0 ± 4repeated 8 times:4, 8, 16, 20, 28, 32, 40, 44, 52, 56, 64, 68, 76, 80, 88, 92.
[!IMPORTANT] Don't Confuse
3 @ ... xx8with3 @ ... x8 m 3! Remember that the number aftermis the±delta index relative toIDX, not an absolute tooth index:
P2 3 @ 43.0 : gp() xx8(=P2 0 @ 43.0 : gp() x8 m 3) mirrors across0(0 ± 3), cutting3, 9, 15, 21, 27, 33, 39, 45, 51, 57, 63, 69, 75, 81, 87, 93.P2 3 @ 43.0 : gp() x8 m 3places the mirror center at3and applies a±3delta (3 - 3 = 0and3 + 3 = 6), cutting0, 6, 12, 18, 24, 30, 36, 42, 48, 54, 60, 66, 72, 78, 84, 90(shifted by 3 teeth!).
D. Explicit Index Arrays ([i1, i2, ...] in FSL / {i1, i2, ...} in Lua)
Need an asymmetric cut, a heart cleft, or a custom subset of teeth? Pass an array of tooth numbers as the index!
P1 [0, 24, 48, 72] @ 42.0 : cp()(orTierAP("P1", {0, 24, 48, 72}, 42.0, cp())in Lua) cuts those exact 4 teeth.
E. Symmetry Inheritance (Omitting xN on Consecutive Tiers)
If you omit the symmetry modifier on a tier, ProFacet automatically reuses the symmetry and mirror settings from the previous tier! That is why in a simple step cut, writing x4 on P1 lets G1 and C1 inherit x4 automatically if omitted—though writing x4 or x8 explicitly on every tier is great practice for clarity.
5. Interactive Playground: Test All Four Symmetry Forms Live
Click the tier chips P1, P2, C1, and C2 in the playground below to see how x8, x8 m 3, xx8, and explicit index arrays [0, 24, 48, 72] place facets around the 96-tooth gear:
name  = "Symmetry Forms Showcase"
ri    = 1.76
gear  = 96
color = "#f59e0b"

// 1. Mirrored 8-fold symmetry (16 facets at 3, 9, 15, 21...)
P1 3 @ 43.0 : cp() xx8
G1 3 @ 90.0 : size xx8

// 2. Rotational 8-fold symmetry (8 facets at 0, 12, 24, 36, 48, 60, 72, 84)
P2 0 @ 41.5 : gp() x8

// 3. Rotational + mirror delta symmetry (0 ± 3 -> same 16 teeth as 3 ... xx8!)
C1 0 @ 42.0 : mp(P1, P2) + girdle x8 m 3

// 4. Explicit tooth array for 4 cardinal bezel facets + 4 offset facets
C2 [0, 24, 48, 72]  @ 34.0 : gp()
C3 [12, 36, 60, 84] @ 34.0 : gp()
C4 6                @ 21.5 : mp(C1) x8
T  0                @ 0.0  : mp(C2) x1
-- lua script
name("Symmetry Forms Showcase")
ri(1.76)
gear(96)
color("#f59e0b")

-- 1. Mirrored 8-fold symmetry (16 facets)
TierAP("P1", 3, 43.0, cp(), "xx8")
TierAD("G1", 3, 90.0, size, "xx8")

-- 2. Rotational 8-fold symmetry (8 facets)
TierAP("P2", 0, 41.5, gp(), "x8")

-- 3. Rotational + mirror delta symmetry (0 ± 3 -> same 16 teeth as 3 ... xx8!)
TierAP("C1", 0, 42.0, mp("P1", "P2"):add(girdle), "x8 m 3")

-- 4. Explicit tooth table for 4 cardinal bezel facets + 4 offset facets
TierAP("C2", {0, 24, 48, 72},  34.0, gp())
TierAP("C3", {12, 36, 60, 84}, 34.0, gp())
TierAP("C4", 6,                21.5, mp("C1"), "x8")
TierAP("T",  0,                0.0,  mp("C2"), "x1")
Next, let’s learn the three distinct geometric styles for aiming a facet cut—Angle + Depth, Angle + Meetpoint, and Point-Pair—in Chapter 11: Cutting Facets & Tiers — The Three Design Styles.
Chapter 11: Cutting Facets & Tiers — The Three Design Styles
Every time ProFacet executes a tier command, it performs a clean two-step geometric operation:
- Aim One Reference Plane: At the tier's starting index (
IDX), ProFacet constructs a single 3D cutting plane with an outward unit normal vector and a perpendicular signed distance from the origin: - Replicate & Slice Around the Dop: ProFacet rotates that reference plane around the Z-axis according to your symmetry and mirror rules (
xN m M), slicing away all crystal volume outside those planes.
How do you tell ProFacet where that reference plane should sit? There are three distinct design styles—and knowing when to use each one is the secret to writing flexible, optimization-ready gemstone scripts.
1. Tier Naming Prefixes (PF, G, P, C, T)
Before looking at the three styles, notice how the first letter of a tier's name automatically determines which side of the stone it cuts:
| Tier Prefix | Region | Cutting Direction | Notes |
|---|---|---|---|
PF (PF1, PF2…) | Temporary CAM Preform | From Below (Down, -Z) | Used inside CAM functions (Round, Oval, RectTr). |
P (P1, P2…) | Permanent Pavilion | From Below (Down, -Z) | 0° is a flat bottom culet; 42° is a sloped pavilion facet. |
G (G1, G2…) | Girdle | Horizontal (90°) | Cuts vertically along the equator of the stone. |
C (C1, C2…) | Crown | From Above (Up, +Z) | 42° is a steep crown facet; 15° is a shallow star facet. |
T (T, T1…) | Table | From Above (Up, +Z) | Typically cut at @ 0.0 to form the flat top window. |
2. The Three Ways to Aim a Tier
Style 1: Angle + Explicit Depth (@ angle : depth / TierAD)
You specify both the mast angle (°) and the raw perpendicular distance (depth) from the stone's origin (0, 0, 0) to the cutting plane:
- In FSL:
P1 0 @ 42.0 : 0.65 x8 - In Lua:
TierAD("P1", 0, 42.0, 0.65, "x8")
When to use Style 1:
- Cutting a
90°girdle cylinder at a fixed radius (G1 0 @ 90.0 : 1.0 x16). - Cutting a flat
0°table at a fixed height when no star meetpoint is desired (T 0 @ 0.0 : 0.30 x1). - Importing legacy GemCAD
.ascfiles that store raw plane distances instead of symbolic meetpoints.
[!WARNING] Why Raw Depths Struggle During Optimization If you write raw numeric depths (
: 0.65) on your Pavilion and Crown tiers and then ask the GPU Optimizer to vary their angles (@ 42.0 +/- 2.0), tilting a plane while holding its distance from(0, 0, 0)constant causes facets to overcut or undercut their neighbors, destroying your meetpoints! That is why Styles 2 and 3 are preferred for parametric design.
Style 2: Angle + Meetpoint (@ angle : point / TierAP) — The Cutter's Standard
You choose the mast angle (°), and pass a 3D landmark point (cp(), gp(), mp(...), ep(...)) after the colon :. ProFacet automatically calculates the exact plane depth so the facet plane passes right through that landmark point!
- In FSL:
C3 6 @ 22.0 +/- 1.5 : mp(C1) x8 - In Lua:
TierAP("C3", 6, val(22.0, 1.5), mp("C1"), "x8")
When to use Style 2:
- 90% of all gemstone tiers! Just like cutting at a physical machine, you set your mast angle and grind until the facet meets an existing corner (
cp(),gp(),mp(C1)). - Because the depth is computed dynamically from the landmark point, you can freely optimize the angle (
+/- 1.5in FSL,val(22.0, 1.5)in Lua) and the meetpoint will never break!
Style 3: Point-Pair (: point1 : point2 / TierPP) — Angle-Free Proportion Locking!
What if you don't know (or don't care to hardcode) the exact mast angle of a tier, because what really matters is that the facet connects two specific 3D landmarks—for example, starting at the girdle corner (gp() + girdle) and ending at a specific fractional width on the crown (surface(0.55, 0.55))?
In Style 3 (Point-Pair), you omit @ angle completely in FSL (or call TierPP in Lua) and provide two 3D points:
- In FSL:
C1 0 : gp() + girdle : surface(0.65, 0.0) x4 - In Lua:
TierPP("C1", 0, gp():add(girdle), surface(0.65, 0.0), "x4")
How Point-Pair works mathematically:
Given your tooth index IDX (which fixes the horizontal azimuth direction of the facet) and two 3D points and that the plane must pass through, there is one and only one mast angle and depth that passes through both and ! ProFacet solves for that exact angle and depth automatically—and prints the resulting angle in your cutting table!
3. Interactive Comparison: All Three Styles in One Stone
Run the live playground below to see all three styles working together in a single gemstone—and click the FSL / Lua toggle to compare the syntax in both languages:
name   = "Three Design Styles Demo"
ri     = 1.76
gear   = 96
color  = "#10b981"
size   = 1.0
girdle = Vector(0, 0, 0.04)

// STYLE 2 (Angle + Meetpoint): P1 meets centerpoint cp() at 42.5°
P1 0  @ 42.5 : cp() x4
P2 12 @ 41.8 : cp() x4

// STYLE 1 (Angle + Raw Depth): G1 cuts at 90° at explicit radius 1.0
G1 0  @ 90.0 : size x4
G2 12 @ 90.0 : (size * 0.92) x4

// STYLE 2 (Angle + Meetpoint): C1 meets the P1/G1 girdle corner + girdle
C1 0  @ 40.0 : mp(P1, G1) + girdle x4
C2 12 @ 39.0 : mp(P2, G2) + girdle x4

// STYLE 3 (Point-Pair — No @ Angle Needed!):
// Connects the C1/C2 ridge midpoint directly to a 32% height point!
C3 0  : ep(edge(C1:0, C2:12), 0.5) : Point(0, 0.55, 0.22) x4

// Flat table meeting the inner corner of C2 and C3
T  0  @ 0.0  : mp(C2, C3) x1
-- lua script
name("Three Design Styles Demo")
ri(1.76)
gear(96)
color("#10b981")
local size   = 1.0
local girdle = Point(0, 0, 0.04)

-- STYLE 2 (Angle + Meetpoint: TierAP)
TierAP("P1", 0,  42.5, cp(), "x4")
TierAP("P2", 12, 41.8, cp(), "x4")

-- STYLE 1 (Angle + Raw Depth: TierAD)
TierAD("G1", 0,  90.0, size, "x4")
TierAD("G2", 12, 90.0, size * 0.92, "x4")

-- STYLE 2 (Angle + Meetpoint: TierAP)
TierAP("C1", 0,  40.0, mp("P1", "G1"):add(girdle), "x4")
TierAP("C2", 12, 39.0, mp("P2", "G2"):add(girdle), "x4")

-- STYLE 3 (Point-Pair: TierPP — 2 points instead of angle + depth!)
TierPP("C3", 0, ep(edge("C1:0", "C2:12"), 0.5), Point(0, 0.55, 0.22), "x4")

-- Flat table meeting C2 and C3
TierAP("T",  0,  0.0,  mp("C2", "C3"), "x1")
4. Optional Tier Settings ({ frosted, notes })
You can also mark individual tiers as frosted (unpolished matte finish, which scatters light diffusely in renders and is noted on printable diagrams) or attach custom cutting instructions via an options object/table at the end of the tier command:
- In FSL:
G1 0 @ 90.0 : size x16 { frosted: true, notes: "Pre-polish girdle cylinder" } - In Lua:
TierAD("G1", 0, 90.0, size, "x16", { frosted = true, notes = "Pre-polish girdle cylinder" })
Next, let’s master every single Point Helper (cp(), gp(), mp(), edge(), ep(), prz(), fred(), grid(), and surface()) in Chapter 12: Mastering Point Helpers — cp(), gp(), mp(), ep() & More.
Chapter 12: Mastering Point Helpers — cp(), gp(), mp(), ep() & More
When you cut a gemstone at a physical faceting machine, you look through a 10× loupe and stop grinding the moment your new facet touches an existing corner or ridge on the stone.
Point helpers are how you express those exact visual landmarks in FSL and Lua. They inspect the live 3D polyhedron at the moment your cut executes, locate the exact 3D vertex or edge you asked for, and anchor your cutting plane to it.
1. Quick Selector: Which Point Helper Do I Need?
| Helper | FSL Syntax | Lua Syntax | What Landmark It Finds |
|---|---|---|---|
cp() | cp() | cp() | Center Point: (0, 0, -1) for Pavilion/PF tiers, or (0, 0, +1) for Crown tiers. |
gp() | gp() | gp() | Girdle Point: The lowest Pavilion girdle vertex directly in front of the current tooth index. |
mp(...) | mp(P1, P2, !G1) | mp("P1", "P2", "!G1") | Meetpoint: The 3D vertex where the listed tiers (or specific facets like P1:0) intersect. |
edge(...) | edge(C1:0, C1:6) | edge("C1:0", "C1:6") | Edge Segment: Returns the [startPt, endPt] ridge line shared between two adjacent facets. |
ep(...) | ep(edge(F1, F2), 0.5) | ep(edge("F1", "F2"), 0.5) | Edge Interpolation: A point fractionally (0.0 to 1.0) along an edge or between two points. |
prz(...) | prz(pt) / prz(pt, P1:0) | prz(pt) / prz(pt, "P1:0") | Project Z: Drops a vertical plumb line from pt straight onto the stone's surface or a facet plane. |
fred(...) | fred(p1, p2, edge) | fred(p1, p2, edge) | Fred Point (2D Crossover): The 3D point on edge where line p1–p2 crosses it in top-down XY view. |
grid(...) | grid(cols, rows, x, y) | grid(cols, rows, x, y) | Flat XY Grid: Returns a 2D grid coordinate at z = 0 scaled to the stone's bounding box. |
surface(...) | surface(u, v) | surface(u, v) | 3D Surface Projection: Projects fractional (u, v) coordinates (-1..+1 or 0..1) onto the 3D mesh surface! |
Point(...) | Point(x, y, z) | Point(x, y, z) | Literal 3D Point: Explicit (x, y, z) coordinates in space. |
2. cp() — Center Point & gp() — Girdle Point
cp() (Center Point)
Brings angled facets together at a central apex along the dop axis:
- On a Pavilion (
P) or Preform (PF) tier,cp()returnsPoint(0, 0, -1). - On a Crown (
C) tier,cp()returnsPoint(0, 0, +1)(useful when cutting a pointed dome or rose cut without a flat table!).
gp() (Girdle Point)
Finds the girdle corner aligned with the current cut's tooth index and angle:
- On a Pavilion tier (
P2 0 @ 43.0 : gp() x8 m 3orP2 3 @ 43.0 : gp() xx8): Finds the intersection of the temporary CAM preform (PFk) and the90°girdle (Gk) so your permanent pavilion facets meet the girdle line cleanly. - On a Crown tier (
C1 0 @ 42.0 : gp() + girdle x8 m 3orC1 3 @ 42.0 : gp() + girdle xx8): Finds the lowest point of the Pavilion girdle at that tooth index, and+ girdleshifts that target upward by your girdle thickness!
3. mp(...) — Meetpoints & Exclusion Filters (!)
mp(...) searches the current 3D stone for vertices that touch all of the tiers or facets you list, and picks the best match for your current cutting plane:
- Single-Tier Meetpoint (
mp(C1)): Finds the corner where two adjacent facets of tierC1meet each other (for example, the upper tip shared byC1:3andC1:93). - Multi-Tier Meetpoint (
mp(P1, G1)): Finds the vertex shared by bothP1andG1. - Specific Facet Targeting (
mp(P1:0, P2:3)): By adding:toothafter a tier name, you restrict the search to that specific facet index! - Exclusion Filter (
!Tier): What if two tiersP1andP2share two vertices—one at the bottom culet (PF1orP3) and one up near the girdle (G1)? Prefixing a tier with!(such asmp(P1, P2, !G1)) excludes any vertex that touchesG1!
Try running and inspecting mp() with specific tiers and show() debug markers in the interactive playground below:
name  = "Meetpoint & Debug Marker Demo"
ri    = 1.76
gear  = 96
color = "#38bdf8"

P1 3 @ 43.0 : cp() xx8
G1 3 @ 90.0 : size xx8
P2 0 @ 41.5 : gp() x8

C1 3 @ 42.0 : mp(P1, P2) + girdle xx8
C2 0 @ 34.5 : gp() x8

// Highlight the upper apex of C1 in bright gold using show()!
show(mp(C1), "#ffd166")

C3 6 @ 22.0 : mp(C1) x8
T  0 @ 0.0  : mp(C2) x1
-- lua script
name("Meetpoint & Debug Marker Demo")
ri(1.76)
gear(96)
color("#38bdf8")

TierAP("P1", 3, 43.0, cp(), "xx8")
TierAD("G1", 3, 90.0, size, "xx8")
TierAP("P2", 0, 41.5, gp(), "x8")

TierAP("C1", 3, 42.0, mp("P1", "P2"):add(girdle), "xx8")
TierAP("C2", 0, 34.5, gp(), "x8")

-- Highlight the upper apex of C1 in bright gold using show()!
show(mp("C1"), "#ffd166")

TierAP("C3", 6, 22.0, mp("C1"), "x8")
TierAP("T",  0, 0.0,  mp("C2"), "x1")
4. edge(F1, F2) and ep(edge, ratio) — Walking Along a Ridge
Sometimes you want to place a cut partway along a ridge between two facets (0.0 = first endpoint, 0.5 = exact midpoint, 1.0 = second endpoint):
edge(FacetA, FacetB)finds the 3D line segment shared by two facets (for example,edge(P1:0, P1:24)oredge(C1:3, C1:93)).ep(edge, ratio)(orep(PointA, PointB, ratio)) linearly interpolates a 3D point atratio(0.0to1.0) along that segment:
Try dragging/changing ratio = 0.55 to 0.35 or 0.75 in the playground below and clicking Run:
name  = "Edge Interpolation (ep) Demo"
ri    = 1.76
gear  = 96
color = "#a78bfa"

P1 0  @ 42.0 : cp() x4
G1 0  @ 90.0 : size x4
C1 0  @ 40.0 : mp(P1, G1) + girdle x4

// Pick a point 55% of the way up the ridge between C1:0 and C1:24
ratio = 0.55
ridge = edge(C1:0, C1:24)
targetPt = ep(ridge, ratio)
show(ridge[0], "#38bdf8")
show(ridge[1], "#38bdf8")
show(targetPt, "#f43f5e")

// Cut corner facets C2 at 32° passing right through targetPt!
C2 12 @ 32.0 : targetPt x4
T  0  @ 0.0  : mp(C2) x1
-- lua script
name("Edge Interpolation (ep) Demo")
ri(1.76)
gear(96)
color("#a78bfa")

TierAP("P1", 0, 42.0, cp(), "x4")
TierAD("G1", 0, 90.0, size, "x4")
TierAP("C1", 0, 40.0, mp("P1", "G1"):add(girdle), "x4")

local ratio = 0.55
local ridge = edge("C1:0", "C1:24")
local targetPt = ep(ridge, ratio)
show(ridge[1], "#38bdf8")
show(ridge[2], "#38bdf8")
show(targetPt, "#f43f5e")

TierAP("C2", 12, 32.0, targetPt, "x4")
TierAP("T",  0,  0.0,  mp("C2"), "x1")
5. prz(), fred(), grid(), and surface(u, v) — Advanced Construction Helpers
A. prz(point, [facet]) — Vertical Z-Projection
Drops a vertical line parallel to the Z-axis through (point.x, point.y) and returns the 3D point where it hits either a specific facet plane (prz(pt, C1:0)) or the top/bottom surface of the stone (prz(pt)).
B. fred(p1, p2, edge) — Top-Down Visual Crossover ("Fred Van Sant Point")
Named in honor of master cutter Fred Van Sant: when you draw an imaginary construction line from p1 to p2 looking straight down at the Crown (X-Y plane), fred(p1, p2, edge) returns the exact 3D point on edge where that construction line crosses over it!
C. grid(cols, rows, x, y) and surface(u, v) — Proportional Step & Checkerboard Cuts
How do you cut a Checkerboard, Pixel Cut, or Multi-Tier Step Cut where the facets are spaced in even proportional fractions across the stone's width and length—even when the stone's aspect ratio (L/W) changes?
surface(u, v)takes normalized coordinates(u, v)across the stone's horizontal bounding box and projects them vertically onto the current 3D crown or pavilion surface!- Pairing
surface(u, v)with Style 3 (Point-Pair) or Style 2 (Angle + Point) lets you space step tiers or checkerboard squares with mathematical perfection.
Try editing the step fractions 5/6 and 3/4 in the surface() Asscher Step Cut playground below and clicking Run:
name  = "Proportional Surface() Asscher Step Cut"
ri    = 1.54
gear  = 96
color = "#34d399"
SquareTr(42, 0.30)

// Multi-tier step pavilion using surface() fractions
P1 0  @ 52.0 : cp() x4
P2 0  @ 44.0 : surface(5/6, 0.5) x4
P3 0  @ 36.0 : surface(4/6, 0.5) x4
P4 12 @ 52.0 : gp() x4
P5 12 @ 44.0 : mp(P4, P1) x4

// Crown steps anchored via surface() fractions!
C1 0  @ 42.0 : gp() + girdle x4
C2 0  @ 30.0 : surface(9/10, 0.5) x4
C3 0  @ 20.0 : surface(8/10, 0.5) x4
T  0  @ 0.0  : surface(3/4, 0.5) x1

C4 12 @ 42.0 : gp() + girdle x4
C5 12 @ 30.0 : mp(C1, C4) x4
C6 12 @ 20.0 : mp(C2, C5) x4
-- lua script
name("Proportional Surface() Asscher Step Cut")
ri(1.54)
gear(96)
color("#34d399")
SquareTr(42, 0.30)

TierAP("P1", 0,  52.0, cp(), "x4")
TierAP("P2", 0,  44.0, surface(5/6, 0.5), "x4")
TierAP("P3", 0,  36.0, surface(4/6, 0.5), "x4")
TierAP("P4", 12, 52.0, gp(), "x4")
TierAP("P5", 12, 44.0, mp("P4", "P1"), "x4")

TierAP("C1", 0,  42.0, gp():add(girdle), "x4")
TierAP("C2", 0,  30.0, surface(9/10, 0.5), "x4")
TierAP("C3", 0,  20.0, surface(8/10, 0.5), "x4")
TierAP("T",  0,  0.0,  surface(3/4, 0.5), "x1")

TierAP("C4", 12, 42.0, gp():add(girdle), "x4")
TierAP("C5", 12, 30.0, mp("C1", "C4"), "x4")
TierAP("C6", 12, 20.0, mp("C2", "C5"), "x4")
Next, let’s combine variables, trigonometry, 3D vectors/planes, and RI-driven optical formulas in Chapter 13: Math, Variables, Vectors, Planes & RI-Adaptive Optics.
Chapter 13: Math, Variables, Vectors, Planes & RI-Adaptive Optics
Most simple designs only need numbers and point helpers (cp(), gp(), mp()). When you want to write a material-adaptive cut that recalculates its own Pavilion angles from ri, or construct a custom CAM outline using 3D geometry, ProFacet gives you a rich mathematical toolkit in both FSL and Lua.
1. Variables, Optimizable Numbers (+/- & val()) & Arrays
A. Defining Variables & Optimizable Ranges
- In FSL: Assign any value directly with
=(noletorlocalkeyword needed), and attach+/-to any number that the GPU Optimizer is allowed to tune:baseAngle = 41.5 +/- 1.5 stepDelta = 1.8 - In Lua: Use standard
localvariables, and wrap optimizable numbers inval(initial, delta)(orval(initial, "2%")/val(initial, min, max)):local baseAngle = val(41.5, 1.5) local stepDelta = 1.8
B. Arrays & Numeric Sequences (Math.range)
In FSL, square brackets create zero-indexed arrays, and Math.range(start, end, step) generates a sequence of numbers from start (inclusive) up to end (exclusive):
teeth = [0, 12, 24, 36](teeth[0]is0,teeth.length()is4)steps = Math.range(0, 8, 1)expands to[0, 1, 2, 3, 4, 5, 6, 7]
In Lua, curly braces create 1-indexed tables:
local teeth = {0, 12, 24, 36}(teeth[1]is0,#teethis4)
2. Trigonometry & the Math Namespace
Both FSL (Math.*) and Lua (math.*) provide a complete set of trigonometric and algebraic functions, along with built-in degree/radian converters:
| Operation | FSL (Math.*) | Lua (math.*) |
|---|---|---|
| Degrees ↔ Radians | Math.toRadians(deg), Math.toDegrees(rad) | math.rad(deg), math.deg(rad) |
| Sine / Cosine / Tangent | Math.sin(rad), Math.cos(rad), Math.tan(rad) | math.sin(rad), math.cos(rad), math.tan(rad) |
| Inverse Trig | Math.asin(x), Math.acos(x), Math.atan(x), Math.atan2(y, x) | math.asin(x), math.acos(x), math.atan(y, x) |
| Square Root & Power | Math.sqrt(x), Math.pow(base, exp) | math.sqrt(x), base ^ exp |
| Absolute, Min, Max | Math.abs(x), Math.min(a, b), Math.max(a, b) | math.abs(x), math.min(a, b), math.max(a, b) |
| Rounding | Math.floor(x), Math.ceil(x), Math.round(x) | math.floor(x), math.ceil(x), math.floor(x + 0.5) |
| Range Generator | Math.range(start, end, step) | for i = start, stop, step do ... end |
| Constants | Math.PI (3.14159265...), Math.E | math.pi, math.exp(1) |
3. RI-Adaptive Pavilion Design: Computing Angles from ri
Remember from Chapter 1 that a gemstone's critical angle is . Because ri is readable right inside your script, you can compute dynamically and set your Pavilion culet and break angles to automatically track the material!
Try changing 1.54 (Quartz) to 1.76 (Sapphire) or 2.42 (Diamond) in the live playground below and clicking Run—watch print() log the new angles and reshape the Pavilion cone automatically:
name  = "RI-Adaptive Portuguese Cut"
ri    = 1.54   // Try 1.54 (Quartz), 1.76 (Sapphire), or 2.42 (Diamond)!
gear  = 96
cube  = 3
color = "#38bdf8"

G1 0 @ 90.0 : size x16

// Compute critical angle in degrees and set culet 2.2° above critical!
crit  = Math.toDegrees(Math.asin(1.0 / ri))
culet = Math.max(39.5, crit + 2.2)
print("RI:", ri, "-> Critical Angle:", Math.round(crit * 100) / 100, "-> Culet Angle:", Math.round(culet * 100) / 100)

// 3-tier Pavilion stepping down to the RI-adaptive culet
P1 0 @ (culet + 12.0) : cp() x16
P2 3 @ (culet + 6.0)  : gp() x16
P3 0 @ culet          : mp(P1) x16

// Crown tiers
C1 0 @ 44.0 : mp(P1) + girdle x16
C2 3 @ 39.0 : gp() x16
C3 0 @ 32.0 : mp(C1) x16
T  0 @ 0.0  : mp(C2) x1
-- lua script
name("RI-Adaptive Portuguese Cut")
local mat_ri = 1.54 -- Try 1.54, 1.76, or 2.42!
ri(mat_ri)
gear(96)
cube(3)
color("#38bdf8")

TierAD("G1", 0, 90.0, 1.0, "x16")

-- Compute critical angle in degrees
local crit  = math.deg(math.asin(1.0 / mat_ri))
local culet = math.max(39.5, crit + 2.2)
print("RI:", mat_ri, "-> Critical Angle:", math.floor(crit * 100 + 0.5) / 100, "-> Culet Angle:", math.floor(culet * 100 + 0.5) / 100)

TierAP("P1", 0, culet + 12.0, cp(), "x16")
TierAP("P2", 3, culet + 6.0,  gp(), "x16")
TierAP("P3", 0, culet,        mp("P1"), "x16")

TierAP("C1", 0, 44.0, mp("P1"):add(girdle), "x16")
TierAP("C2", 3, 39.0, gp(), "x16")
TierAP("C3", 0, 32.0, mp("C1"), "x16")
TierAP("T",  0, 0.0,  mp("C2"), "x1")
4. 3D Geometric Primitives: Point, Vector, and Plane
When writing custom CAM outlines or geometric constructions, you can work directly with 3D points, vectors, and planes in both FSL and Lua:
| Type & Constructor | Properties & Operations | FSL & Lua Examples |
|---|---|---|
Point(x, y, z) | .x, .y, .z, .distance(p2)• FSL: p + v -> Point, p1 - p2 -> Vector• Lua: p:add(v) -> Point, p1:sub(p2) -> Vector | FSL: shifted = gp() + Vector(0, 0, 0.03)Lua: local shifted = gp():add(Vector(0, 0, 0.03)) |
Vector(x, y, z) | .x, .y, .z, .length(), .normalize().dot(v2), .cross(v2)• FSL: v * s, v / s, -v• Lua: v:mul(s), v:div(s), v:unm() | FSL: n = Vector(0, 1, -1).normalize()Lua: local n = Vector(0, 1, -1):normalize() |
Plane(origin, normal)Plane(p1, p2, p3) | Constructs a 3D plane from an origin Point + normal Vector, or from 3 non-collinear Points..origin, .normal, .distance(pt), .project(pt), .intersect(rayOrigin, rayDir) | pl = Plane(Point(0, 0, 0), Vector(0, 0, 1))hit = pl.intersect(Point(0.5, 0, 1), Vector(0, 0, -1)) |
Visual Debugging with show() and print()
print(val1, val2, ...): Logs numbers, strings, points, or stone metrics to the Script Output console (Cmd/Ctrl + Lin Studio, or right below the playground in this book).show(point_or_edge, "label", "#hexColor"): Renders a bright 3D marker at aPointor a glowing line along anedge()right inside the 3D Viewport!
Enforcing Geometric Guardrails with assert(condition, message)
assert(expr, "reason"): Verifies thatexpristrue. Ifexprisfalse:- During normal editing, it stops and highlights the assertion message.
- During a GPU Optimization run, any candidate stone that violates an
assert()is automatically penalized and rejected!
Next, see how FSL’s functional programming features (=> lambdas, map, filter, reduce, and forEach) let you build multi-tier patterns and even the Platonic Solids in Chapter 14: Functional Programming in FSL — Lambdas & Pipelines.
Chapter 14: Functional Programming in FSL — Lambdas & Pipelines
Why doesn't FSL use for (int i = 0; i < 8; i++) or while loops?
Because a gemstone specification is naturally a functional pipeline: you start with a sequence of step numbers, gear indices, or angles (Math.range(0, 4, 1)), transform them mathematically, and turn each entry into a facet tier. By keeping arrays immutable and providing clean arrow functions (=>) with .forEach(), .map(), .filter(), and .reduce(), FSL lets you express complex multi-tier cuts—including all of ProFacet's built-in CAM preforms—in a handful of declarative lines.
(And remember: if you ever prefer traditional imperative for and while loops, you can switch to Lua at any time—covered in Chapter 16!)
1. Arrow Functions (=>), Default Parameters & Closures
In FSL, you define a function by listing its parameters in parentheses followed by =>:
- Single-Expression Function:
degToTooth = (deg) => Math.round(deg / 360.0 * gear) - Default Parameter Values:
makeStepAngle = (step, base = 42.0, delta = 3.0) => base - step * delta - Multi-Line Block Function (
{ ... }) & Dynamic Tier Names (concat): Inside curly braces{ ... }, you can execute multiple statements (including cutting tiers!) and useconcat(Prefix, k)to generate numbered tier names (P1,P2,C1,C2) dynamically:cutStepPair = (k, pavAngle, crownAngle) => { concat(P, k) 0 @ pavAngle : gp() x4 concat(C, k) 0 @ crownAngle : gp() + girdle x4 } - Conditional Expressions (
? :andcond): Use the inline ternary operatorcondition ? trueVal : falseValfor expressions, orcond(condition, () => trueAction, () => falseAction)when branching between actions.
Functions in FSL are first-class closures: they capture variables from their surrounding scope (gear, ri, girdle) and can be passed directly into array methods.
2. Array Pipeline Methods Reference
Given any array (such as [45.0, 42.0, 39.0]) or numeric sequence generated with Math.range(start, end, step), FSL provides chainable functional methods:
| Method / Helper | Example | What It Does |
|---|---|---|
Math.range(start, end, step) | Math.range(0, 4, 1) | Generates [0, 1, 2, 3] (start inclusive, end exclusive; step defaults to 1). |
.forEach((item, idx) => ...) | Math.range(0, 3).forEach(i => ...) | Calls the function once for each element (ideal for cutting a sequence of tiers!). |
.map((item, idx) => ...) | Math.range(1, 5).map(k => 38.0 + k * 2.5) | Transforms each element and returns a new array of the same length. |
.filter((item) => ...) | Math.range(0, 96).filter(t => t % 12 == 0) | Returns a new array containing only elements where the predicate returns true. |
.reduce((acc, item) => ..., init) | angles.reduce((sum, a) => sum + a, 0) | Folds the array from left to right into a single accumulated value. |
.average() | angles.average() / pts.average() | Computes the mean of an array of numbers, or the 3D centroid of an array of Points. |
concat(a, b) | concat("P", i + 1) / concat(arr1, arr2) | Concatenates strings/identifiers into a dynamic tier name, or joins two arrays. |
3. Interactive Example: Generating a Multi-Tier Step Cut with .forEach()
3. Generating Multi-Tier Cuts with Math.range() + concat()
Look how clean it is to generate a 5-Tier Functional Portuguese Cut in both FSL (using Math.range(0, 3).forEach(...) + concat(...)) and Lua (using for i = 0, 2 do ... end + TierAP(...)). Try changing the step decrement 5.0 to 4.5 in the playground below and clicking Run:
name   = "Functional Portuguese Cut"
ri     = 1.76
gear   = 96
cube   = 3
color  = "#38bdf8"

G1 0 @ 90.0 : size x16
P1 0 @ 62.0 : cp() x16
P2 3 @ 57.0 : gp() x16

// Inner pavilion tiers P3..P5 generated via functional pipeline!
Math.range(0, 3).forEach(i => {
  idx   = (i % 2) * 3
  angle = 52.0 - i * 5.0
  concat(P, i + 3) idx @ angle : mp(concat(P, i + 1)) x16
})

C1 0 @ 46.0 : mp(P1) + girdle x16
C2 3 @ 41.0 : gp() x16

// Inner crown tiers C3..C5 generated via functional pipeline!
Math.range(0, 3).forEach(i => {
  idx   = (i % 2) * 3
  angle = 36.0 - i * 5.0
  concat(C, i + 3) idx @ angle : mp(concat(C, i + 1)) x16
})

T 0 @ 0.0 : mp(C4) x1
-- lua script
name("Functional Portuguese Cut")
ri(1.76)
gear(96)
cube(3)
color("#38bdf8")

TierAD("G1", 0, 90.0, size, "x16")
TierAP("P1", 0, 62.0, cp(), "x16")
TierAP("P2", 3, 57.0, gp(), "x16")

-- Inner pavilion tiers P3..P5 generated via Lua loop!
for i = 0, 2 do
  local idx   = (i % 2) * 3
  local angle = 52.0 - i * 5.0
  TierAP("P" .. (i + 3), idx, angle, mp("P" .. (i + 1)), "x16")
end

TierAP("C1", 0, 46.0, mp("P1"):add(girdle), "x16")
TierAP("C2", 3, 41.0, gp(), "x16")

-- Inner crown tiers C3..C5 generated via Lua loop!
for i = 0, 2 do
  local idx   = (i % 2) * 3
  local angle = 36.0 - i * 5.0
  TierAP("C" .. (i + 3), idx, angle, mp("C" .. (i + 1)), "x16")
end

TierAP("T", 0, 0.0, mp("C4"), "x1")
4. Mathematical Showcase: Cutting a Regular Dodecahedron (12 Pentagons)
Because ProFacet is a true 3D half-space polyhedron kernel, you can slice exact Platonic Solids directly from mathematical formulas! A regular Dodecahedron has 12 regular pentagonal faces: a flat top and bottom face at 0°, and two antiprism rings of 5 faces inclined at , offset by (gear / 10 teeth) on an 80-tooth gear:
name  = "Regular Dodecahedron (12 Pentagons)"
ri    = 2.42
gear  = 80
color = "#a78bfa"

// Distance from center to each pentagonal face
w = 0.75

// Exact dihedral ring inclination: atan(2) ≈ 63.4349°
ringAngle = Math.toDegrees(Math.atan(2.0))
offset    = gear / 10

// Lower hemisphere (Pavilion: bottom pentagon + 5 lower ring faces)
P1 0      @ 0.0       : w x1
P2 offset @ ringAngle : w x5

// Upper hemisphere (Crown: 5 upper ring faces + top pentagon)
C1 0 @ ringAngle : w x5
T  0 @ 0.0       : w x1
-- lua script
name("Regular Dodecahedron (12 Pentagons)")
ri(2.42)
gear(80)
color("#a78bfa")

local w = 0.75
local ringAngle = math.deg(math.atan(2.0))
local offset    = gear() / 10

-- Lower hemisphere (Pavilion)
TierAD("P1", 0,      0.0,       w, "x1")
TierAD("P2", offset, ringAngle, w, "x5")

-- Upper hemisphere (Crown)
TierAD("C1", 0, ringAngle, w, "x5")
TierAD("T",  0, 0.0,       w, "x1")
Next, learn how your script can inspect the live 3D polyhedron at any point during execution—querying table percentage, depth percentage, facet counts, and vertices—in Chapter 15: Inspecting the Virtual Stone — The stone() API.
Chapter 15: Inspecting the Virtual Stone — The stone() API
What if your script wants to ask a question about the stone it has cut so far—such as:
- "What is the current Table Percentage (
tablePercentage), Total Depth Percentage (depthPercentage), or Length-to-Width Ratio (lengthWidthRatio)?" - "Is the girdle continuous and level around the stone (
isGirdleEven,isGirdleOK)?" - "How many surviving facets (
facetCount) and vertices (vertexCount) are on the stone right now?"
Calling stone() anywhere in an FSL or Lua script captures a live reflection snapshot of the 3D gemstone polyhedron at that exact step in the cutting sequence!
1. Stone-Level Properties Returned by stone()
When you write s = stone() (FSL) or local s = stone() (Lua), the returned object exposes the following overall metrics and arrays:
| Property | Type | Description |
|---|---|---|
s.name | String | Current gemstone title. |
s.refractiveIndex | Number | Active refractive index (ri). |
s.facetCount | Number | Total number of surviving polygon faces on the 3D polyhedron. |
s.vertexCount | Number | Total number of unique 3D vertices on the polyhedron. |
s.tablePercentage | Number | Width of the flat 0° Table (T) expressed as a percentage of stone width (0–100). |
s.depthPercentage | Number | Total stone height divided by stone width (height / width * 100). |
s.crownHeight | Number | Vertical height of the Crown above the girdle plane (as % of width). |
s.pavilionDepth | Number | Vertical depth of the Pavilion below the girdle plane (as % of width). |
s.girdleThickness | Number | Average vertical thickness of the 90° Girdle band (as % of width). |
s.lengthWidthRatio | Number | Ratio of longest horizontal caliper dimension to narrowest (1.0 for rounds/squares). |
s.compactness | Number | Volumetric efficiency ratio comparing the polyhedron volume to its bounding box. |
s.isGirdleEven | Boolean | true if all girdle segments have consistent vertical height around the stone. |
s.isGirdleOK | Boolean | true if the girdle forms a valid, closed perimeter without zero-thickness overcuts. |
s.vertices | Array<Point> | List of all unique 3D vertices (Point(x, y, z)) on the polyhedron. |
s.faces | Array<Face> | List of every surviving 3D polygon face on the polyhedron (see below). |
2. Inspecting Individual Faces (s.faces)
Each entry f in s.faces represents a single surviving polygon face on the 3D stone:
| Face Property | Type | Description |
|---|---|---|
f.tier | String | Tier name that created this facet (e.g., "P1", "C2", "T"). |
f.index | Number | Gear tooth index of this specific facet (e.g., 0, 12, 24). |
f.angle | Number | Mast tilt angle (0°–90°) of the facet. |
f.area | Number | 3D surface area of the polygon. |
f.centroid | Point | 3D center of mass (Point(x, y, z)) of the facet polygon. |
f.normal | Vector | Outward-pointing unit normal vector (Vector(x, y, z)). |
f.vertices | Array<Point> | Ordered loop of 3D Point vertices around the facet perimeter. |
f.isPavilion / f.isCrown / f.isGirdle | Boolean | Region classification flags for filtering faces by hemisphere. |
3. Interactive Example: Querying Metrics & Enforcing Optimization Constraints
One of the most powerful uses of stone() is combining it with assert() to keep the GPU Performance Optimizer within practical gem-cutting boundaries—for example, ensuring the Table Percentage stays between 45% and 68%, total depth stays below 75%, and the girdle remains valid (s.isGirdleOK)!
Click Run (Ctrl+Enter / Cmd+Enter) in the playground below and look at the Script Output panel to see the live stone() report:
name  = "Stone() Reflection & Constraint Demo"
ri    = 1.76
gear  = 96
color = "#38bdf8"

P1 3 @ 43.00 +/- 1.0 : cp() xx8
G1 3 @ 90.00         : size xx8
P2 0 @ 41.50 +/- 1.5 : gp() x8
C1 3 @ 42.00 +/- 2.0 : mp(P1, P2) + girdle xx8
C2 0 @ 34.50 +/- 1.5 : gp() x8
C3 6 @ 22.00 +/- 1.5 : mp(C1) x8
T  0 @ 0.00          : mp(C2) x1

// Capture live 3D stone snapshot
s = stone()
print("Gem Name:", s.name, "| RI:", s.refractiveIndex)
print("Total Facets:", s.facetCount, "| Vertices:", s.vertexCount)
print("Table %:", Math.round(s.tablePercentage * 10) / 10, "| Depth %:", Math.round(s.depthPercentage * 10) / 10)
print("Girdle OK:", s.isGirdleOK)

// Guardrails enforced during GPU Optimization:
assert(s.isGirdleOK, "Girdle must remain continuous and valid")
assert(s.tablePercentage >= 45.0, "Table became too small (< 45%)")
assert(s.tablePercentage <= 68.0, "Table became too wide (> 68%)")
assert(s.depthPercentage <= 75.0, "Stone became too deep (> 75%)")
-- lua script
name("Stone() Reflection & Constraint Demo")
ri(1.76)
gear(96)
color("#38bdf8")

TierAP("P1", 3, val(43.00, 1.0), cp(), "xx8")
TierAD("G1", 3, 90.00,           size, "xx8")
TierAP("P2", 0, val(41.50, 1.5), gp(), "x8")
TierAP("C1", 3, val(42.00, 2.0), mp("P1", "P2"):add(girdle), "xx8")
TierAP("C2", 0, val(34.50, 1.5), gp(), "x8")
TierAP("C3", 6, val(22.00, 1.5), mp("C1"), "x8")
TierAP("T",  0, 0.00,            mp("C2"), "x1")

-- Capture live 3D stone snapshot
local s = stone()
print("Gem Name:", s.name, "| RI:", s.refractiveIndex)
print("Total Facets:", s.facetCount, "| Vertices:", s.vertexCount)
print("Table %:", math.floor(s.tablePercentage * 10 + 0.5) / 10, "| Depth %:", math.floor(s.depthPercentage * 10 + 0.5) / 10)
print("Girdle OK:", s.isGirdleOK)

-- Guardrails enforced during GPU Optimization:
assert(s.isGirdleOK, "Girdle must remain continuous and valid")
assert(s.tablePercentage >= 45.0, "Table became too small (< 45%)")
assert(s.tablePercentage <= 68.0, "Table became too wide (> 68%)")
assert(s.depthPercentage <= 75.0, "Stone became too deep (> 75%)")
Next, let’s dive into the final chapter of Part II—Chapter 16: Complete Lua Scripting Guide — Loops, Tables & Procedural Cuts—to see how Lua unlocks full algorithmic gemstone design.
Chapter 16: Complete Lua Scripting Guide — Loops, Tables & Procedural Cuts
Throughout Part II, you have seen how FSL and Lua sit side by side atop ProFacet’s 3D geometry kernel. While FSL shines for declarative, diagram-style cuts and functional pipelines, Lua (-- lua script) gives you a full imperative programming language with for and while loops, mutable tables, and modular helper functions.
This chapter is your complete reference and cookbook for scripting gemstones in Lua.
1. Activating Lua Mode & Global Settings
Start any script with -- lua script on line 1. ProFacet’s Lua environment exposes global configuration functions that mirror FSL’s top-of-file metadata (calling gear() or size() with no arguments returns the current setting):
-- lua script
name("Procedural Sapphire")
ri(1.76)
gear(96)
cw(true)
color("#38bdf8")
absorption(1.2)
notes("Generated algorithmically in Lua")
tags("lua, procedural, sapphire")

-- Built-in girdle offset vector (3% of radius along +Z) is pre-defined as `girdle`,
-- or you can customize it:
girdle = Vector(0, 0, 0.03)
2. Cutting Facet Tiers: TierAD, TierAP, TierPP & val()
In Lua, you cut facet tiers using three dedicated functions corresponding to ProFacet’s three design styles:
A. The Three Tier Constructors
TierAD(name, index, angle, depth, [sym], [opts])— Angle + Numeric Depth (Style 1):-- Cut 16 vertical girdle facets at distance 1.0 from center: TierAD("G1", 0, 90.0, 1.0, "x16")TierAP(name, index, angle, point, [sym], [opts])— Angle + Landmark Point (Style 2):-- Cut 8 pavilion mains at 41.5° to the centerpoint cp(): TierAP("P1", 0, 41.5, cp(), "x8") -- Cut 16 mirrored crown breaks at 42.0° to the top of the girdle (0 ± 3): TierAP("C1", 0, 42.0, gp():add(girdle), "x8 m 3")TierPP(name, index, point1, point2, [sym], [opts])— Point + Point (Style 3, Angle Computed Automatically):-- Slice a plane at tooth 12 passing through cp() and 85% down the PF1:0 / G1:0 edge: TierPP("PF2", 12, cp(), ep(edge("PF1:0", "G1:0"), 0.85), "x4")
B. Symmetry Strings & Optional Options Table (opts)
| Argument | Examples | Meaning |
|---|---|---|
index | 0, 3, or {6, 30, 54} | Single gear tooth or a Lua table of explicit gear teeth. |
sym | "x8", "x8 m 3", "xx8", "x1" | Rotational symmetry (xN), mirror delta ±M around axis index (xN m M), or zero-axis mirror of cut tooth index (xxN). If omitted, inherits the previous tier's symmetry. |
opts | {frosted = true, color = "#f43f5e", side = "up", primary_cut_index = 6} | Optional table of per-tier overrides (matte finish, custom RGB color, explicit hemisphere "up"/"down", or primary reference tooth). |
C. Optimizable Parameters in Lua (val(...))
To mark any angle, depth, or variable for the GPU Performance Optimizer (matching +/- in FSL), wrap the number in val(...):
val(41.5, 1.5)— Equivalent to41.5 +/- 1.5in FSL (explores[40.0, 43.0]).val(42.0, "2%")— Equivalent to42.0 +/- 2%in FSL.val(41.5, 40.0, 43.0)— Explicit(initial, min, max)bounds.
3. Point Helpers & 3D Vector Methods in Lua
In Lua, tier and facet names passed to mp() and edge() are strings ("P1", "C1:0", "!G1"), and 3D Point / Vector arithmetic uses explicit methods:
| Helper / Type | Lua Syntax | Notes |
|---|---|---|
| Center & Girdle Points | cp(), gp() | Identical to FSL. |
| Meetpoints | mp("P1", "G1", "!PF1") | Pass tier names, "Tier:Index" strings, or "!Exclude" strings. |
| Edges & Interpolation | edge("C1:0", "C1:6")ep(edge("C1:0", "C1:6"), 0.5) | ep(p1, p2, t) also interpolates between any two Point objects. |
| Projections & Grids | prz(pt) / prz(pt, "C1:0")fred(p1, p2, edge("P1:0", "P1:12"))grid(cols, rows, x, y)surface(index, frac) | Full parity with FSL. Use resolve(pt) if you need to inspect .x, .y, .z on a lazy point helper before passing it to a tier. |
3D Point & Vector | Point(x, y, z)Vector(x, y, z) | Methods: p:add(v), p:sub(v), p1:distance(p2), v:mul(s), v:div(s), v:unm(), v:length(), v:normalize(), v:dot(v2), v:cross(v2). |
| CAM Preforms | Round(43, 16), Oval(43, 1.35, 5), RectTr(1.4, 43, 0.28, 0)… | All built-in CAM functions are available as global Lua functions. |
4. Cookbook Recipe 1: Parametric N-Tier Portuguese Cut Generator
In a classic Portuguese cut, multiple tiers of rhomboid facets step down from the girdle to the culet. Below, compare how FSL (Math.range) and Lua (for k = 2, pavTiers do) generate an interlocking 4-tier Portuguese Pavilion cone and Crown wheel:
name  = "Procedural N-Tier Portuguese Cut"
ri    = 1.76
gear  = 96
cube  = 3
color = "#ec4899"

G1 0 @ 90.0 : size x16

// 1. Base Pavilion cone & girdle break (x16)
P1 0 @ 62.0 : cp() x16
P2 3 @ 57.0 : gp() x16

// Each interlocking Pavilion tier Pk meets mp(P(k - 2))!
Math.range(3, 6).forEach(k => {
  idx  = ((k - 1) % 2) * 3
  ang  = 62.0 - (k - 1) * 5.0
  prev = concat(P, k - 2)
  concat(P, k) idx @ ang : mp(prev) x16
})

// 2. Base Crown tiers + interlocking Crown wheel C3..C5
C1 0 @ 46.0 : mp(P1) + girdle x16
C2 3 @ 41.0 : gp() x16

Math.range(3, 6).forEach(k => {
  idx  = ((k - 1) % 2) * 3
  ang  = 46.0 - (k - 1) * 5.0
  prev = concat(C, k - 2)
  concat(C, k) idx @ ang : mp(prev) x16
})

T 0 @ 0.0 : mp(C4) x1
-- lua script
name("Procedural N-Tier Portuguese Cut")
ri(1.76)
gear(96)
cube(3)
color("#ec4899")

TierAD("G1", 0, 90.0, 1.0, "x16")

-- 1. Base Pavilion cone & girdle break (x16)
TierAP("P1", 0, 62.0, cp(), "x16")
TierAP("P2", 3, 57.0, gp(), "x16")

-- Each interlocking Pavilion tier Pk meets mp(P(k - 2))!
for k = 3, 5 do
  local idx  = ((k - 1) % 2) * 3
  local ang  = 62.0 - (k - 1) * 5.0
  local prev = "P" .. (k - 2)
  TierAP("P" .. k, idx, ang, mp(prev), "x16")
end

-- 2. Base Crown tiers + interlocking Crown wheel C3..C5
TierAP("C1", 0, 46.0, mp("P1"):add(girdle), "x16")
TierAP("C2", 3, 41.0, gp(), "x16")

for k = 3, 5 do
  local idx  = ((k - 1) % 2) * 3
  local ang  = 46.0 - (k - 1) * 5.0
  local prev = "C" .. (k - 2)
  TierAP("C" .. k, idx, ang, mp(prev), "x16")
end

TierAP("T", 0, 0.0, mp("C4"), "x1")
5. Cookbook Recipe 2: Algorithmic Vortex / Spiral Turbine Crown
By computing individual tooth indices inside a loop, you can create chiral (spiral/vortex) cuts where each successive tier rotates by +2 gear teeth clockwise relative to the tier below it:
name  = "Spiral Vortex Turbine"
ri    = 2.15
gear  = 96
color = "#38bdf8"

// High-brilliance 16-facet pavilion & girdle
P1 3 @ 43.0 : cp() xx8
G1 3 @ 90.0 : size xx8
P2 0 @ 41.5 : gp() x8

// Spiral Crown: each tier rotates +2 teeth clockwise and steps shallower!
C1 3 @ 43.0 : mp(P1, P2) + girdle xx8

spiralSteps = 3
Math.range(1, spiralSteps + 1).forEach(step => {
  tooth = (step * 2) % 96
  angle = 36.0 - step * 6.0
  frac  = 1.0 - step * 0.14
  concat(C, step + 1) tooth @ angle : surface(frac, 0.5) x8
})

T 0 @ 0.0 : surface(0.46, 0.5) x1
-- lua script
name("Spiral Vortex Turbine")
ri(2.15)
gear(96)
color("#38bdf8")

-- High-brilliance 16-facet pavilion & girdle
TierAP("P1", 3, 43.0, cp(), "xx8")
TierAD("G1", 3, 90.0, size, "xx8")
TierAP("P2", 0, 41.5, gp(), "x8")

-- Spiral Crown: each tier rotates +2 teeth clockwise and steps shallower!
TierAP("C1", 3, 43.0, mp("P1", "P2"):add(girdle), "xx8")

local spiralSteps = 3
for step = 1, spiralSteps do
  local tooth = (step * 2) % 96
  local angle = 36.0 - step * 6.0
  local frac  = 1.0 - step * 0.14
  TierAP("C" .. (step + 1), tooth, angle, surface(frac, 0.5), "x8")
end

TierAP("T", 0, 0.0, surface(0.46, 0.5), "x1")
End of Part II — Explore the Showcase & Reference Appendices!
You now have complete command of both Part I (The Visual Studio & Optical Workbench) and Part II (FSL & Lua Parametric Scripting).
In the Appendices that follow, you can explore:
- Appendix A: 10 Complete Interactive Cut Recipes (ready to run, edit, and copy into your studio!)
- Appendix B: Studio Path-Traced Render Gallery
- Appendix C: Faceting Glossary, Troubleshooting & FAQ
Appendix A: 10 Complete Interactive Cut Recipes
Every recipe below is a complete, battle-tested gemstone specification with paired FSL and Lua implementations (including matching optimizable parameters +/- and val()) that you can run, edit, and inspect right on this page—or copy into ProFacet Studio to print or optimize for your favorite rough crystal.
1. Standard Round Brilliant (Sapphire / Ruby, RI = 1.76)
The benchmark 57-facet brilliant cut tuned for Corundum (RI = 1.76), with optimizable angle ranges (+/- in FSL, val() in Lua):
name  = "Sapphire Standard Round Brilliant"
ri    = 1.76
gear  = 96
color = "#38bdf8"

P1 3 @ 43.00 +/- 1.0 : cp() xx8
G1 3 @ 90.00         : size xx8
P2 0 @ 41.50 +/- 1.5 : gp() x8
C1 3 @ 42.00 +/- 2.0 : mp(P1, P2) + girdle xx8
C2 0 @ 34.50 +/- 1.5 : gp() x8
C3 6 @ 22.00 +/- 1.5 : mp(C1) x8
T  0 @ 0.00          : mp(C2) x1
-- lua script
name("Sapphire Standard Round Brilliant")
ri(1.76)
gear(96)
color("#38bdf8")

TierAP("P1", 3, val(43.00, 1.0), cp(), "xx8")
TierAD("G1", 3, 90.00,           size, "xx8")
TierAP("P2", 0, val(41.50, 1.5), gp(), "x8")
TierAP("C1", 3, val(42.00, 2.0), mp("P1", "P2"):add(girdle), "xx8")
TierAP("C2", 0, val(34.50, 1.5), gp(), "x8")
TierAP("C3", 6, val(22.00, 1.5), mp("C1"), "x8")
TierAP("T",  0, 0.00,            mp("C2"), "x1")
2. Classic Emerald Step Cut (RectTr, RI = 1.54)
A 3-step Pavilion and 3-step Crown built on a 1.50× truncated rectangle preform (RectTr(1.5, 40, 0.4)), using surface() helper points so that all step angles remain independently optimizable without breaking facet proportions:
name = "Emerald Cut"
ri = 1.54
gear = 96
color = "#10b981"

// Pavilion & Crown step angles (all optimizable)
ang_p = [ 53.0306 +/- 2%, 33.0 +/- 2.0, 22.7648 +/- 2.0 ]
ang_c = [ 45.0 +/- 2.0, 27.5353 +/- 2.0, 27.5 +/- 2.0 ]

// CAM truncated rectangle
RectTr(1.5, 40, 0.4)

P1 0  @ ang_p[0] : cp() x2
P2 0  @ ang_p[1] : surface(5/6, 0.5)
P3 0  @ ang_p[2] : surface(4/6, 0.5)
P4 12 @ ang_p[0] : mp(G2, P1) xx2
P5 12 @ ang_p[1] : mp(P4, P1)
P6 24 @ ang_p[0] : gp()
P7 24 : mp(P2, P5) : mp(P4, P6)
P8 24 @ ang_p[2] : mp(P5)

C1 0  @ ang_c[0] : mp(P1) + girdle
C2 0  @ ang_c[1] : surface(9/10, 0.5)
C3 0  @ ang_c[2] : surface(8/10, 0.5)
T  0  @ 0        : surface(3/4, 0.5)

C4 12 @ ang_c[0] : mp(G2, G3)
C5 12 @ ang_c[1] : mp(C1, C4)
C6 12 @ ang_c[2] : mp(C2, C5)

C7 24 @ ang_c[0] : mp(G1, G3)
C8 24 @ ang_c[1] : mp(C4, C7)
C9 24 @ ang_c[2] : mp(C5, C8)
-- lua script
name("Emerald Cut")
ri(1.54)
gear(96)
color("#10b981")

local ang_p = {
  val(53.0306, "2%"),
  val(33.0, 2.0),
  val(22.7648, 2.0)
}

local ang_c = {
  val(45.0, 2.0),
  val(27.5353, 2.0),
  val(27.5, 2.0)
}

RectTr(1.5, 40, 0.4)

TierAP("P1", 0,  ang_p[1], cp(), "x2")
TierAP("P2", 0,  ang_p[2], surface(5/6, 0.5))
TierAP("P3", 0,  ang_p[3], surface(4/6, 0.5))
TierAP("P4", 12, ang_p[1], mp("G2", "P1"), "xx2")
TierAP("P5", 12, ang_p[2], mp("P4", "P1"))
TierAP("P6", 24, ang_p[1], gp())
TierPP("P7", 24, mp("P2", "P5", {angle=30}), mp("P4", "P6", {angle=30}))
TierAP("P8", 24, ang_p[3], mp("P5"))

TierAP("C1", 0,  ang_c[1], mp("P1"):add(girdle))
TierAP("C2", 0,  ang_c[2], surface(9/10, 0.5))
TierAP("C3", 0,  ang_c[3], surface(8/10, 0.5))
TierAP("T",  0,  0,        surface(3/4, 0.5))

TierAP("C4", 12, ang_c[1], mp("G2", "G3"))
TierAP("C5", 12, ang_c[2], mp("C1", "C4"))
TierAP("C6", 12, ang_c[3], mp("C2", "C5"))

TierAP("C7", 24, ang_c[1], mp("G1", "G3"))
TierAP("C8", 24, ang_c[2], mp("C4", "C7"))
TierAP("C9", 24, ang_c[3], mp("C5", "C8"))
3. Classic 5-Tier Portuguese Cut (RI = 1.54)
With five Pavilion tiers (62° stepping down in 5° increments to 42°) and five matching Crown tiers, the classic Portuguese cut breaks light into a dense wheel of rhomboid facets:
name  = "Portuguese Cut"
ri    = 1.54
gear  = 96
cube  = 3
color = "#a78bfa"

G1 0 @ 90 : size x16
P1 0 @ 62 +/- 2 : cp()
P2 3 @ 57 +/- 2 : gp()
P3 0 @ 52 +/- 2 : mp(P1)
P4 3 @ 47 +/- 2 : mp(P2)
P5 0 @ 42 +/- 2 : mp(P3)

C1 0 @ 46 +/- 2 : mp(P1) + girdle
C2 3 @ 41 +/- 2 : gp()
C3 0 @ 36 +/- 2 : mp(C1)
C4 3 @ 31 +/- 2 : mp(C2)
C5 0 @ 26 +/- 2 : mp(C3)
T  0 @ 0.00     : mp(C4) x1
-- lua script
name("Portuguese Cut")
ri(1.54)
gear(96)
cube(3)
color("#a78bfa")

TierAD("G1", 0, 90, 1.0, "x16")
TierAP("P1", 0, val(62.0, 2.0), cp())
TierAP("P2", 3, val(57.0, 2.0), gp())
TierAP("P3", 0, val(52.0, 2.0), mp("P1"))
TierAP("P4", 3, val(47.0, 2.0), mp("P2"))
TierAP("P5", 0, val(42.0, 2.0), mp("P3"))

TierAP("C1", 0, val(46.0, 2.0), mp("P1"):add(girdle))
TierAP("C2", 3, val(41.0, 2.0), gp())
TierAP("C3", 0, val(36.0, 2.0), mp("C1"))
TierAP("C4", 3, val(31.0, 2.0), mp("C2"))
TierAP("C5", 0, val(26.0, 2.0), mp("C3"))
TierAP("T",  0, 0.00,           mp("C4"), "x1")
4. Square Princess Cut (Optimized Chevron Pavilion, RI = 1.54)
A modern square princess cut using prz() projections and ep() edge interpolations to sculpt four chevron fans on the Pavilion and Crown:
name  = "Princess Cut Optimized"
ri    = 1.54
gear  = 96
color = "#38bdf8"

G1 0 @ 90 : size xx4

P1 0 @ 56.1315 +/- 2% : cp()
p1 = ep(edge(P1:0, G1:0), 0.5)
p2 = ep(edge(P1:48, G1:48), 0.5)

P2 1 : gp() : prz(ep(p1, p2, 1 / 8), P1:0)
P3 2 : gp() : prz(ep(p1, p2, 2 / 8), P2:1)
P4 3 : gp() : prz(ep(p1, p2, 3 / 8), P3:2)

C1 0 @ 35.1184 +/- 2% : mp(P1) + girdle
C2 1 @ 30.7955 +/- 2% : gp()
C3 2 : gp() : ep(edge(C2:1, C2:95), 0.7381 +/- 0.05)
T  0 @ 0 : mp(C2)
-- lua script
name("Princess Cut Optimized")
ri(1.54)
gear(96)
color("#38bdf8")

TierAD("G1", 0, 90, 1.0, "xx4")

TierAP("P1", 0, val(56.1315, "2%"), cp())
local p1 = ep(edge("P1:0", "G1:0"), 0.5)
local p2 = ep(edge("P1:48", "G1:48"), 0.5)

TierPP("P2", 1, gp(), prz(ep(p1, p2, 1 / 8), "P1:0"))
TierPP("P3", 2, gp(), prz(ep(p1, p2, 2 / 8), "P2:1"))
TierPP("P4", 3, gp(), prz(ep(p1, p2, 3 / 8), "P3:2"))

TierAP("C1", 0, val(35.1184, "2%"), mp("P1"):add(girdle))
TierAP("C2", 1, val(30.7955, "2%"), gp())
TierPP("C3", 2, gp(), ep(edge("C2:1", "C2:95"), val(0.7381, 0.05)))
TierAP("T",  0, 0, mp("C2"))
5. FVS-12 "Karen-2" Mixed Cut (RectTr, RI = 1.76)
A hybrid cut pairing a lively brilliant-style halo of Crown facets with step-controlled Pavilion tiers on a truncated rectangle (RectTr(1.5, 34)):
name  = "FVS-12 Karen-2"
ri    = 1.76
gear  = 64
color = "#f43f5e"

RectTr(1.5, 34)

P1 0  @ 61.50 : cp() xx2
P2 8  @ 41.00 : mp(G2)
P3 16 @ 46.00 : mp(G3)
P4 4  @ 42.73 : gp()
P5 14 : mp(P2) : mp(G1, G3)
P6 1  @ 43.41 : ep(mp(P4, P4, P4), mp(P2), 0.5)
P7 0  : mp(P1) : mp(P4)

ang1 = 36.64 +/- 1.0
ang2 = 30.64 +/- 1.0
ang3 = 28.98 +/- 1.0

C1 8  @ ang1 : mp(P2) + girdle
C2 8  @ ang2 : ep(mp(C1), mp(G3), 0.9)
C3 8  @ ang3 : ep(mp(C2), mp(C1), 0.9)

C4 0  @ ang1 : mp(G3)
C5 0  @ ang2 : mp(C1)
C6 0  @ ang3 : mp(C2)

C7 16 @ ang1 : mp(G3)
C8 16 @ ang2 : mp(C1)
C9 16 @ ang3 : mp(C2)
T  0  @ 0.00 : mp(C3)
-- lua script
name("FVS-12 Karen-2")
ri(1.76)
gear(64)
color("#f43f5e")

RectTr(1.5, 34)

TierAP("P1", 0,  61.50, cp(), "xx2")
TierAP("P2", 8,  41.00, mp("G2"))
TierAP("P3", 16, 46.00, mp("G3"))
TierAP("P4", 4,  42.73, gp())
TierPP("P5", 14, mp("P2"), mp("G1", "G3"))
TierAP("P6", 1,  43.41, ep(mp("P4", "P4", "P4"), mp("P2"), 0.5))
TierPP("P7", 0,  mp("P1"), mp("P4"))

local ang1 = val(36.64, 1.0)
local ang2 = val(30.64, 1.0)
local ang3 = val(28.98, 1.0)

TierAP("C1", 8,  ang1, mp("P2"):add(girdle))
TierAP("C2", 8,  ang2, ep(mp("C1"), mp("G3"), 0.9))
TierAP("C3", 8,  ang3, ep(mp("C2"), mp("C1"), 0.9))

TierAP("C4", 0,  ang1, mp("G3"))
TierAP("C5", 0,  ang2, mp("C1"))
TierAP("C6", 0,  ang3, mp("C2"))

TierAP("C7", 16, ang1, mp("G3"))
TierAP("C8", 16, ang2, mp("C1"))
TierAP("C9", 16, ang3, mp("C2"))
TierAP("T",  0,  0.00, mp("C3"))
6. Cushioned Checkerboard Dome (surface(), RI = 1.54)
Adapted from the classic GemCad advanced checkerboard tutorial, using surface(u, v, ll, ur) to project a 4×4 checkerboard grid directly onto the domed crown:
name  = "Checkerboard Dome"
ri    = 1.54
gear  = 64
color = "#c084fc"

G1 3 @ 90.00 : 0.9500 xx4
C1 1 @ 54.983 +/- 2.0 : cp()

midp1 = ep(edge(C1:1, G1:61), 0.5)
midp2 = ep(edge(C1:31, G1:35), 0.5)

G2 1 @ 90.00 : midp1
ur = mp(C1, { index: 40, angle: 90 })
ll = mp(C1, { index: 10, angle: 90 })

C2 3 : midp1 : surface(3/4, 1/4, ll, ur)
C3 8 : gp({ index: 6 }) : surface(3/4, 0/4, ll, ur)
C4 3 : surface(3/4, 1/4, ll, ur) : surface(4/4, 1/4, ll, ur)
C5 8 : surface(2/4, 1/4, ll, ur) : surface(3/4, 1/4, ll, ur)

P1 1 @ 45.3667 +/- 2.0 : mp(C1) - girdle
P2 3 @ 44.1930 +/- 2.0 : gp()
P3 2 @ 44.5960 +/- 2.0 : gp()
-- lua script
name("Checkerboard Dome")
ri(1.54)
gear(64)
color("#c084fc")

TierAD("G1", 3, 90.00, 0.9500, "xx4")
TierAP("C1", 1, val(54.983, 2.0), cp())

local midp1 = resolve(ep(edge("C1:1", "G1:61"), 0.5))
local midp2 = resolve(ep(edge("C1:31", "G1:35"), 0.5))

TierAP("G2", 1, 90.00, midp1)

local ur = resolve(mp("C1", { index = 40, angle = 90 }))
local ll = resolve(mp("C1", { index = 10, angle = 90 }))

TierPP("C2", 3, midp1, surface(3/4, 1/4, ll, ur))
TierPP("C3", 8, gp({ index = 6 }), surface(3/4, 0/4, ll, ur))
TierPP("C4", 3, surface(3/4, 1/4, ll, ur), surface(4/4, 1/4, ll, ur))
TierPP("C5", 8, surface(2/4, 1/4, ll, ur), surface(3/4, 1/4, ll, ur))

TierAP("P1", 1, val(45.3667, 2.0), mp("C1"):sub(girdle))
TierAP("P2", 3, val(44.1930, 2.0), gp())
TierAP("P3", 2, val(44.5960, 2.0), gp())
7. FVS-39 Opposed-Bar Pixel Cut (RI = 1.54)
Perpendicular step bars on the Pavilion and Crown act like crossed retro-reflectors, splitting the stone into a shimmering grid of rectangular pixels:
name  = "FVS-39 Cross-Bar Pixel Cut"
ri    = 1.54
gear  = 64
cube  = 5
color = "#f59e0b"

P1 16 @ 70.00 : 0.8 x2
G1 0  @ 90.00 : 0.8

e  = edge(P1:16, P1:48)
p1 = e[0]
p2 = e[1]

ang1 = [49.51, 48.05, 44.19, 43.59]

P2 0 @ ang1[0] : 0.18
P3 0 @ ang1[1] : prz(ep(p1, p2, 7 / 8), P2:0)
P4 0 @ ang1[2] : prz(ep(p1, p2, 6 / 8), P3:0)
P5 0 @ ang1[3] : prz(ep(p1, p2, 5 / 8), P4:0)

P6 8  @ 65.53 : mp(P3) x4
G2 8  @ 90.00 : mp(P2)
G3 16 @ 90.00 : mp(P6) x2
C1 0  @ 70.00 : mp(P2) + girdle xx2

C2 8  @ 49.80 : gp() x4
C3 16 @ 36.00 : gp() x2

p6 = ep(edge(C3:48, G3:16), 0.5)
p7 = ep(edge(C3:16, G3:48), 0.5)

ang2 = [20.4718, 14.52, 0.0]
C4 16 @ ang2[0] : mp(C2)
C5 16 @ ang2[1] : prz(ep(p7, p6, 2 / 7), C4:16)
C6 16 @ ang2[2] : prz(ep(p7, p6, 3 / 7), C5:16)
-- lua script
name("FVS-39 Cross-Bar Pixel Cut")
ri(1.54)
gear(64)
cube(5)
color("#f59e0b")

TierAD("P1", 16, 70.00, 0.8, "x2")
TierAD("G1", 0,  90.00, 0.8)

local e  = edge("P1:16", "P1:48")
local p1 = e[1]
local p2 = e[2]

local ang1 = {49.51, 48.05, 44.19, 43.59}

TierAD("P2", 0, ang1[1], 0.18)
TierAP("P3", 0, ang1[2], prz(ep(p1, p2, 7 / 8), "P2:0"))
TierAP("P4", 0, ang1[3], prz(ep(p1, p2, 6 / 8), "P3:0"))
TierAP("P5", 0, ang1[4], prz(ep(p1, p2, 5 / 8), "P4:0"))

TierAP("P6", 8,  65.53, mp("P3"), "x4")
TierAP("G2", 8,  90.00, mp("P2"))
TierAP("G3", 16, 90.00, mp("P6"), "x2")
TierAP("C1", 0,  70.00, mp("P2"):add(girdle), "xx2")

TierAP("C2", 8,  49.80, gp(), "x4")
TierAP("C3", 16, 36.00, gp(), "x2")

local p6 = ep(edge("C3:48", "G3:16"), 0.5)
local p7 = ep(edge("C3:16", "G3:48"), 0.5)

local ang2 = {20.4718, 14.52, 0.0}
TierAP("C4", 16, ang2[1], mp("C2"))
TierAP("C5", 16, ang2[2], prz(ep(p7, p6, 2 / 7), "C4:16"))
TierAP("C6", 16, ang2[3], prz(ep(p7, p6, 3 / 7), "C5:16"))
8. FVS-222 Honeycomb Cut (fred() Crossover, RI = 1.54)
An advanced 6-fold design using fred() line-to-line crossover intersections and show() debug markers to construct a hexagonal honeycomb crown:
name  = "FVS-222 Honeycomb"
ri    = 1.54
gear  = 96
color = "#2dd4bf"

G1 5 @ 90 : size xx6
P1 5 @ 43.02 +/- 2% : cp()
G2 0 @ 90 : ep(edge(G1:5, P1:5), 0.75)
P2 0 @ 41.3 : mp(G1, G2, P1)
P3 8 @ 40.9 : mp(G1, P1)
C1 5 @ 35.0 : mp(P3) + girdle
C2 0 @ 28.6 : mp(G2, G1, C1, { index: 4, angle: 45 })

p1 = mp(G2, G1, C2, { index: 4, angle: 45 })
p2 = mp(G2, G1, C2, { index: 10, angle: 45 })
p3 = fred(p1, p2, edge(C1:11, C1:5))
show(p1, "#6d4370")
show(p2, "purple")
show(p3, "#1eff00")

C3 8 @ 25.04 : p3

p4      = mp(G2, G1, C2, { index: 46, angle: 45 })
p_white = fred(p1, p4, edge(C2:0, C3:8))
show(p4, "red")
show(p_white, "white")

orange1 = mp(C1, C1, C3, { index: 88, angle: 45 })
orange2 = mp(C1, C1, C3, { index: 24, angle: 45 })
center  = mp(C1, C1, C3, { index: 8, angle: 45 })
blue1   = mp(C3, { index: 0, angle: 5 })
green1  = fred(orange1, orange2, center, blue1)
show(orange1, "#9c3540")
show(orange2, "#2b2417")
show(center, "#b6a486")

C4 0 : green1 : p_white
T  0 @ 0 : ep(edge(C4:0, C4:16), 0.5)
-- lua script
name("FVS-222 Honeycomb")
ri(1.54)
gear(96)
color("#2dd4bf")

TierAD("G1", 5, 90, 1.0, "xx6")
TierAP("P1", 5, val(43.02, "2%"), cp())
TierAP("G2", 0, 90, ep(edge("G1:5", "P1:5"), 0.75))
TierAP("P2", 0, 41.3, mp("G1", "G2", "P1"))
TierAP("P3", 8, 40.9, mp("G1", "P1"))
TierAP("C1", 5, 35.0, mp("P3"):add(girdle))
TierAP("C2", 0, 28.6, mp("G2", "G1", "C1", { index = 4, angle = 45 }))

local p1 = mp("G2", "G1", "C2", { index = 4, angle = 45 })
local p2 = mp("G2", "G1", "C2", { index = 10, angle = 45 })
local p3 = fred(p1, p2, edge("C1:11", "C1:5"))
show(p1, "#6d4370")
show(p2, "purple")
show(p3, "#1eff00")

TierAP("C3", 8, 25.04, p3)

local p4      = mp("G2", "G1", "C2", { index = 46, angle = 45 })
local p_white = fred(p1, p4, edge("C2:0", "C3:8"))
show(p4, "red")
show(p_white, "white")

local orange1 = mp("C1", "C1", "C3", { index = 88, angle = 45 })
local orange2 = mp("C1", "C1", "C3", { index = 24, angle = 45 })
local center  = mp("C1", "C1", "C3", { index = 8, angle = 45 })
local blue1   = mp("C3", { index = 0, angle = 5 })
local green1  = fred(orange1, orange2, center, blue1)
show(orange1, "#9c3540")
show(orange2, "#2b2417")
show(center, "#b6a486")

TierPP("C4", 0, green1, p_white)
TierAP("T",  0, 0, ep(edge("C4:0", "C4:16"), 0.5))
9. Victorian Briolette Pendeloque Drop (RI = 2.15)
An all-around 3D faceted pendant drop (cube = 5) wrapped in interlocking kite facets so it sparkles from every viewing angle:
name  = "Briolette Drop"
ri    = 2.15
gear  = 96
cube  = 5
color = "#60a5fa"

G  3 @ 90 : 0.5 x16
P1 3 @ 83 : 0.4
P2 0 @ 80 : mp(G)
P3 0 @ 66 : mp(P1)
P4 3 @ 62 : mp(P1)
P5 3 @ 58 : mp(P3)
P6 0 @ 55 : mp(P3)
P7 0 @ 40 : mp(P5)
P8 3 @ 38 : mp(P5)
P9 3 @ 18 : mp(P7)

C1 0 @ 87 : mp(P2)
C2 0 @ 80 : mp(G)
C3 3 @ 77 : mp(G)
C4 3 @ 72 : mp(C2)
C5 0 @ 70 : mp(C2)
C6 0 @ 65 : mp(C4)
C7 3 @ 63 : mp(C4)
C8 3 @ 53 : mp(C6)
C9 0 @ 51 : mp(C6) x8
-- lua script
name("Briolette Drop")
ri(2.15)
gear(96)
cube(5)
color("#60a5fa")

TierAD("G",  3, 90, 0.5, "x16")
TierAD("P1", 3, 83, 0.4)
TierAP("P2", 0, 80, mp("G"))
TierAP("P3", 0, 66, mp("P1"))
TierAP("P4", 3, 62, mp("P1"))
TierAP("P5", 3, 58, mp("P3"))
TierAP("P6", 0, 55, mp("P3"))
TierAP("P7", 0, 40, mp("P5"))
TierAP("P8", 3, 38, mp("P5"))
TierAP("P9", 3, 18, mp("P7"))

TierAP("C1", 0, 87, mp("P2"))
TierAP("C2", 0, 80, mp("G"))
TierAP("C3", 3, 77, mp("G"))
TierAP("C4", 3, 72, mp("C2"))
TierAP("C5", 0, 70, mp("C2"))
TierAP("C6", 0, 65, mp("C4"))
TierAP("C7", 3, 63, mp("C4"))
TierAP("C8", 3, 53, mp("C6"))
TierAP("C9", 0, 51, mp("C6"), "x8")
10. Rhombitrihexagonal Dome (ProFacet Original, RI = 1.54)
An original 6-fold trihexagonal pattern created by the ProFacet team (up Crown cut first using Style 1 + Style 2, followed by the G1–G3 girdle and optimizable Pavilion):
name  = "Rhombitrihexagonal"
ri    = 1.54
gear  = 96
color = "#6366f1"

A up 0 @ 0.00  : 0.3500 x1
B    0 @ 8.97  : 0.3633 x6
C    8 @ 10.33 : mp(A, B) xx6
D    8 @ 15.28 : 0.3891 xx6
E    0 @ 17.51 : mp(B, C) x6
F    8 @ 20.02 : 0.4180 xx6
G    5 @ 22.66 : mp(E, D) xx6
H    0 @ 25.33 : 0.4610 x6
I    3 @ 25.73 : mp(E, H) xx6
J    8 @ 28.66 : mp(G, F) xx6
K    4 @ 29.63 : mp(G, J) xx12
L    0 @ 32.26 : mp(I, K) x6

G1 0  @ 90.00 : 0.9600 x6
G2 8  @ 90.00 : 0.9600 x6

P1 0  @ 43.4781 +/- 2.0 : mp(G1, L) - girdle x6
P2 8  @ 43.4944 +/- 2.0 : mp(G1, G2) x6
-- lua script
name("Rhombitrihexagonal")
ri(1.54)
gear(96)
color("#6366f1")

TierAD("A", 0, 0.00,  0.3500, "x1", {side = "up"})
TierAD("B", 0, 8.97,  0.3633, "x6")
TierAP("C", 8, 10.33, mp("A", "B"), "xx6")
TierAD("D", 8, 15.28, 0.3891, "xx6")
TierAP("E", 0, 17.51, mp("B", "C"), "x6")
TierAD("F", 8, 20.02, 0.4180, "xx6")
TierAP("G", 5, 22.66, mp("E", "D"), "xx6")
TierAD("H", 0, 25.33, 0.4610, "x6")
TierAP("I", 3, 25.73, mp("E", "H"), "xx6")
TierAP("J", 8, 28.66, mp("G", "F"), "xx6")
TierAP("K", 4, 29.63, mp("G", "J"), "xx12")
TierAP("L", 0, 32.26, mp("I", "K"), "x6")

TierAD("G1", 0, 90.00, 0.9600, "x6")
TierAD("G2", 8, 90.00, 0.9600, "x6")

TierAP("P1", 0, val(43.4781, 2.0), mp("G1", "L"):sub(girdle), "x6")
TierAP("P2", 8, val(43.4944, 2.0), mp("G1", "G2"), "x6")
Appendix B: Studio Path-Traced Render Gallery
A curated showcase of classic and contemporary gemstone cuts modeled and rendered in ProFacet. Looking for thousands of ready-to-cut, optically scored diagrams sorted by refractive index and shape? Visit OffTheDop.shop.
Tip: Click any render below to open it in the full-screen lightbox viewer (and use your Left/Right arrow keys to browse).
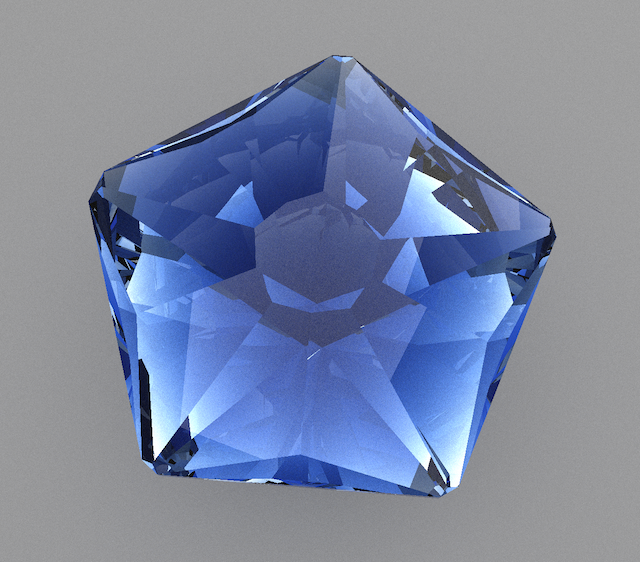 Sakura 96 — Marco Voltolini | 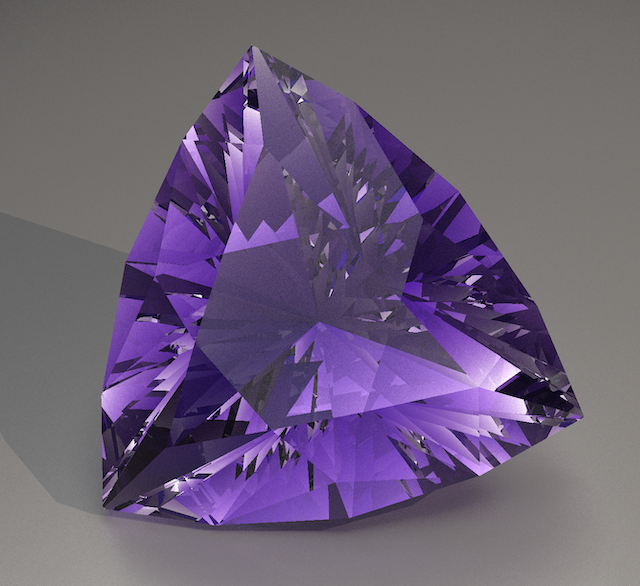 Beginner Trillion — Michiko Huynh |
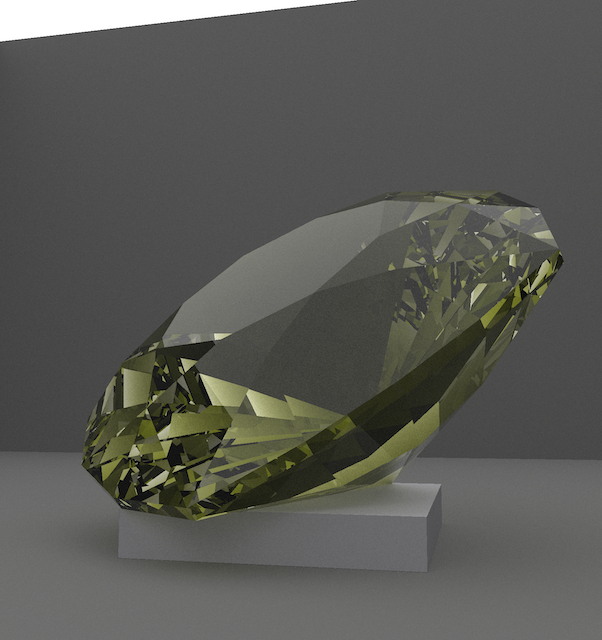 Rubicello — Marco Voltolini | 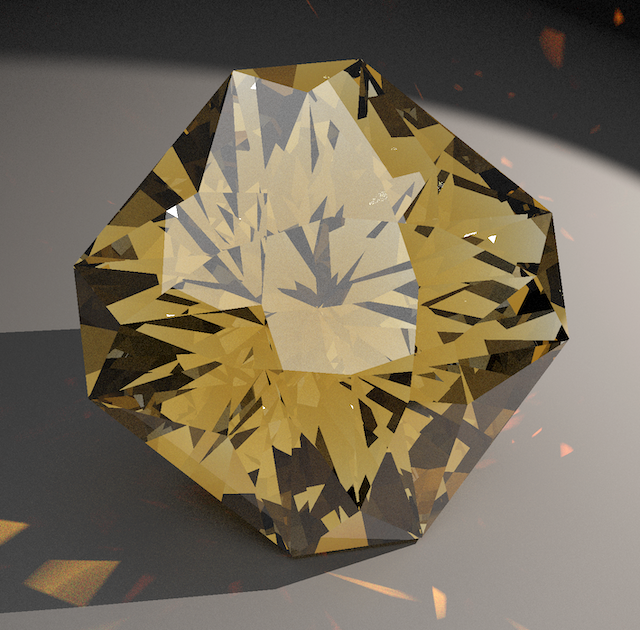 Void Reaver — Arya Akhavan |
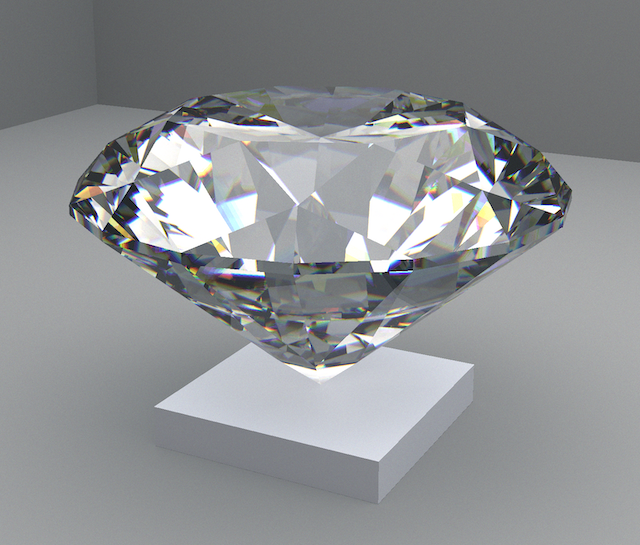 Standard Round Brilliant with Spectral Fire | 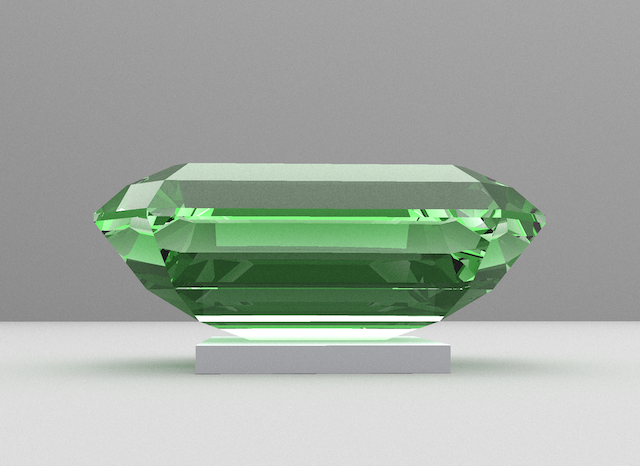 Emerald Step Cut |
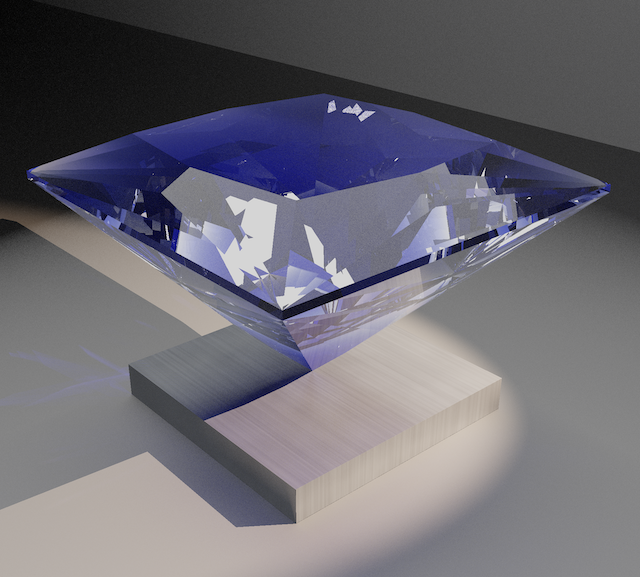 Princess Cut on Brushed Aluminum | 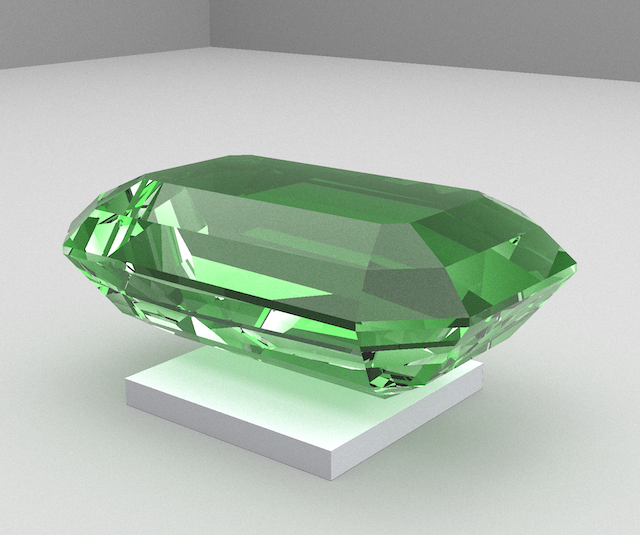 Asscher Step Cut |
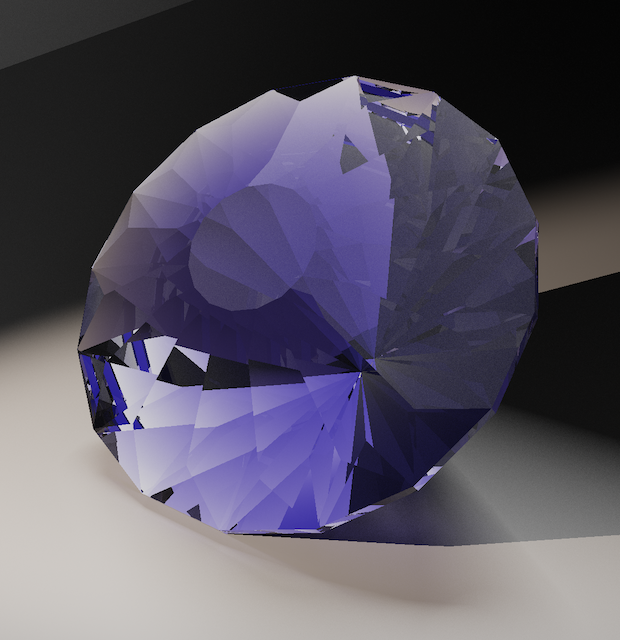 Crisantemo — Marco Voltolini | 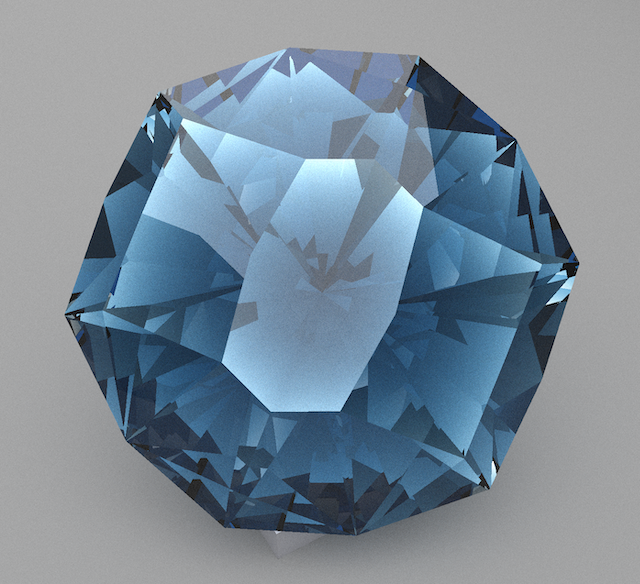 Abyssal Maw — Arya Akhavan |
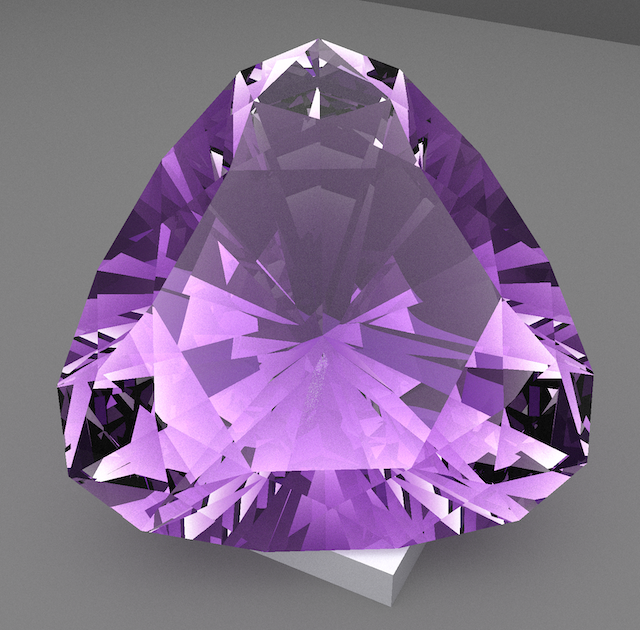 Tristano — Marco Voltolini | 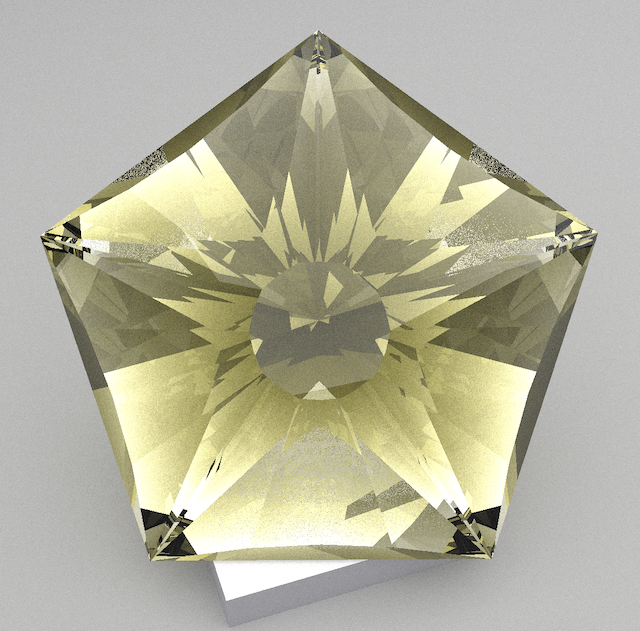 Fallen Star — Arya Akhavan |
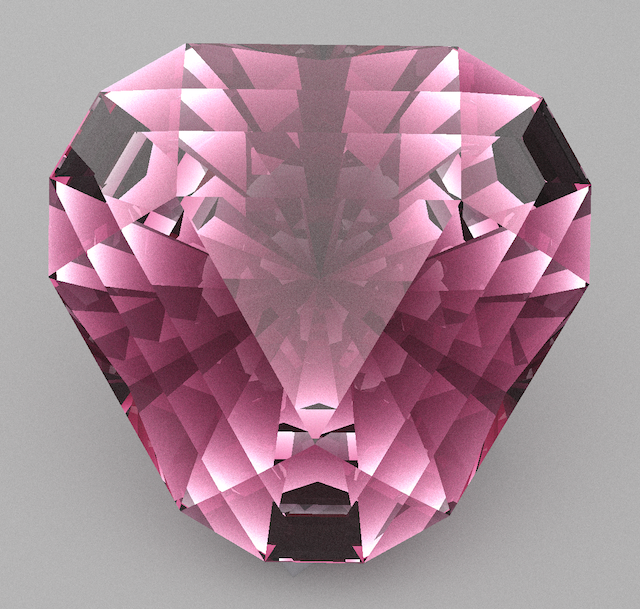 FVS-336 Trillium — Fred W. Van Sant | 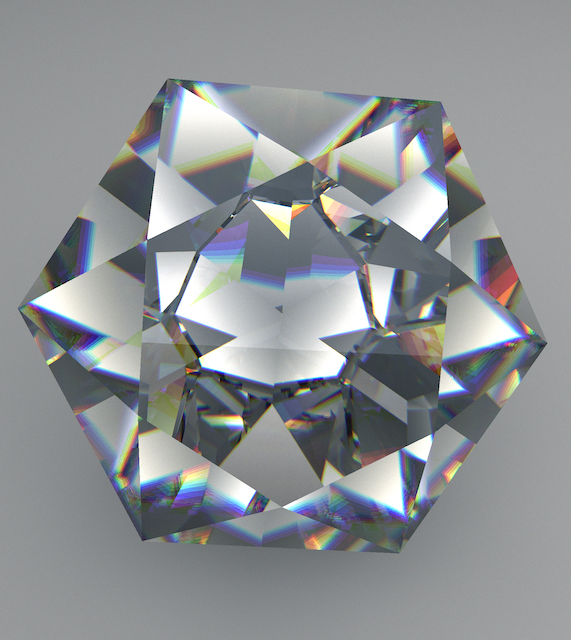 2014 Maximize Entry 6 — Marco Voltolini |
Appendix C: Faceting Glossary, Troubleshooting & FAQ
Part 1: Gemological & ProFacet Glossary
| Term | Definition |
|---|---|
ASET (Angular Spectrum Evaluation Tool) | A diagnostic map that colors every pixel on the crown according to the hemisphere angle of the light ray it returns: Red (15°–45°) for direct overhead brilliance, Blue (0°–15°) for viewer head-shadow contrast, Green (45°–90°) for low horizon light, and Black for light leakage. |
| Break Facets | Facets sitting immediately adjacent to the girdle (e.g., P2 on the Pavilion or C1 on the Crown) that level out the girdle line and split main facets into smaller virtual facets. |
CAM (Centerpoint Angle Method) | A preforming technique where temporary pavilion facets (PF1, PF2…) are cut to a single central point (cp()) at calculated angles, followed by 90° vertical girdle cuts (G1, G2…) meeting mp(PFk) to form an exact non-round outline. |
| Critical Angle () | The minimum internal angle of incidence required for a light ray to undergo Total Internal Reflection (TIR) instead of leaking out the back of the pavilion. |
Crown (C) | The upper dome of the gemstone above the girdle. |
Culet (cp()) | The bottom apex where the lowest Pavilion facets meet at a point. |
Dispersion (Fire) | The splitting of white light into spectral rainbow flashes caused by wavelength-dependent refractive index variation. |
| Dop | The metal rod to which the rough gemstone crystal is attached during cutting. |
FCI (Faceting Complexity Index) | ProFacet’s 0–100 difficulty score computed from total facet count, tier count, acute angle changes, and delicate meetpoint tolerances. |
Girdle (G) | The 90° vertical perimeter belt separating the Pavilion from the Crown. |
Index Gear (96) | A toothed wheel on the faceting quill that divides the 360° circle into discrete stops (e.g., 96 teeth = 3.75° per tooth). |
| Main Facets | The primary structural facets of the Pavilion (P1) or Crown (C2 / bezel facets) that drive primary light reflection and refraction. |
Meetpoint (mp()) | A 3D vertex where three or more facet planes intersect at a single sharp corner. |
Pavilion (P) | The conical bottom section of the gemstone below the girdle, designed to reflect light upward via Total Internal Reflection. |
| Scintillation | The dynamic interplay of bright and dark flashes (virtual facets turning on and off) as the gemstone, light source, or viewer moves. |
| Star Facets | Shallow triangular facets surrounding the flat Table (T) on the upper Crown (e.g., C3). |
Table (T) | The flat 0.0° horizontal facet at the very top of the Crown. |
TIR (Total Internal Reflection) | 100% mirror-like reflection of light inside a gemstone when a ray strikes an internal facet at an angle steeper than the critical angle (θc). |
| Windowing | Undesirable light leakage through the bottom of the pavilion when pavilion facets are cut too shallow (< θc), creating a dead, see-through zone under the table. |
Part 2: Troubleshooting Common Cut & Script Errors
1. "Interactive slicer only works in Monochrome or Palette mode"
- Cause: Your 3D Viewport is currently set to
Raytraced,ASET,Window,Fire,Scintillation, orBDPT. - Fix: Use the dropdown in the top-right corner of the 3D Viewport to switch to
PaletteorMonowhile slicing facets visually.
2. "Process the design (Cmd/Ctrl + Enter) before running analysis"
- Cause: You edited the code in the Spec Editor (or have an uncommitted live preview in the Slicer) that hasn't been compiled yet.
- Fix: Switch to the 3D Studio, click
Process 🚀(or pressCmd/Ctrl + Enter), and then clickAnalyzerorOptimizer.
3. "Facet did not cut the stone" or "Meetpoint not found"
- Cause: Either:
- You referenced a tier in
mp(TierX)beforeTierXwas cut (check your top-to-bottom tier order!), or - An earlier tier cut so deeply that it completely ground away the tier you are trying to meet, or
- On a Pavilion break tier (
P2), your angle is shallower thanP1(cp()) instead of steeper thanP1.
- You referenced a tier in
- Fix: Ensure Pavilion tiers that meet
cp()(P1) are slightly shallower (e.g.41.5°) than outer Pavilion break tiers meetinggp()(P2at43.0°), and verify inPalettemode withFacet Infoturned on that the target tier exists on the mesh.
4. "Open Girdle" or Knife-Edge Girdle Corners
- Cause: You forgot to include
+ girdleon the first Crown tier that meets the Pavilion girdle (C1 0 @ 42.0 : gp() + girdle x8 m 3orC1 3 @ 42.0 : gp() + girdle xx8), or an optimization range (+/-) allowed a Crown tier to cut deeper than the girdle. - Fix: Click
+girdleon your first Crown tier, and checkProtect Girdle (Enforce closed girdle)in the GPU Optimizer!
Part 3: Studio Keyboard Shortcuts
Press ? anywhere in the 3D Studio (outside a text input) or click ☰ → Keyboard Shortcuts to view all shortcuts:
| Shortcut | Action |
|---|---|
Cmd/Ctrl + Enter | Process / Run the current FSL or Lua specification |
Shift + Cmd/Ctrl + F | Auto-format and align FSL source code |
Cmd/Ctrl + L | Toggle the Script Output (print()) console |
? | Open the Keyboard Shortcuts reference dialog |
Escape | Close the active modal, popover, or in-place Slicer edit |